

You can turn cardboard, bottles and old jars into finished crafts in five to thirty minutes, at almost no cost. Dozens of simple projects work with items already sitting in your recycling bin, and many suit young children with light supervision. The only real caveat is sharp or hot elements, such as tin edges or a hot glue gun, which need an adult’s hands nearby.
TL;DR:
- Reusing plastic bottles, jars, and fabric scraps can produce durable crafts like planters, storage containers, or bunting, with safety precautions for sharp edges and heat.
- Paper and cardboard projects, such as papier-mâché bowls or cardboard towns, are quick beginner-friendly options that also serve as teachable moments for environmental science.
- Combining waste materials like corks, plastic bottle caps, and fabric enhances the strength and visual appeal of finished crafts, encouraging creative mixing.
- Proper cleaning, drying, and safety checks significantly increase the success rate and safety of homemade items made from household recyclables.
- Engaging children in waste crafts promotes early environmental awareness and can be extended through outdoor activities like nature exploration with recycled-themed gear.
Table of Contents
- Easy craft ideas from waste materials: what to save first
- Paper and cardboard projects for quick wins
- Plastic, glass and metal projects with a safety note
- Textile and small-object crafts worth keeping scraps for
- Staying safe and sustainable while you craft
- Mixing materials for a stronger finished project
- Turning crafting with household waste into a learning moment
- Common mistakes that spoil an otherwise easy craft
- Why simple upcycles matter more than they seem
- Extending the outdoor adventure beyond the craft table
- Sources
- FAQ
Easy craft ideas from waste materials: what to save first
Not every scrap is worth keeping, but a handful of household staples cover nearly every project in this guide. Rinse and dry items before storing them, and sort by type rather than piling everything into one box.
- Cardboard and toilet rolls — flatten boxes, keep tubes dry, and they last indefinitely.
- Plastic bottles and lids — wash out residue and remove labels while the glue is still fresh.
- Egg cartons — keep the cardboard type; polystyrene versions don’t paint as well.
- Glass jars — soak off labels in warm water, and let them air-dry fully before storage.
- Fabric scraps and old t-shirts — cut into rough squares so they’re ready to grab.
- Wine corks and Tetra Paks — corks need no prep; Tetra Paks should be rinsed and flattened.
- Plastic bags — save clean ones for plastic-bag yarn projects later on.
Most of these need only scissors, glue, paint and tape to become something new, and swapping a craft knife for child-safe scissors keeps younger crafters safer without slowing the project down.
Pro Tip: Keep a labelled scrap kit, a few jars or a cardboard box sorted by material, near your craft space. You’re far more likely to actually reuse an item if it’s already sorted and visible rather than buried in the recycling bin.
Paper and cardboard projects for quick wins
Paper and cardboard are the most forgiving waste materials for beginners, and they’re the backbone of most eco-friendly craft projects. A simple flour-and-water paste works as a safe, non-toxic glue for any of the papier-mâché projects below, which matters if small children are involved.
- Toilet-roll animals (5–10 minutes). Cut ears or wings from card, glue onto a cardboard tube, add paint or marker details. No drying time needed beyond the paint.
- Cardboard town (20–30 minutes). Cut cereal boxes into building shapes, score fold lines, paint windows and doors, then glue several together for a tabletop street scene.
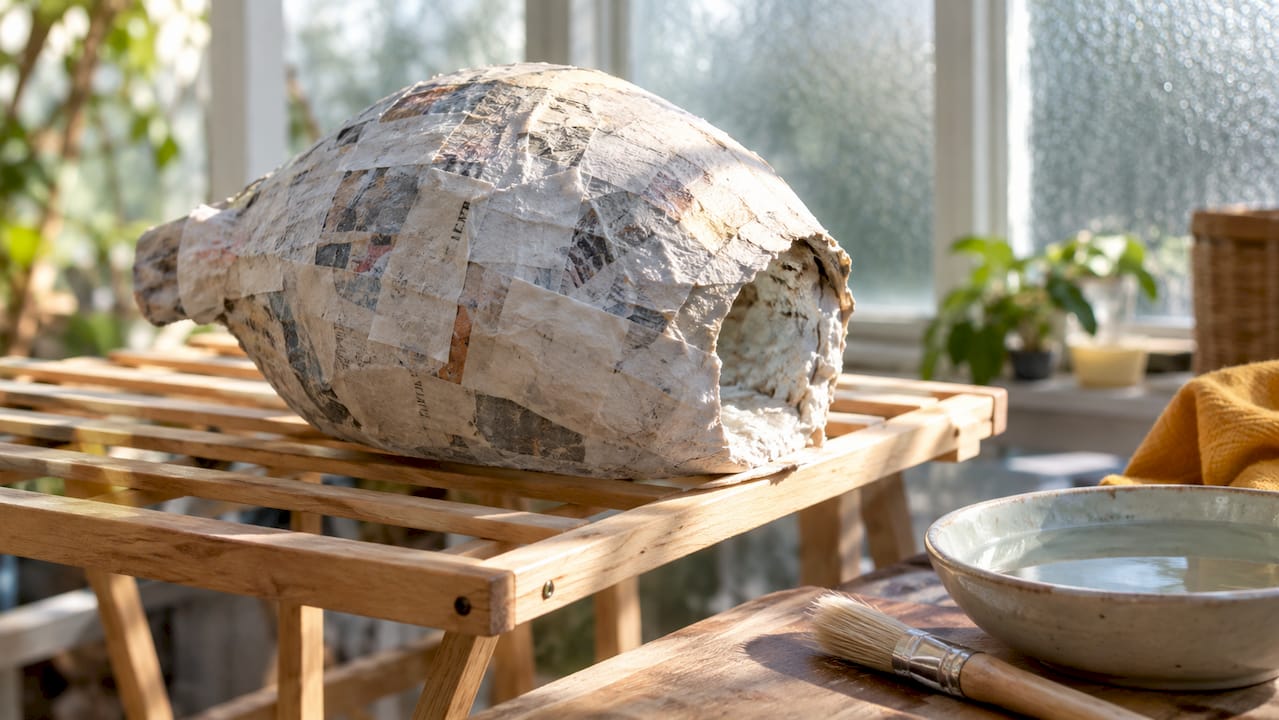
- Papier-mâché bowls (25–30 minutes active, plus overnight drying). Tear newspaper into strips, layer over a greased bowl mould with paste, then paint once fully dry.
- Collagraph printing plates (15 minutes). Glue textured scraps, string or torn card onto a flattened Tetra Pak, ink it, and press onto paper for a textured print, a technique Creativebug recommends for reusing juice cartons.
- Egg-carton flowers (10 minutes). Cut individual cups from an egg carton, snip petal shapes, paint, and glue a button or bead centre.
Finish any of these with decoupage tissue paper, acrylic paint or a light varnish spray for a more polished, giftable result.
Plastic, glass and metal projects with a safety note
These materials make sturdier home décor pieces, but they need a touch more care than paper crafts. Tin cans in particular can have sharp cut edges, so smooth them with a metal file or cover the rim with tape before handing a can to a child, a precaution Resource Recycling flags specifically for craft use.
- Plastic-lid suncatchers. Poke a small hole in a clean lid, layer tissue paper squares with glue inside the rim, dry flat, then hang by a thread near a window. A washable, low-mess project Mod Podge Rocks built specifically for preschoolers.
- Jar planters or pencil pots. Wash a jar thoroughly, wrap with twine or paint the outside, and use for herbs, pens or small storage.
- Bottle lights. A clean, translucent glass bottle with a string of battery fairy lights inside makes soft ambient lighting, an idea Martha Stewart suggests for repurposed wine bottles.
- Tin-can organisers. File the rim smooth, cover with fabric or rope glued around the outside, and use for pens, brushes or kitchen utensils.
Glass and metal pieces work well as indoor décor; anything with an open flame element (candles rather than battery lights) should stay supervised and away from curtains or paper.
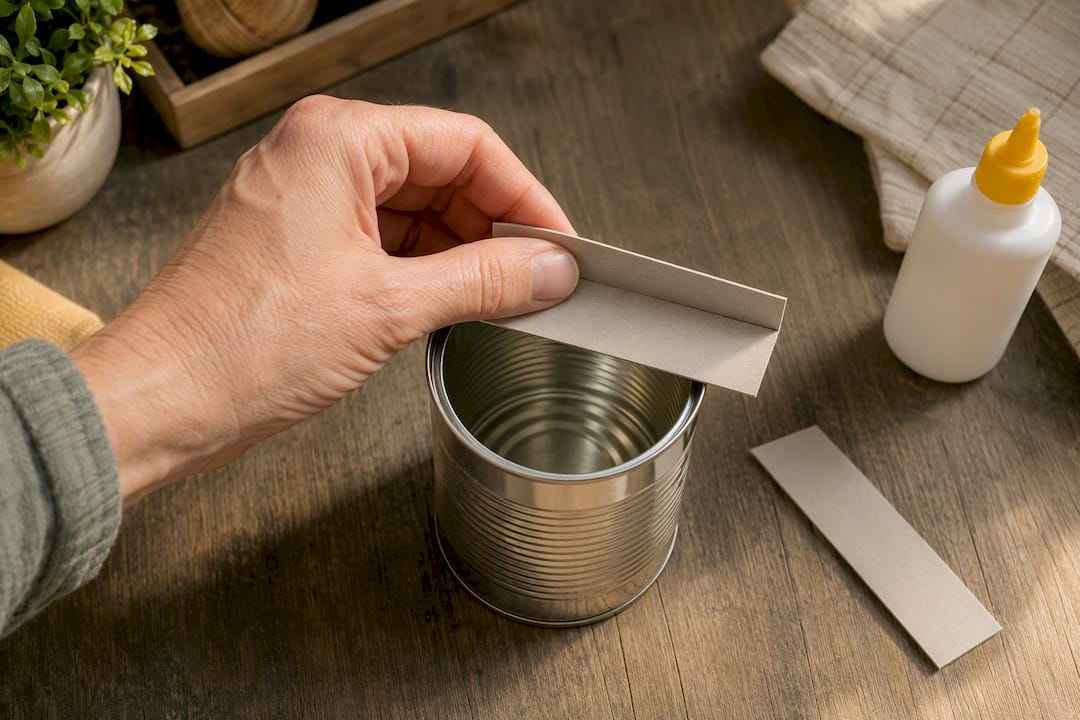
Pro Tip: If you don’t have a metal file to hand, a strip of card folded over the tin rim and glued in place is a fast, effective cover for any project a child will handle.
Textile and small-object crafts worth keeping scraps for
Fabric offcuts, corks and eggshell cartons are easy to overlook, but they’re some of the fastest materials to turn into finished pieces, and most need no sewing at all.
- No-sew fabric bunting. Cut triangle shapes from old t-shirts or offcuts, thread onto string with a simple loop or a dab of fabric glue, and hang across a room.
- Yarn pom-poms from plastic-bag yarn. Cut plastic bags into strips to make “plarn,” wind around a fork or cardboard circle, tie the centre, and snip the loops, a reuse method Gathered recommends for turning bag waste into shoppers or baskets.
- Wine-cork coasters. Glue corks side by side onto a cardboard base, trim to shape, and seal with a light varnish.
- Egg-carton creatures. Cut individual cups, paint as caterpillars or ladybirds, and add pipe-cleaner legs or antennae.
Stuffed items, like a simple sock puppet, take a few basic hand stitches if you want a firmer shape, but hot glue works nearly as well for gift-ready pieces without any needlework at all.
Staying safe and sustainable while you craft
A little hygiene goes a long way with repurposed materials. Wash jars and lids in hot soapy water and let them dry completely before storing, since damp containers encourage mould even when sealed. Fabric scraps should go through a normal wash cycle if they came from worn clothing rather than fresh offcuts.
Metal, glass and heat are the three things that need adult hands. File or tape sharp tin edges, handle broken glass with gloves rather than bare fingers, and never let a child near a hot glue gun’s nozzle unsupervised. Melting crayons into new shapes is a lovely quick project, but it needs a low oven and full cooling time before little hands touch the result.
Saving newspapers, cardboard and fabric scraps for later projects isn’t just tidy habit. It’s the difference between reaching for a craft the moment inspiration strikes and having nothing to hand at all.
Keeping a simple sorted scrap kit, rather than one overflowing bag, makes it far more likely those materials actually get reused rather than binned months later. Some companies share that same instinct for turning everyday materials into something that sparks a child’s curiosity about the natural world.
Mixing materials for a stronger finished project
The best home décor pieces rarely use just one waste material. A cardboard town looks flat until you add plastic-lid wheels to toy cars parked outside it, or a jar planter gains more character with a fabric-scrap bow tied around the neck and a painted cardboard label.
Try building a “nature diorama” inside a shoebox: cardboard hills, a jar lid pond, fabric-scrap grass, and cork-slice stepping stones. Or combine a Tetra Pak base with plastic bottle-cap wheels and a fabric sail to make a toy boat that actually floats in the bath. Suncatchers gain extra texture when you glue on tiny bits of coloured plastic salvaged from packaging alongside the tissue paper.
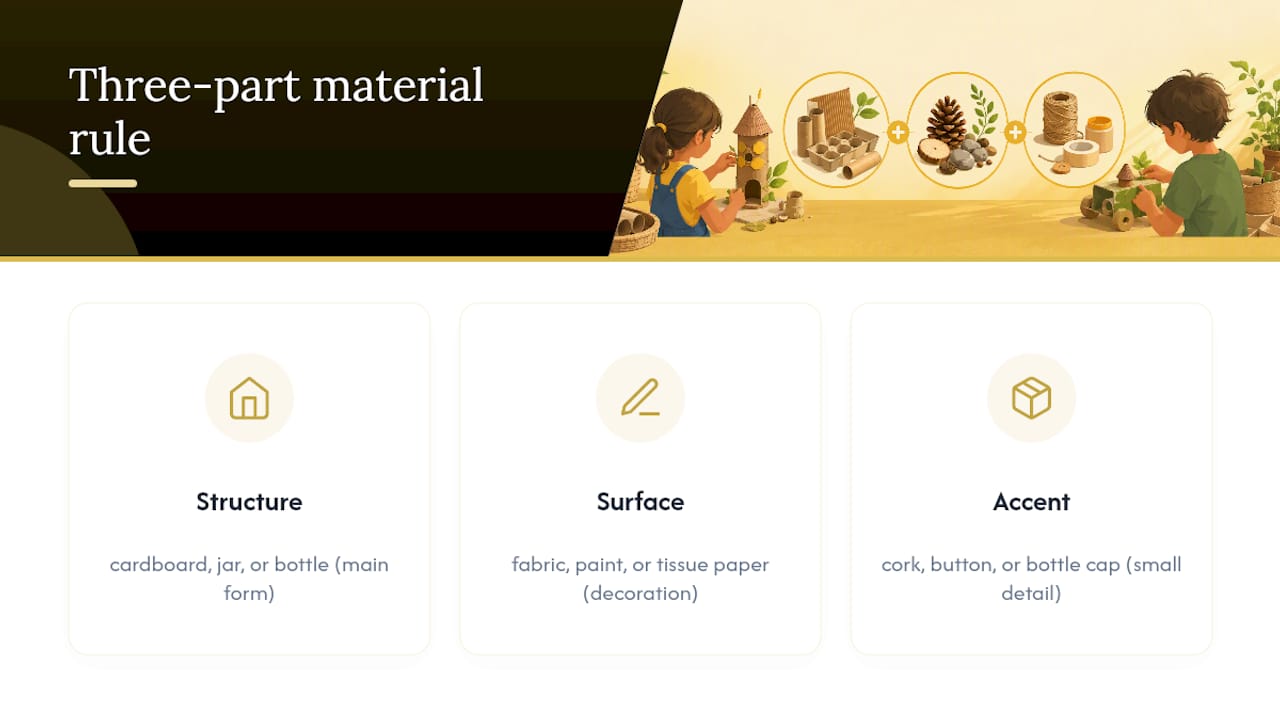
The rule of thumb: pick one material for structure (cardboard, a jar, a bottle), one for surface decoration (fabric, paint, tissue paper), and one small accent (a cork, a button, a bottle cap). That combination almost always produces a more finished-looking result than a single-material project, and it uses up the odd leftover pieces that don’t fit anywhere else. It’s also a genuinely good way to stretch a small scrap kit across more projects, since half a fabric offcut or three spare lids are rarely enough for a whole craft on their own.
Turning crafting with household waste into a learning moment
A cardboard-and-jar craft session is also a chance to slip in a little science without it feeling like a lesson. Point out that a plastic bottle can take hundreds of years to break down naturally, which is exactly why turning it into a planter or suncatcher instead of binning it matters.
Egg-carton creatures are a natural opening for a quick chat about materials: card decomposes far faster than plastic, which is worth mentioning while you’re cutting the cups apart. Melting crayons into new shapes is a simple, visible lesson in states of matter, solid to liquid and back to solid again, that a child can watch happen in front of them. Papier-mâché, meanwhile, is a hands-on lesson in how paper fibres bind together when wet and hold their shape once dry.
Ask a child to guess how many times a jar or bottle might have been refilled before it reached your recycling pile. There’s no correct answer, but it plants the idea that reuse extends an object’s life well beyond what the label on the bin suggests.
Common mistakes that spoil an otherwise easy craft
Rushing the drying stage causes more failed projects than any other single mistake. Papier-mâché that looks dry on the outside can still be damp inside, and painting over it too soon leads to mould or a collapsed shape days later.
Skipping the cleaning step is the second big one. Sticky jar labels, food residue in a yoghurt pot, or grease on a Tetra Pak all stop glue and paint from sticking properly, and they leave a project smelling unpleasant within a week. Using the wrong glue for the job trips up a lot of first attempts too. Fabric glue on cardboard tends to warp it, and craft glue struggles on smooth plastic, so match the adhesive to the material rather than reaching for whatever’s closest.
Finally, don’t skip the safety check on metal or glass just because a project “looks simple.” A tin can with an unfiled edge, or a bottle with a hairline crack from washing, causes more craft-time injuries than anything involving glue or paint. A thirty-second check before handing a piece to a child is worth far more than the time it saves to skip it.
Why simple upcycles matter more than they seem
There’s a temptation to treat waste-material crafts as a filler activity, something to do when it’s raining and the toy box has lost its appeal. That undersells what’s actually happening. A child gluing bottle caps onto a boat hull is testing structure, balance and cause and effect, the same instincts that show up later in more formal science and design work.
Adapting a project for different ages is mostly about where you place the scissors, not about simplifying the idea. Let a toddler tear paper for papier-mâché while an older sibling handles the pasting and shaping. Both are doing real work, at their own level, on the same craft.
— ALAIN
Extending the outdoor adventure beyond the craft table
Crafting from waste materials is a brilliant way to spend a rainy afternoon, but it’s just as valuable to get kids noticing and exploring the natural world their materials came from. Animal-themed cameras, binoculars and walkie-talkies can carry that same curiosity outdoors, turning a walk to the recycling point into a proper nature expedition. They’re a complement to craft time, not a substitute for it, giving children a reason to look closely at the birds, insects and plants around them once the glue has dried.
Some companies tie purchases directly to environmental habits by planting trees for products sold. If your child has just finished building a jar planter or a cardboard nature diorama, a Thezoofamily camera or binoculars set is a natural next step for documenting whatever they find outside next.
Sources
- Sustainable crafting: 32 earth-friendly project ideas — Creativebug
- Recycled crafts — Martha Stewart
- 50 sustainable crafts to help the planet — Gathered
- Resource Recycling — metal/handling safety note
FAQ
What are some easy crafts I can make with recycled materials?
Toilet-roll animals, egg-carton creatures, plastic-lid suncatchers and jar planters are among the fastest, taking as little as five to ten minutes with materials most households already have.
What everyday object can I make from recyclable materials?
A pencil pot from a washed jar, a planter from a plastic bottle, or a coaster set from wine corks are all practical, giftable objects made from single waste items.
What is a 5-minute craft?
It’s a single-step or very low-step activity using materials already to hand, such as a toilet-roll animal or a cork stamp, finished start to finish in about five minutes.
What is the most popular waste-material craft trend right now?
Textile upcycling, particularly turning old t-shirts and plastic bags into “plarn” for woven bags, rugs and bunting, has become one of the most popular eco-friendly craft projects for both kids and adults.
Do I need special tools for crafting with household waste?
No. Most projects need only scissors, glue and paint; a metal file is worth having on hand solely for smoothing tin-can edges before children handle them.