

Pick a sunny patch of at least 50 square feet, or build one 4x4 raised bed, and test the soil before you plant anything. Grow a handful of easy crops like lettuce, radishes and bush beans first. Expect a couple of hours a week once things are growing, and lean on local extension services or a guide like this one from Thezoofamily when you get stuck.
TL;DR:
- Most beginner gardens should stay within 50 to 75 square feet, with a 4x4 or 4x8 raised bed for manageable maintenance.
- Ensure your garden spot receives at least 6 to 8 hours of direct sunlight daily for optimal vegetable growth.
- Conduct soil tests from labs or home kits to adjust pH with lime and improve drainage before planting, especially in heavy clay or sandy soils.
- Start with forgiving crops like lettuce, radishes, bush beans, and marigolds, planting directly or as transplants based on the crop’s needs.
- Weekly maintenance routines, including mulching, watering deeply, weeding, and harvesting on time, are key to a thriving beginner garden.
Table of Contents
- How do I plan my garden size and goals?
- Where’s the best spot for a beginner garden?
- What soil tests do I need, and how do I fix problems?
- In-ground, raised beds or containers: which should I choose?
- Which vegetables and flowers should beginners grow first?
- How do I plant and care for young plants without losing them?
- What weekly maintenance keeps a garden healthy?
- How do you make compost at home?
- What mistakes do most beginner gardeners make?
- How do you attract pollinators and beneficial insects?
- How can beginners make gardening safe and fun for kids?
- Ready to start your first garden bed this weekend?
- Where to check local soil tests and planting dates
- Sources
How do I plan my garden size and goals?
Before buying a single seed packet, decide what you actually want from your garden. Someone chasing fresh salads all summer needs a different setup to someone who mainly wants a few pollinator-friendly flower beds.
Match your ambition to your available time:
- Vegetables for the table: needs the most sun and weekly attention, but gives the biggest return in food.
- Herbs: thrive in containers near the kitchen door and need very little space.
- Cut flowers: reward a small dedicated bed and regular deadheading.
- Wildlife-friendly patches: need minimal maintenance once established.
Extension guidance consistently points beginners towards a manageable starter size of 50 to 75 square feet, or a 4x4 or 4x8 raised bed. That footprint is big enough to grow something worth eating, small enough to weed in twenty minutes. Sketch a rough map on paper, mark where the sun falls, and leave at least a 45cm path so you can reach every plant without stepping on the soil.
Where’s the best spot for a beginner garden?
Sunlight decides more of your garden’s success than soil, seeds or effort combined. Most vegetables need 6 to 8 hours of direct sunlight daily, and fruiting crops such as tomatoes, peppers and courgettes often want more than 8 hours to crop well.
Track sun exposure over a full day before committing to a spot. Then work through the practical checks:
- Watch how a patch drains after heavy rain; standing water for more than an hour signals poor drainage that will need raised beds or amendment.
- Keep new beds well away from mature trees, whose roots will out-compete young vegetables for water and nutrients.
- Check how far the spot is from an outdoor tap. Proximity to water access is one of the strongest predictors of whether a new garden gets properly cared for.
Pro Tip: Put your first bed somewhere you walk past daily, not just somewhere convenient on paper. A garden you see every morning gets watered, weeded and harvested. One tucked round the back gets forgotten within a fortnight.
What soil tests do I need, and how do I fix problems?
Guessing at soil health wastes money on the wrong fertiliser and can actively harm young plants. A proper test removes the guesswork, and soil testing helps you choose targeted amendments rather than over-fertilising blindly.
You have two realistic routes to a result:
- Send a sample to your local extension or agricultural lab. This is the most reliable option and usually returns pH, nutrient levels and specific amendment recommendations.
- Use a home pH and nutrient kit. Faster and cheaper, though less precise than a lab test.
Most vegetables prefer a slightly acidic to neutral pH, roughly 6.0 to 7.0. If your results come back too acidic, the timing of correction matters as much as the amendment itself: apply dolomitic lime three to six months before planting so it has time to shift the pH before roots need to use it. Adding lime the week before you plant does almost nothing.
Fast fixes by soil type:
- Heavy clay: work in generous organic matter, or skip the fight entirely and build a raised bed on top.
- Sandy soil: mulch heavily and add organic matter regularly, since it drains and loses nutrients quickly.
If you’re starting this season and missed the three to six month lime window, don’t wait a full year. Add compost now, retest in spring, and treat lime as a longer-term project rather than a launch-day task.
In-ground, raised beds or containers: which should I choose?
Your soil quality and mobility needs should decide this, not aesthetics. Each format solves a different problem.
- In-ground beds cost nothing to build and suit gardeners with decent, well-draining native soil.
- Raised beds give you full control over soil quality and drainage, which matters enormously if your native ground is heavy clay or thin and sandy. They’re also easier on the knees and back.
- Containers work for patios, balconies, or renters who can’t dig up a lawn at all.
Keep raised beds no wider than 4 feet so you can reach the centre from either side without stepping on the soil and compacting it. Leave at least 60cm between beds for a wheelbarrow or kneeling pad, and add simple vertical supports, canes or a trellis, for climbing crops like beans and cucumbers to save ground space.
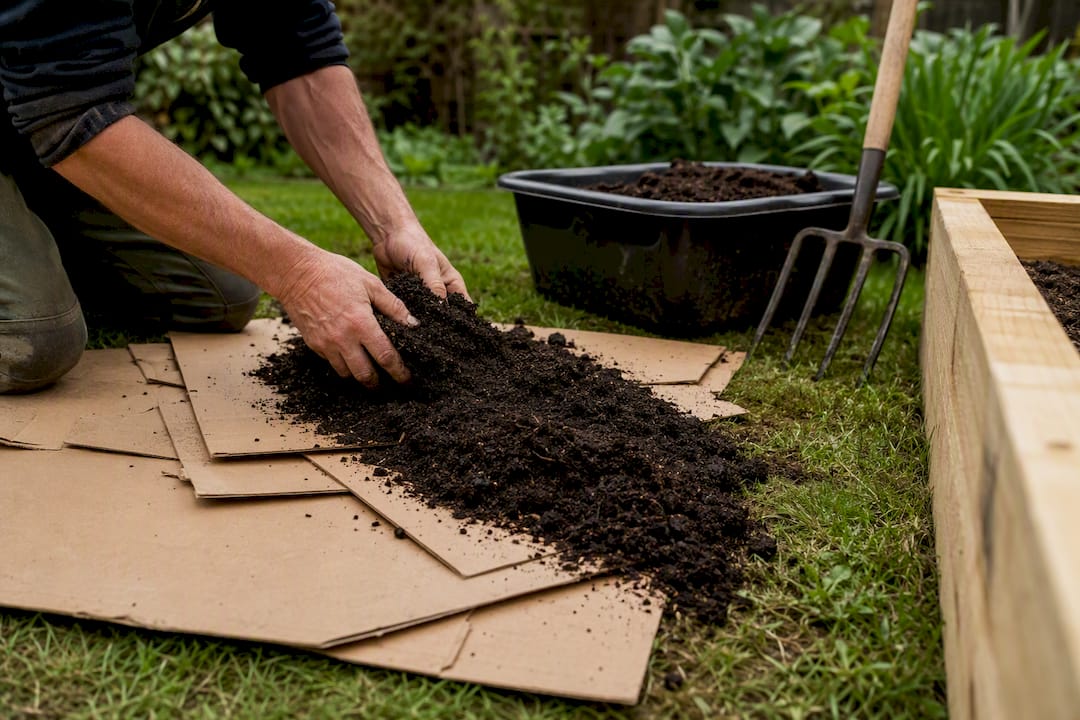
If your plot is currently lawn, skip the backbreaking sod removal. Lasagna gardening, or sheet mulching, layers cardboard and compost directly over the grass to smother it and build a bed over several months with almost no digging.
Which vegetables and flowers should beginners grow first?
Success in year one comes from choosing plants that forgive mistakes. Lettuce, radishes, bush beans and marigolds are the classic starter list for good reason: they germinate reliably and tolerate uneven watering.
A solid first-season line-up looks like this:
- Lettuce and radishes: fast, forgiving, and ready to harvest within weeks.
- Bush beans: productive without needing the trellis a climbing variety demands.
- Courgettes: one or two plants produce more than most households can eat.
- Tomatoes: buy as young transplants rather than sowing from seed indoors, since they need a long, warm head start.
- Marigolds and sunflowers: near-foolproof flowers that also draw pollinators to your vegetables.
Some crops want to go straight into the ground; others do better started elsewhere and moved. Radishes, beans and lettuce generally dislike root disturbance and grow best direct-sown where they’ll mature. Tomatoes, peppers and courgettes benefit from a transplant start, either bought as small nursery plants or begun indoors weeks earlier.
Timing hinges on your local last-frost date, which your regional extension service publishes annually. Count backwards from that date using the “days to maturity” figure on the seed packet to work out a realistic sowing window, and add a buffer of a week or two for cooler-than-average springs.
How do I plant and care for young plants without losing them?
Most beginner losses happen in the first fortnight after planting, not months later. Get the transplant stage right and the rest gets much easier.
- Dig a hole slightly wider and no deeper than the root ball, so roots spread out rather than curl at the bottom.
- Handle roots gently, teasing apart any that are tightly circled rather than tearing them.
- Water deeply immediately after planting, soaking the root zone rather than lightly wetting the surface.
Before any transplant goes into open ground, it needs hardening off. This is a gradual introduction to sun, wind and outdoor temperatures over seven to ten days, starting with an hour outside and building up daily. Skip this step and tender seedlings can scorch or collapse within days of planting out.
Once established, water deeply about once a week rather than lightly every day; shallow, frequent watering encourages weak, surface-level roots. Hot spells, sandy soil, and containers all demand more frequent watering than that baseline.
Pro Tip: Push a finger 5cm into the soil before watering. If it’s still damp, wait a day. Overwatering kills more young vegetables than drought ever does.
What weekly maintenance keeps a garden healthy?
A thriving beginner garden runs on a handful of small habits repeated weekly, not constant intervention. Build this into a Sunday-morning routine and it takes under half an hour once plants are established.
- Mulch beds with straw, shredded leaves or bark to suppress weeds and hold soil moisture between waterings.
- Feed vegetables every three to four weeks with a balanced organic fertiliser or compost tea, more often for hungry crops like tomatoes and courgettes.
- Weed little and often; five minutes weekly beat an hour-long battle once weeds have set seed.
- Check for pests by turning over a few leaves each visit, looking for aphids, slug damage or chewed edges.
- Harvest promptly. Overripe courgettes and bolted lettuce signal you’re behind, not that something’s wrong.
For pests, reach for the mildest response first: hand-pick slugs, hose off aphid clusters, or use an insecticidal soap before anything stronger. Most beginner pest problems solve themselves once natural predators move in, which is exactly why the insect-friendly habits later in this guide matter as much as any spray.
How do you make compost at home?
Composting turns kitchen and garden waste into free, nutrient-rich material that improves almost any soil type. You need only a bin, a corner of the garden, or even a covered tumbler to get started.
The method is simple: alternate layers of “greens” (vegetable peelings, coffee grounds, grass clippings) with “browns” (dried leaves, cardboard, straw) in roughly equal amounts. Greens supply nitrogen, browns supply carbon, and the balance between them determines how fast the pile breaks down.
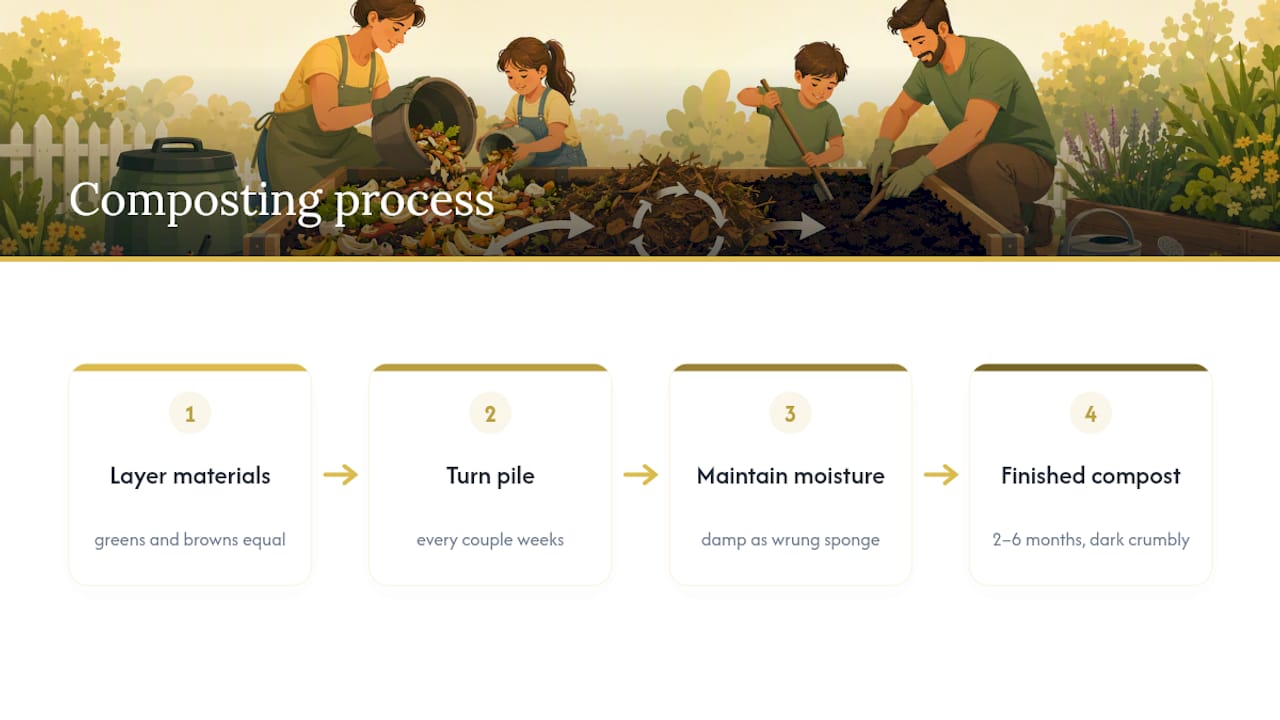
Turn the pile every couple of weeks with a fork to introduce oxygen, which speeds decomposition and prevents the sour smell that comes from an airless, soggy heap. Keep it as damp as a wrung-out sponge; too dry and it stalls, too wet and it rots rather than composts.
A well-managed pile is ready in two to six months, depending on the season and how often you turn it. You’ll know it’s done when it looks dark, crumbly and smells like earth rather than rubbish. Avoid meat, dairy and cooked food, which attract pests and slow the process down.
Finished compost works as a soil amendment, a mulch, or a gentle feed dug into beds before planting. For a full walkthrough with bin options and troubleshooting, Thezoofamily’s composting guide covers the process step by step.
What mistakes do most beginner gardeners make?
The single biggest error is doing too much, too soon. Experts consistently point to overambition as the top beginner mistake, planting a 500-square-foot plot in year one, only to abandon half of it by July once weeding and watering become a chore.
A shorter list of the mistakes that follow close behind:
- Skipping the soil test and adding fertiliser blindly, which can burn roots or feed the wrong nutrient entirely.
- Planting too close together, ignoring the spacing on the seed packet and ending up with stunted, disease-prone crops.
- Watering little and often instead of deeply and occasionally, which trains roots to stay shallow and fragile.
- Forgetting hardening off, then watching healthy seedlings scorch or wilt within days of transplanting.
- Choosing plants you don’t actually eat, which is how a courgette glut ends up in the compost bin instead of the kitchen.
The fix for nearly all of these is the same: start smaller than you think you need, and only expand the following year once you know what caring for your current plot actually takes.
How do you attract pollinators and beneficial insects?
A garden full of pollinators and predatory insects largely takes care of its own pest problems, which is reason enough to invite them in deliberately.
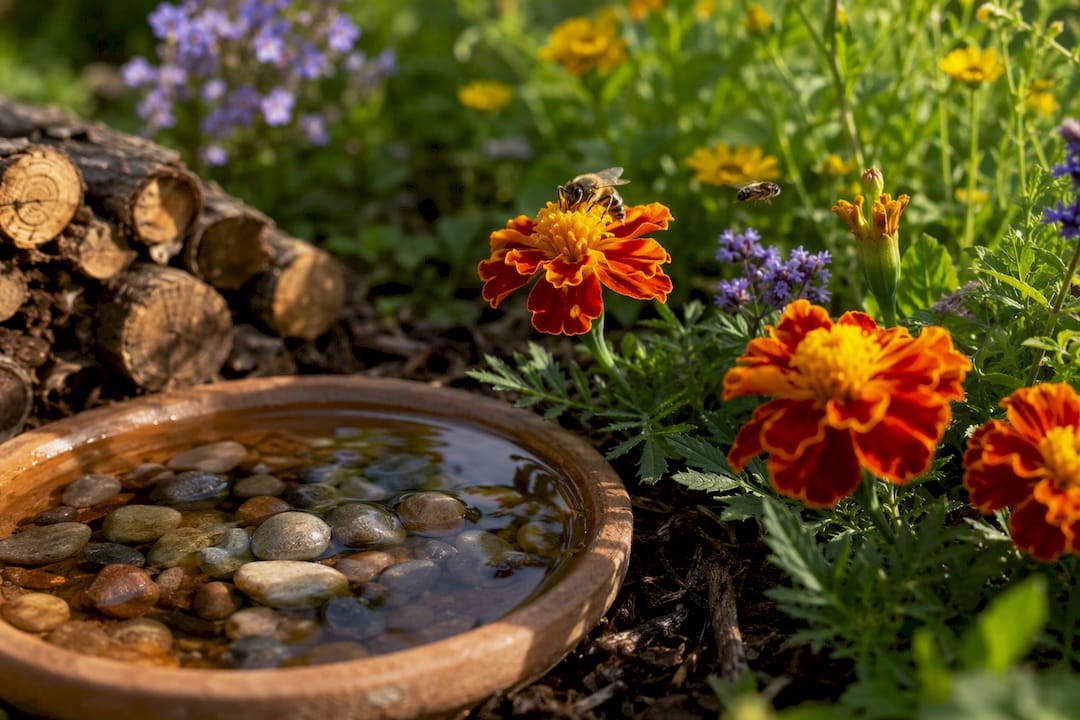
Flowers do most of the heavy lifting. Marigolds, sunflowers and other simple, open-faced blooms planted alongside vegetables draw bees and hoverflies, both of which also prey on aphids. Native wildflowers tend to outperform showy hybrids here, since local pollinators recognise and use them more readily.
A shallow dish of water, refreshed every few days, gives bees and beneficial wasps somewhere to drink without drowning; a few pebbles in the dish give them somewhere to land. Leaving a small pile of logs or leaf litter in an unused corner shelters ground beetles and other predatory insects that hunt slugs and aphids overnight.
Avoid broad-spectrum insecticides even when a pest problem looks bad. They kill the predators alongside the pests, often making the following season’s infestation worse. A patch of clover or a few unmown edges left through summer does more for pollinator numbers than any spray does for pest control.
How can beginners make gardening safe and fun for kids?
Keep child-friendly beds low, wide enough to reach into from either side, and planted with sturdy, non-toxic species like sunflowers, marigolds and cherry tomatoes that survive enthusiastic little hands. Give each child one small, repeatable task, watering with a light can, checking for ripe strawberries, and let them own it.
A shallow water dish, a small log pile, and a few native flowers turn any starter bed into a mini wildlife habitat with almost no extra work. Watching a ladybird or bee arrive is often more exciting to a young gardener than the harvest itself. For more ideas, Thezoofamily’s guide to wildlife-friendly gardens for children and its piece on building a fairy garden both offer simple weekend projects. For every camera Thezoofamily sells, one tree gets planted, a small link between play and the natural world this article encourages you to build at home.
— ALAIN
Ready to start your first garden bed this weekend?
You don’t need a full growing season plan to get going, just one bed and one crop. Pick a single 4x4 patch, test the soil, and plant something forgiving like lettuce or bush beans. That one small success this weekend is what carries most beginners into a second bed next month, rather than a stalled ambition that never gets past the sketch stage.

If children are part of your gardening plan, Thezoofamily is worth a look beyond this guide. Its animal-themed cameras, binoculars and walkie-talkies are built to get kids exploring the garden they’ve just helped plant, spotting the bees on the marigolds or the ladybirds on the log pile, rather than watching from the doorstep. Every camera sold funds a tree planted, so the connection between a child’s first garden and the wider outdoors runs deeper than one weekend project. If you’re also weighing up pet-safe planting near your new beds, this guide to vegetables that support dog health is a useful companion read. Browse the Thezoofamily shop for child-safe gear that turns this weekend’s planting into a habit your kids actually look forward to.
Where to check local soil tests and planting dates
For results specific to your postcode or region, always check a local source rather than relying on general guidance alone. The University of Maryland Extension’s step-by-step guide lays out the full plan-to-harvest process, while Cornell CALS covers sunlight requirements crop by crop. Your own regional extension office remains the best source for exact last-frost dates and soil lab submissions.
Sources
- Sunlight: the key to great vegetables — Cornell CALS
- Timing of lime and fertilizer applications — UMass Amherst
- How to start a vegetable garden — University of Maryland Extension