
Nearly 80 percent of parents say that hands-on science projects help their children stay curious and eager to learn. Building a DIY weather station offers families an easy entry point into science that feels more like play than homework. By turning everyday tasks into teamwork and discovery, this guide empowers you and your kids to collect, design, and explore real weather patterns right from your backyard.
Table of Contents
- Step 1: Gather Simple Materials With Your Kids
- Step 2: Design Weather Station Components Together
- Step 3: Assemble And Decorate Your Diy Weather Station
- Step 4: Install Your Station Safely Outdoors
- Step 5: Record And Track Weather Observations
Quick Summary
| Key Point | Explanation |
|---|---|
| 1. Involve kids in material gathering | Turn collecting supplies into a treasure hunt to make it exciting and engaging for children. |
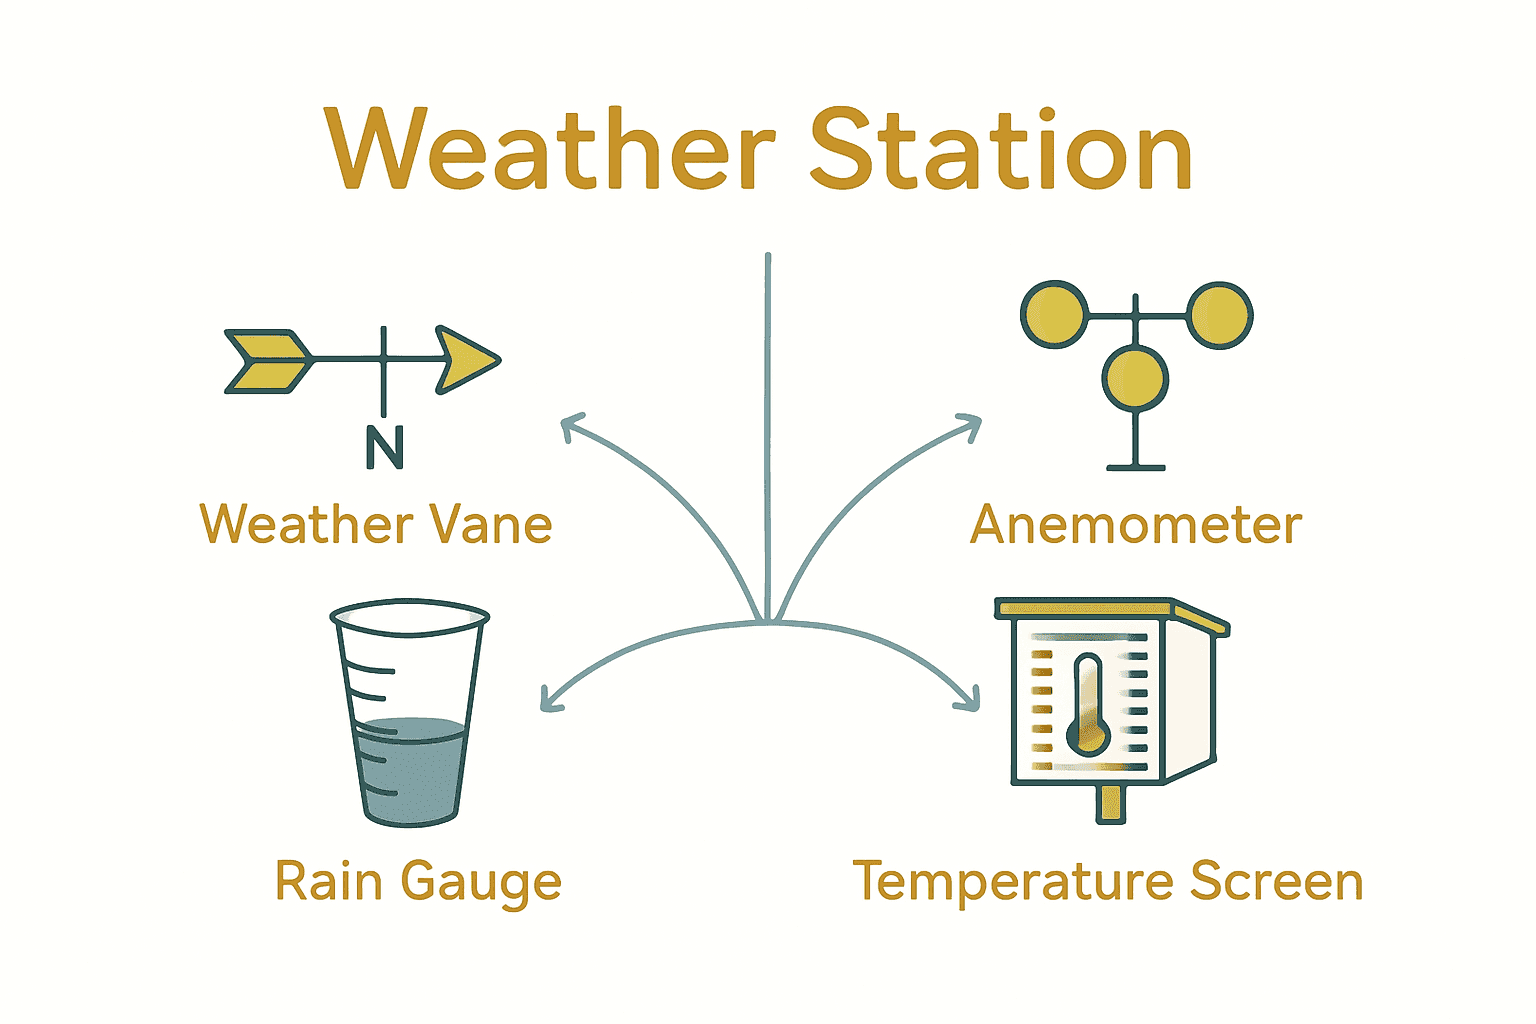
| 2. Create key weather station instruments | Design and build a rain gauge, weather vane, anemometer, and temperature screen for comprehensive weather measurements. |
| 3. Personalize your weather station | Encourage children to decorate their weather station, enhancing ownership and engagement in the project. |
| 4. Choose an appropriate outdoor location | Install the station in an open area, 1.5-2 meters above ground, to ensure accurate weather readings. |
| 5. Record daily weather observations | Keep a dedicated chart to track measurements, making it a fun family activity that promotes learning. |
Step 1: Gather simple materials with your kids
Making a DIY weather station starts with collecting materials your whole family can find together. According to Life Lab, involving children in material gathering transforms this project into an exciting learning adventure. You will want to create a fun treasure hunt around your home and garden to collect everything needed.
Start by assembling basic supplies that are safe and easy for children to handle. Your essential materials will include a sturdy wooden board as a base, waterproof paint or sealant, some nails or screws, and simple tools like a hammer. Gather additional items such as clear plastic containers, a small thermometer, a compass, and lightweight materials like pinwheels or ribbons that will help measure wind direction and speed.
To make this experience engaging, turn material gathering into a playful game. Ask your kids to search different areas of your home for potential weather station components. Let them suggest creative ways to use everyday objects. Some children might discover an old jar that could become a rain gauge or find a colourful ribbon perfect for tracking wind movement. Making Learning Fun: Engaging Activities for Your Kids suggests that transforming tasks into interactive experiences helps children stay motivated and excited about learning.
Quick tip: Always supervise children when handling tools and choose age appropriate tasks. Safety comes first in this creative exploration of weather science.
Step 2: Design weather station components together
Transforming your collected materials into functional weather monitoring tools is an exciting adventure in scientific exploration. According to Ocean Service, creating your own weather station instruments allows children to understand how scientists track environmental changes. This step will help you and your kids design unique components that capture different weather measurements.
Start with four key instruments that will make your weather station comprehensive. Learning Corner recommends creating a rain gauge, weather vane, anemometer, and temperature screen. For the rain gauge, use a clear plastic container with measurement markings. A weather vane can be crafted using a lightweight material like cardboard or aluminium foil mounted on a central pivot point. The anemometer requires creating cup shaped attachments that will spin with wind movement. Your temperature screen will need protection from direct sunlight to ensure accurate readings.
Encourage your children to personalise each component with creative decorations or colour schemes. This approach not only makes the project more engaging but also helps them develop a sense of ownership over their scientific creation. Discuss the purpose of each instrument explain how they work together to provide a complete picture of weather conditions.
 As you design and construct these components remember that precision matters less than the learning experience and fun of collaborative creation.
Tip: Take photographs of your design process. These can serve as wonderful memories and help track your progress in building a functional weather monitoring system.
Step 3: Assemble and decorate your diy weather station
With all your weather station components prepared, it is time to bring your scientific creation to life. Construction cabane de jardin: Guide pratique pour 2025 demonstrates how hands-on projects can be both educational and enjoyable for families looking to create something together.
Begin by mounting your wooden base securely in a location with clear exposure to wind and open sky. Attach each weather instrument carefully using waterproof sealant or small screws. Position your rain gauge where it can collect precipitation without obstruction. Mount the weather vane at the highest point to capture accurate wind direction. The anemometer should be placed where wind can freely spin its cups. Create a protective screen for your temperature sensor using white painted materials that reflect sunlight and prevent direct heat absorption.
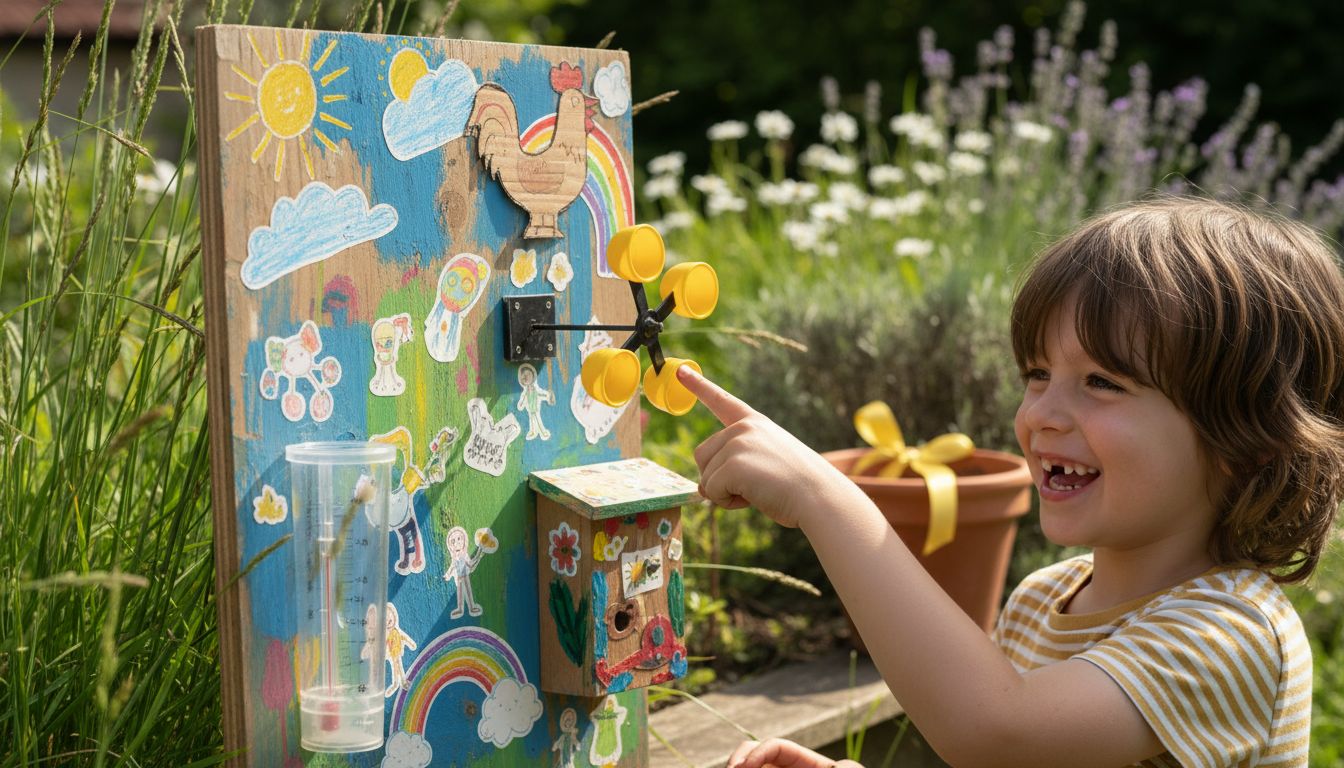
Encourage your children to personalise the weather station with creative decorations. They might paint the base with bright colours or add animal stickers that represent different weather patterns. This personal touch transforms a simple scientific tool into a memorable family project. Adding name tags or small artwork helps children feel connected to their creation and more excited about tracking environmental changes.
Tip: Choose a location that is safe from extreme weather but provides an unobstructed view of the sky. A garden area or raised platform works perfectly for maintaining your new weather monitoring station.
Step 4: Install your station safely outdoors
Preparing to install your homemade weather station marks an exciting milestone in your family science project. Life Lab emphasizes the critical importance of selecting the right location to ensure accurate and reliable weather measurements.
According to Ocean Service, your ideal installation spot should provide an unobstructed view of the sky and represent typical environmental conditions. Look for an open area away from buildings, trees, or large structures that might interfere with wind and temperature readings. Mount your weather station approximately 1.5 to 2 metres above ground level to capture representative atmospheric conditions. Ensure the base is secured firmly using ground stakes or a sturdy mounting platform that can withstand local weather variations.
Involve your children in the installation process by making it an interactive learning experience. Discuss why certain locations work better for scientific observations. Teach them about microclimate variations and how nearby objects can impact weather instrument readings. Encourage them to observe and document any challenges they encounter during installation. This hands-on approach transforms a simple setup into an engaging educational moment that connects them directly with scientific methodology.
Tip: Consider creating a small logbook where your children can record their initial observations and track how different environmental factors might influence their weather station’s measurements.
Step 5: Record and track weather observations
Now that your weather station is set up, the most exciting part begins tracking and documenting daily weather patterns. Lunar and Planetary Institute provides excellent guidance on transforming weather observation into a systematic scientific exploration for children.
Create a dedicated observation chart where your children can record key measurements daily. Learning Corner recommends tracking temperature, precipitation, wind direction, and cloud coverage. Establish a consistent time each day for taking measurements to ensure accuracy. Encourage your children to use different coloured markers or stickers to make the recording process more engaging. Have them draw small pictures representing the day’s weather or use symbols that make tracking feel like a fun game rather than a chore.
Turn weather tracking into a family activity by discussing daily changes and patterns. Help your children understand how weather connects to broader environmental systems. Ask them to predict the next day’s weather based on their observations and compare their predictions with actual results. This approach transforms simple data collection into a dynamic learning experience that develops critical thinking and observational skills.
Tip: Create a large wall chart where children can see their weather data evolve over weeks and months. Visual representations help kids understand long term weather patterns and make scientific tracking exciting.
Inspire Your Child’s Love for Science and Nature Today
Building a DIY weather station at home is a wonderful way to spark curiosity and hands-on learning in children. However the challenge lies in keeping kids engaged and connected to the wonders of nature while exploring scientific concepts like wind direction and temperature. If you want to deepen that connection and bring more excitement to outdoor discovery you will appreciate how The Zoofamily offers tools designed to nurture young explorers. Our kids’ cameras and binoculars come with playful animal references that entice children to develop a lifelong love for the environment and science.

Start creating unforgettable outdoor adventures that complement your weather station projects. Visit The Zoofamily main site to discover our range of interactive devices that make nature exploration fun and meaningful. By choosing The Zoofamily you not only equip your kids with quality tools but also help restore natural beauty as one tree is planted for every camera sold. Bring science and nature closer to your family today and watch their imagination grow while protecting the world they will inherit.
Frequently Asked Questions
What materials do I need to build a DIY weather station with my kids?
To build a DIY weather station, gather a sturdy wooden board, waterproof paint, nails or screws, and simple tools like a hammer. Additionally, collect items such as clear plastic containers, a small thermometer, a compass, and lightweight materials like pinwheels or ribbons to measure wind direction and speed.
How can I involve my kids in building the weather station?
Involve your kids by turning the material-gathering phase into a fun treasure hunt around your home and garden. Let them suggest creative uses for everyday objects, which enhances their engagement and excitement throughout the project.
What are the essential components to include in a DIY weather station?
Include four key instruments: a rain gauge, weather vane, anemometer, and temperature screen. Each instrument serves a unique purpose and helps collect comprehensive weather data, enhancing your kids’ understanding of weather monitoring.
How can I make the weather station visually appealing for my kids?
Encourage your children to personalize the weather station using bright colors and creative decorations. They might paint the wooden base or add stickers to make the project feel more like their personal creation and foster a sense of ownership.
What steps should I take to install the weather station outdoors?
Choose a clear and open location free from obstructions and mount the weather station at about 1.5 to 2 meters off the ground. Secure the base firmly with ground stakes or a mounting platform to ensure it can withstand local weather variations.
How can I track and record weather observations effectively?
Create a dedicated observation chart for your children to record daily measurements like temperature, wind direction, and precipitation. Establish a consistent time each day for measurements to build a routine, enhancing accuracy and making it a fun family activity.