
Over 60 percent of British families now seek out creative hobbies that bring them closer to nature, and sky photography is soaring in popularity. With so many dazzling celestial moments passing overhead every day, finding the right way to capture them matters more than ever. Unlocking the secrets of light, timing, and creative framing, this guide helps you transform ordinary family outings into inspiring sky photo adventures everyone will remember.
Table of Contents
- Step 1: Select The Best Time And Spot For Sky Photos
- Step 2: Prepare Your Camera And Adjust Key Settings
- Step 3: Guide Your Child In Framing The Perfect Shot
- Step 4: Experiment With Angles And Creative Features
- Step 5: Check And Share Your Family’s Sky Photographs
Quick Summary
| Key Point | Explanation |
|---|---|
| 1. Optimal timing enhances sky photography | Shoot during the Golden Hour and Blue Hour for stunning light that transforms landscapes and elevates your images to extraordinary levels. |
| 2. Choose locations wisely for clarity | Select spots with minimal light pollution and unobstructed views, such as dark sky sanctuaries or elevated areas, for the best sky photographs. |
| 3. Master camera settings for best results | Adjust your camera’s ISO, aperture, and shutter speed correctly to capture the celestial scenes you envision with clarity and depth. |
| 4. Engage children through creative framing | Teach children about composition and encourage experimentation with angles, turning photography into a fun and educational family activity. |
| 5. Review and celebrate your photography | Discuss your photos together, ensuring each family member reflects on their favourites and consider creating a memorable display to celebrate your sky adventures. |
Step 1: Select the best time and spot for sky photos
Catching breathtaking sky photographs requires understanding the magical windows of natural light and finding the perfect location. When you plan your outdoor photography adventure, timing and positioning become your secret weapons for stunning results.
The most incredible sky shots happen during what photographers call the Golden Hour and Blue Hour. These precious periods just after sunrise and before sunset transform ordinary landscapes into extraordinary canvases. During the Golden Hour, warm sunlight bathes everything in soft, golden tones perfect for dramatic sky images. The Blue Hour provides cooler, more ethereal light that can make your photographs feel mystical and serene.
When selecting your photography location, seek out spots with minimal light pollution and unobstructed horizon views. Dark sky sanctuaries like the Kaikōura Dark Sky Sanctuary offer incredible opportunities for capturing pristine night sky scenes. Look for elevated positions such as hills, open fields, or coastal areas that provide wide panoramic views without buildings or dense trees blocking your perspective.
Pro tip: Always check local weather forecasts and plan your shoot around clear or partially cloudy conditions. Wispy clouds can add dramatic texture to your sky photographs, while completely clear skies might seem flat and uninteresting. Pack warm clothing, a sturdy tripod, and plenty of patience to capture nature’s most spectacular moments.
Step 2: Prepare your camera and adjust key settings
Photographing magnificent skies requires more than just pointing and shooting. You will need to transform your camera settings to capture those stunning celestial scenes with professional clarity and depth.
The secret to incredible sky photography lies in understanding your camera’s technical capabilities. When shooting night skies or dramatic daytime scenes, you’ll want to follow some precise techniques. Night sky photography experts recommend mounting your camera on a sturdy tripod to eliminate any potential camera shake. This stability is crucial for capturing crisp, clear images especially during longer exposure times.
Your camera settings become critical in these moments. For night scenes, set your ISO between 800 and 3200, open your aperture wide (around f/1.8), and experiment with shutter speeds ranging from a few seconds to 30 seconds. Interestingly, photographers often use the Sunny 16 rule as a baseline for exposure settings during bright daylight scenes. This technique suggests setting your aperture to f/16 and matching your shutter speed to the reciprocal of your ISO setting.
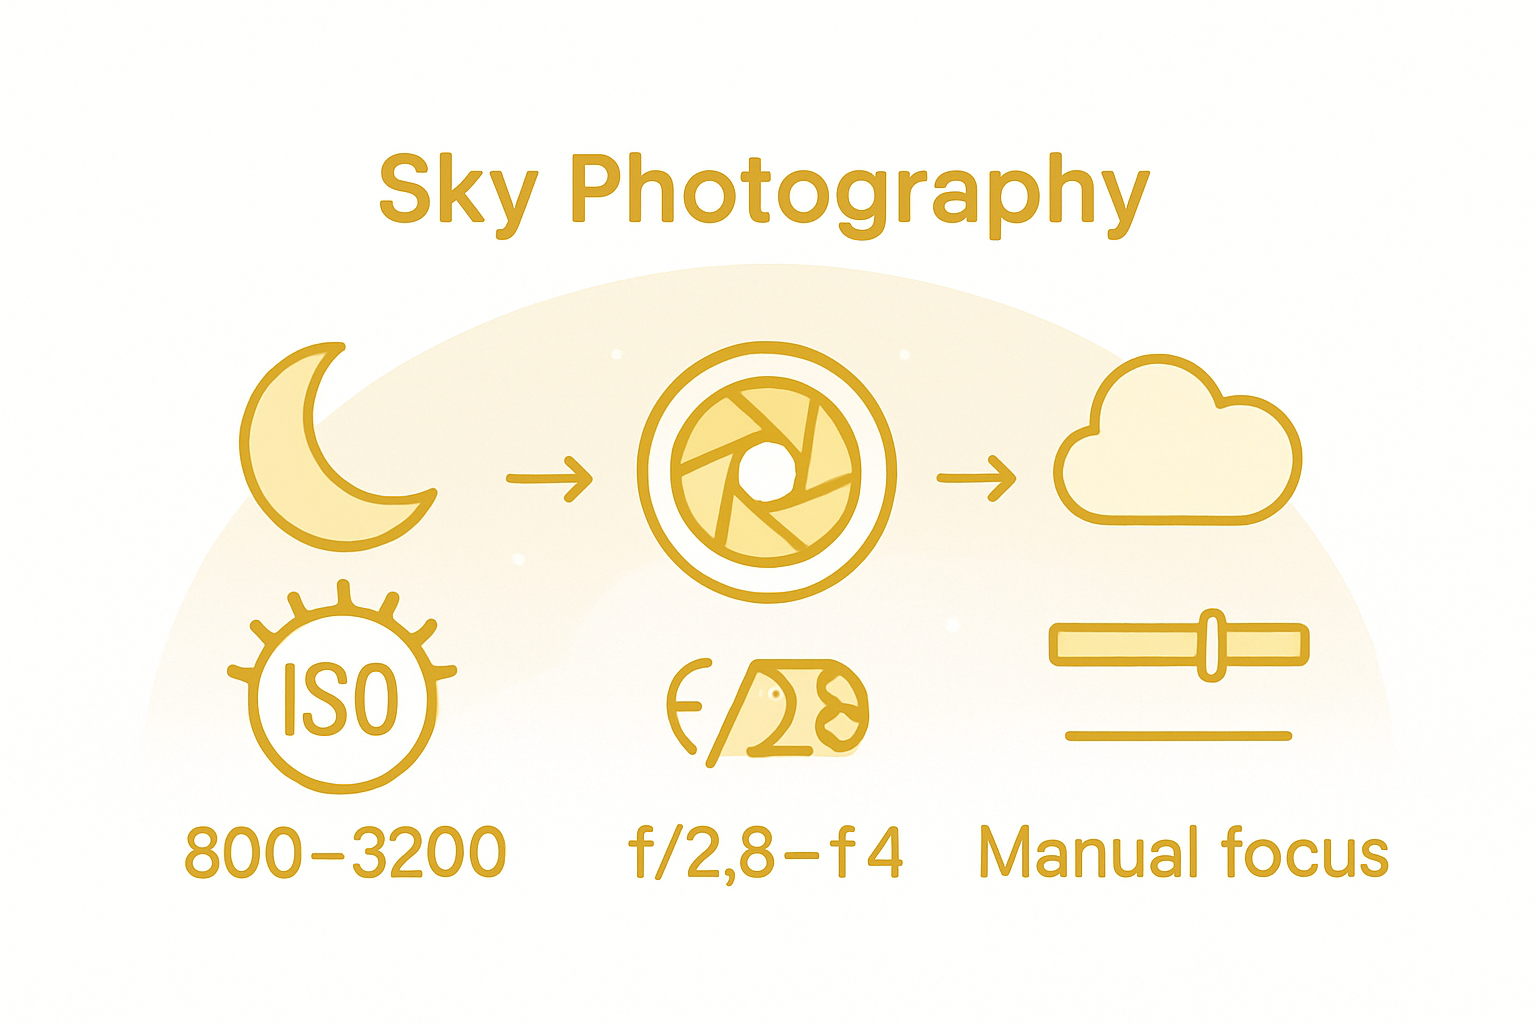
Pro tip: Always focus manually and aim for infinity when capturing expansive sky scenes. Autofocus can struggle with distant landscapes, so taking control ensures your images remain razor sharp. Pack extra batteries and memory cards, as long exposure shots can quickly drain your camera’s resources.
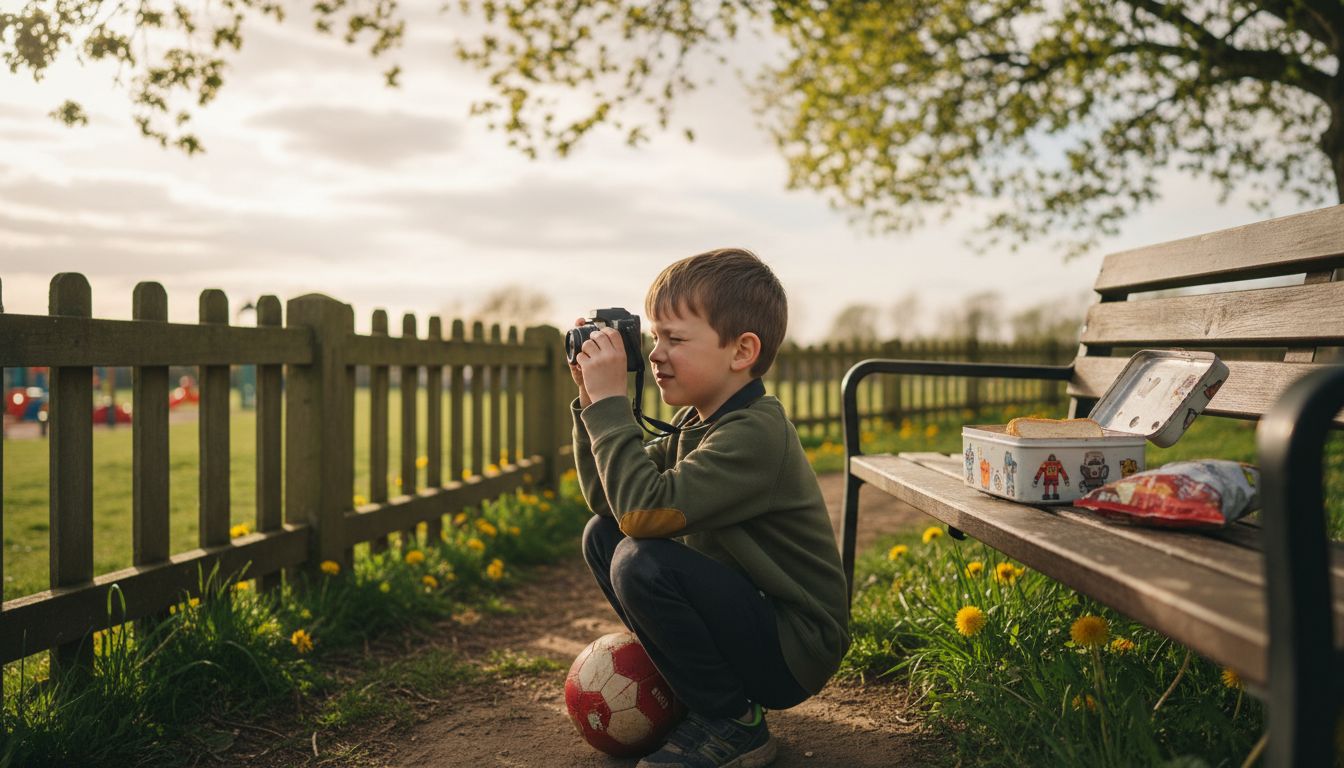
Step 3: Guide your child in framing the perfect shot
Engaging children in sky photography transforms a simple outdoor activity into an adventure of creative discovery. This step is about turning technical skills into a playful learning experience that sparks your child’s imagination and observation skills.
Digital camera experts recommend teaching children about horizontal guidelines to help them compose more balanced and professional looking images. Show them how to use the camera’s grid lines to ensure the horizon sits perfectly straight. Make this a game by challenging them to align clouds or distant landmarks precisely along these lines.
Encourage experimentation and creativity during your photography session. Let your child explore different angles and perspectives teaching them that great photographs often come from unique viewpoints. Suggest they try shooting from low positions looking upwards or finding interesting foreground elements to frame the sky. Demonstrate how slight movements can dramatically change an image composition showing them that photography is about storytelling and personal interpretation.
Pro tip: Create a fun game where your child earns points for creative framing techniques. Ask them to capture the sky in ways that tell a story or evoke an emotion. This approach transforms technical learning into an engaging family activity that builds confidence and artistic expression.
Step 4: Experiment with angles and creative features
Sky photography is an art of exploration where technical skills meet boundless creativity. This step invites you and your child to transform ordinary photographs into extraordinary visual stories by playing with different techniques and perspectives.
Photographers can capture stunning effects by experimenting with various shutter speeds, particularly when photographing night skies. For Milky Way images, try exposures around 8 to 10 seconds to create different visual textures. Some shots might reveal crisp, pin sharp stars while others will produce dreamy, soft star trails that dance across your image.
Star trail photography offers a mesmerising way to capture the Earth’s rotation through long exposure techniques. Encourage your child to imagine these light streaks as celestial paintbrushes drawing magical patterns across the night sky. Ask them to notice how slight changes in camera angle or exposure time can dramatically alter the image narrative.
Pro tip: Turn technical learning into a playful challenge. Create a family photography game where each person tries a unique angle or technique. Who can capture the most interesting sky composition? This approach transforms learning into an exciting shared adventure that sparks curiosity and builds confidence.
Step 5: Check and share your family’s sky photographs
Capturing beautiful sky photographs is just the beginning of your creative journey. This final step transforms your images from simple snapshots into cherished family memories that celebrate your shared outdoor adventure.
Review each photograph together, discussing what makes each image special. Look for unique details like cloud formations, subtle colour gradients, or interesting silhouettes. Utilising astronomy apps can help identify specific celestial events and enhance your understanding of the sky, turning your photo review into an educational moment that sparks curiosity about the universe.
Encourage each family member to select their favourite image and explain why it resonates with them. This sharing process helps children develop visual storytelling skills and builds confidence in their creative abilities. Consider creating a family sky photography album or digital slideshow that chronicles your outdoor exploration and artistic growth.
Pro tip: Print your most memorable shots and create a special display wall or scrapbook. This tangible celebration of your family’s photographic adventure will become a treasured keepsake that reminds you of the magical moments shared under open skies.
Capture Magical Sky Moments with The Zoofamily
Sky photography for families can be challenging when trying to balance technical skills like manual focus and exposure with engaging young minds in creative storytelling. This article highlights the joys and hurdles of capturing captivating sky images during the Golden Hour and Blue Hour, experimenting with angles, and guiding children in framing their perfect shot. Your goal is to transform outdoor time into a memorable, artistic experience while helping children connect deeply with nature.
The Zoofamily offers a unique solution to these challenges by providing specially designed kids’ cameras that inspire curiosity about the natural world. Our cameras feature animal references that spark children’s fascination with wildlife and the outdoors, making sky photography a fun, educational adventure rather than a technical chore. Plus, we support environmental restoration by planting a tree for every camera sold, helping secure the natural beauty your family explores.
Explore our range of innovative tools and ignite your child’s passion for outdoor creativity today.

Discover how easy and rewarding sky photography can be with the right gear. Visit The Zoofamily to find the ideal camera and accessories designed for young explorers. Turn every moment under open skies into a treasured family memory and help nurture a healthier planet. Start your sky photography adventure now at https://thezoofamily.com.
Frequently Asked Questions
What time of day is best for sky photography with my family?
The best times for capturing stunning sky photographs are during the Golden Hour and Blue Hour, which occur just after sunrise and just before sunset. Plan your outdoor outings around these times to maximise the quality of your images and create magical moments.
How can I prepare my camera for sky photography?
To achieve beautiful sky photos, adjust your camera settings based on the time of day. For night photography, set your ISO to between 800 and 3200, use a wide aperture (around f/1.8), and experiment with shutter speeds of a few seconds to 30 seconds.
How can I engage my child in sky photography?
Involve your child by teaching them how to compose their shots using horizontal guidelines and encouraging them to experiment with different angles. Make it a playful learning experience by creating games that challenge them to align elements in their photos creatively.
What techniques can we try to improve our sky photography?
You can experiment with various shutter speeds to create different effects, such as soft star trails or sharp star images. Encourage your child to adjust the camera angle or exposure time, as small changes can dramatically influence the final photograph.
How can we preserve and share our family’s sky photographs?
After capturing beautiful images, review them together and select favourites to create a digital slideshow or photo album. Consider printing selected shots to create a display wall or scrapbook, turning your sky photography adventure into tangible memories.
Recommended
- Meilleurs gadgets plein air enfants – Comparatif 2025 – The Zoofamily
- 7 Tips for Exciting Photography Scavenger Hunts – The Zoofamily
- Complete Guide to Sustainable Living for Families – The Zoofamily
- Learning Fun Games: Engage Kids with Creative Play Steps – The Zoofamily
- Realizzazione sito web per fotografi a Castelfranco Veneto