

The fastest recycled sculpture projects use materials already sitting in your recycling bin: tin cans, toilet rolls, bottle caps and cardboard. A tin-can robot planter, a toilet-roll butterfly or a bottle-cap mosaic each takes roughly 20 to 60 minutes, needs no specialist tools, and turns a full recycling box into a finished piece of art before the afternoon is over.
TL;DR:
- Projects like wind chimes and mosaics can take up to an hour or slightly longer, depending on size and complexity, requiring adult reinforcement for cutting and punching.
- Using household recyclables such as cans, caps, and cardboard involves simple joins like glue and tape, but larger or sharper pieces should be handled with caution and pre-prepared for safety.
- Project difficulty should match children’s age, with preschoolers focusing on sensory activities, while older kids can handle moving parts and more complex joins for STEM learning.
- Finishing touches such as weather-resistant paint or varnish are essential for outdoor displays, and all sculptures should be dismantled and recycled properly afterward.
- Keeping a simple, reusable craft kit with basic tools and supplies ensures safe, ongoing recycling projects without the need for new materials each time.
Table of Contents
- 12 easy recycled sculpture ideas to try today
- How to build any recycled sculpture in four steps
- Supplies and safety checklist for crafting with children
- Adapting recycled sculpture projects by age and class size
- Turning craft time into STEM and sustainability learning
- Displaying, finishing and recycling your sculptures afterwards
- Practical rules for crafting with children
- Why simple beats elaborate with young sculptors
- Sources
- FAQ
12 easy recycled sculpture ideas to try today
Each of these easy recycled sculpture ideas uses two or three household recyclables, a basic adhesive, and a short window of time. Pick two or three to rotate through a week of after-school crafting or a single classroom session.
-
Tin-can robot planter. Materials: a cleaned tin can, bottle caps, a small houseplant or seeds. Time: 30 to 40 minutes. Smooth any sharp rim edges before handing the can to a child, and once painted, the robot doubles as a working planter. Learning outcome: basic plant care paired with reuse.
-
Toilet-roll butterfly. Materials: a cardboard tube, paint, pipe cleaners. Time: around 30 minutes, making it one of the quickest wins on this list. Younger children can stick pre-cut wing shapes rather than cutting their own. Learning outcome: symmetry and colour matching.
-
Cardboard mask. Materials: a flattened cereal box, string or elastic, paint. Time: 45 minutes. An adult should pre-cut eyeholes with a craft knife; children handle only the decorating. Learning outcome: facial proportion and character design.
-
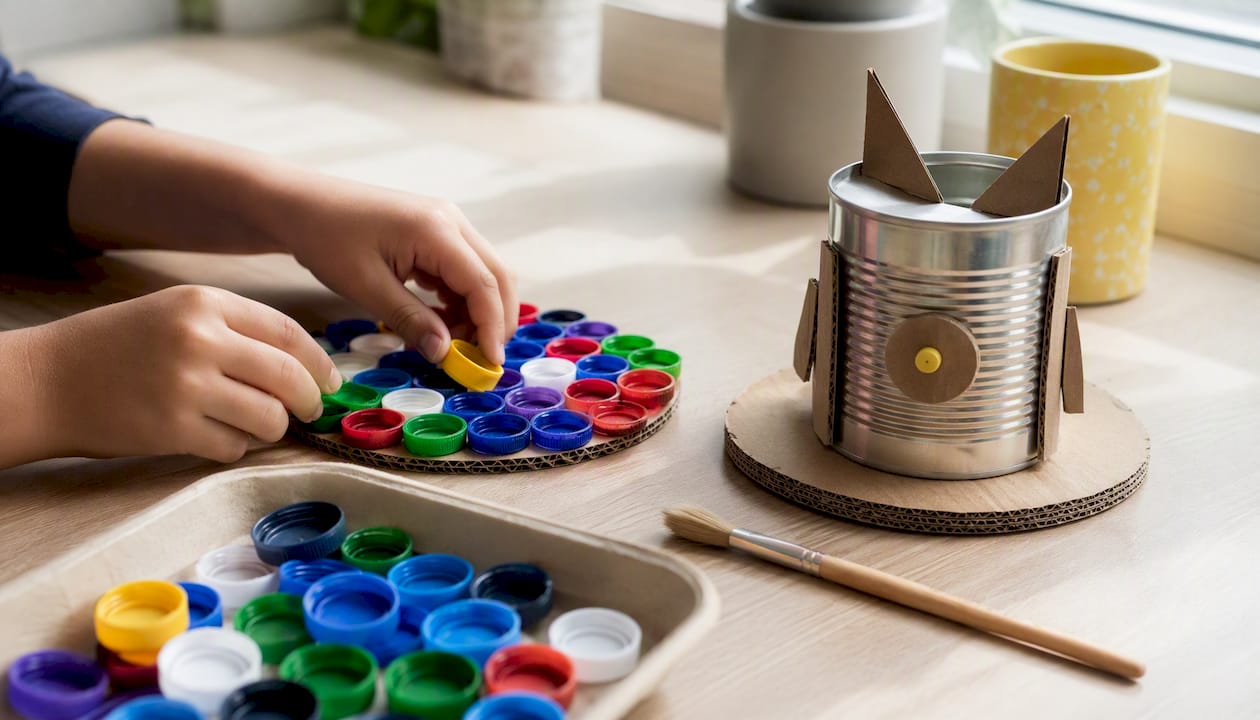
Bottle cap mosaic. Materials: assorted plastic bottle caps, cardboard backing, glue. Time: 40 minutes. Sort caps by colour first so younger children aren’t overwhelmed by choice. Learning outcome: pattern-building and colour theory.
-
CD sun catcher. Materials: an old CD, tissue paper or permanent markers, ribbon. Time: 20 minutes, one of the fastest projects here. Hang near a window rather than a door where it could swing into someone. Learning outcome: light and colour observation.
-
Tin-can wind chime. Materials: two or three small cans, string, beads. Time: 45 minutes. An adult should punch the attachment holes with a hammer and nail and reinforce them so the string doesn’t slip loose later. Learning outcome: sound and vibration basics.
-
Aluminium can mosaic. Materials: several clean cans, wire cutters (adult use only), a wooden backing board. Time: 60 minutes or longer for bigger pieces. Best suited to older children working alongside an adult, given the cut metal edges involved. Learning outcome: texture and reflected light.
-
Recycled lantern. Materials: a clear plastic bottle, tissue paper, a battery-powered tea light. Time: 30 minutes. Always use battery lights rather than open flame with any recycled paper or plastic. Learning outcome: safe use of light in design.
-
Soda-can birds. Materials: a clean can, felt or paper for wings, glue. Time: 40 minutes. Fold sharp pull-tab edges flat or remove them entirely before children start. Learning outcome: basic bird anatomy and balance.
-
Cardboard vase flower threading. Materials: a cardboard tube, wool or string, dried or paper flowers. Time: 30 minutes, and particularly good for fine motor practice with younger children. Learning outcome: hand-eye coordination.
-
Cardboard architecture. Materials: cereal boxes, egg cartons, sticky tape. Time: 50 minutes for a simple structure. Works well as a group project split by “building” and “decorating” teams. Learning outcome: structural stability and spatial planning.
-
Mixed-media animal figures. Materials: any leftover recyclables (caps, tubes, foil, scraps), glue gun (adult-operated). Time: 45 minutes. Keep this one open-ended. There’s no single right answer, which is exactly the point. Learning outcome: creative problem-solving from limited materials.
How to build any recycled sculpture in four steps
Every project on this list follows the same reusable process, whichever materials you’re holding.
- Gather and sort. Rinse and dry recyclables, then set aside anything with sharp edges, broken glass, or leftover food residue.
- Plan. Sketch the shape roughly and decide where pieces will attach and how the finished sculpture will balance on its base.
- Join. Use tape or a hot glue gun for light materials, and reinforce heavier joins with extra card tabs or string knots.
- Finish. Add paint, decoration, movement or light, then give the piece a gentle wobble test before calling it done.
If a sculpture leans or topples, the fix is almost always a wider or heavier base, not a stronger glue joint.
Pro Tip: Museum educators encourage treating the first version as a draft. It’s fine, even good, to take a sculpture apart and rebuild it once a child spots a better way to join the pieces.
Supplies and safety checklist for crafting with children
Keep a small, repeatable kit rather than buying anything new for each project:
- Clean tins, cardboard tubes, bottle caps, plastic bottles and cereal boxes
- Non-toxic PVA glue, masking tape, and a hot glue gun for adult use only
- Child-safe scissors, plus a craft knife kept for adult hands
- Washable paint, brushes, and string or wool for hanging pieces
Before any tin-can project, rinse the can thoroughly and smooth the cut rim with sandpaper or a can-opener that leaves a rolled edge. For a group setting, one adult per four or five children under age eight is a workable ratio when hot glue or hole-punching tools are involved. Set up separate stations for cutting, gluing and decorating so tools don’t get passed hand to hand unnecessarily.
Adapting recycled sculpture projects by age and class size
The same idea can flex from a toddler activity to a challenging build for a ten-year-old.
- Preschoolers (3 to 5): focus on sensory play with pre-cut large pieces; skip cutting tools entirely and let an adult pre-punch any holes.
- Primary age (6 to 9): introduce blunt-tip scissors and simple joins; painting detail work suits this age well.
- Older children (10+): add moving parts, wind chime elements or lights, and let them test whether their own joins hold weight.
- Classroom logistics: rotate small groups through prep, building and decorating stations, and stagger start times so the adult supervising glue guns isn’t stretched across the whole room at once.
Turning craft time into STEM and sustainability learning
A wind chime is a physics lesson wearing a craft disguise. Spacing the cans evenly and testing different string lengths teaches balance and how vibration changes pitch, and KidMinds recommends reinforcing each punched hole so the string doesn’t slip under the can’s weight, a small detail that also happens to be the engineering fix if a chime keeps drooping to one side.
Ask children which length of string produces the deepest sound, then let them test it rather than telling them the answer.
The most useful classroom question isn’t “is this finished?” but “what happens if we change one thing?” That single habit turns a craft table into a small experiment station, and it works whether the material in hand is a tin can or a toilet roll.
Battery-powered fairy lights tucked inside a lantern or laid across a mosaic add a genuine spark of delight without any of the risks of a real flame.
Displaying, finishing and recycling your sculptures afterwards
A light coat of clear varnish protects cardboard pieces staying indoors, while anything destined for a garden or windowsill needs weather-resistant paint and a stable, weighted base.
- Photograph each finished piece before it’s dismantled, and build a simple gallery wall or shared album from the shots.
- For outdoor mosaics using many cans, wear gloves, clamp pieces while drilling, and pre-drill holes rather than forcing them freehand.
- When a sculpture’s had its display run, take it apart and sort the parts back into their proper recycling stream rather than binning the whole thing.
Practical rules for crafting with children
Animal-themed cameras, walkie-talkies and binoculars exist to spark exactly this kind of curiosity about nature and creative play. For every camera sold, a tree is planted, because the aim is for materials children reuse today to matter for a much longer stretch of time than one afternoon.
Why simple beats elaborate with young sculptors
The advice most parents get wrong is reaching for a template that promises a “perfect” result. Recycled sculpture doesn’t reward precision. It rewards a child noticing that a can wobbles and figuring out a wider base fixes it. That’s the entire value of the medium, and it’s why the twelve-minute bottle-cap mosaic often teaches more than an hour spent following someone else’s exact diagram.
Prioritise time estimates over ambition when you’re choosing a project for a group. A 20-minute sun catcher that actually finishes beats a 90-minute build that gets abandoned halfway through nap time. Once a child has finished two or three quick wins, they’ll ask for the harder projects themselves, the wind chime, the mosaic, the mask with moving parts, without needing to be pushed toward them.
Start with whatever’s already full in your recycling bin this week, or explore structured trash robot ideas and kits for additional creative building templates. If you’d like more family-tested project ideas in the same spirit, Thezoofamily’s blog has several worth trying, and our animal-themed product range is built on the same idea: curiosity about the natural world starts with hands-on play.
— ALAIN
Sources
For fuller instructions beyond this list, KidMinds’ wind chime guide covers hole reinforcement in detail, A Little Pinch of Perfect walks through the robot planter step by step, and the Royal Academy’s family how-to offers a classroom-ready lesson framing.
- DIY Toilet Paper Roll Butterfly Craft for Kids - Making Crafty Things
- How to make tin can wind chimes | KidMinds
- Recycled tin can robot planters for kids | A Little Pinch of Perfect
FAQ
What are some creative art ideas for recycling?
Tin-can robots, bottle-cap mosaics, CD sun catchers and cardboard masks are among the most reliable creative recycling projects, since they use materials most households already have. Each takes under an hour and needs no specialist equipment beyond basic glue, tape and paint.
What should a beginner sculpt first?
Start with a single-material project like a toilet-roll butterfly, which takes around 30 minutes and involves no cutting tools beyond what an adult pre-cuts. Simple shapes with few joins build confidence before tackling anything with moving parts.
What are some easy cardboard sculpture ideas for beginners?
Cardboard masks, vase flower threading and small cardboard architecture builds are all beginner-friendly, since cardboard cuts, folds and glues easily with basic tools. A cardboard vase threading project is particularly good for younger children still developing fine motor skills.
What are some examples of recycled art sculptures?
Tin-can wind chimes, aluminium can mosaics, soda-can birds and mixed-media animal figures are all recognised recycled sculpture forms. Larger aluminium mosaics intended for permanent outdoor display need extra safety steps, including gloves, clamps and pre-drilled holes.
How do I make crafting safer for young children?
Clean and smooth any tin-can edges before children handle them, and keep hot glue guns, craft knives and drilling tools for adult use only. Supervision matters most during the joining and finishing stages, when tools and adhesives are in active use.