

Here’s the quick answer: if the creature has three body parts (head, thorax, abdomen) and six legs, it’s an insect. That single check, straight from field-guide basics, is your starting point for garden bugs identification, and it works whether you’re in a school playground or your own back garden with a curious five year old.
Once you’ve made that call, the next step is simple: photograph it, jot down a quick note, and use the identification key below to narrow it down to a familiar group like beetle, butterfly, or bee. You don’t need expensive kit or entomology training. You need a checklist, a bit of patience, and the confidence to let a child lead the way.
Before you head outside, run through this:
- Body parts: three sections visible? Head, thorax, abdomen.
- Legs: count them. Six means insect; more or fewer means something else.
- Antennae: are there two feelers on the head?
- Wings: present or absent, and how many pairs?
- Safety flag: does it look like a bee, wasp, or anything with bright warning colours? Keep a respectful distance if anyone nearby has an allergy.
If it ticks the insect boxes, move to the identification key. If it doesn’t, jump to the non-insect section further down. Either way, the answer is closer than you think.
Key Takeaways
Confident garden bugs identification comes down to one habit: check three body parts and six legs first, then let a simple key and a photograph do the rest.
| Point | Details |
|---|---|
| Confirm insect status first | Look for three body parts and six legs before anything else. |
| Follow the wing-based key | Wing count and antennae length narrow the group fast, from beetles to butterflies. |
| Photograph over handling | Take top, side, and close-up shots with a scale reference for later identification. |
| Observe briefly, then release | Short sessions with quick release protect both the child and the creature. |
| Model calm curiosity | Adult reactions shape how confidently children approach unfamiliar bugs. |
| Consider a kid-sized camera | Thezoofamily’s cameras help children photograph bugs safely, with a tree planted per sale. |
Table of Contents
- Garden bugs identification: a simple step-by-step key
- What are the most common garden insects to spot?
- Is it really an insect, or something else entirely?
- How can children safely handle and observe garden bugs?
- What should you photograph and write down for later identification?
- Fun ways to teach garden insect identification
- Why a calm, curious approach changes everything
- A practical camera for young garden explorers
- Where to find more garden bug resources
- Frequently asked questions about garden bugs identification
- Sources
Garden bugs identification: a simple step-by-step key
A dichotomous key sounds technical, but it’s really just a series of yes-or-no questions that whittle down the possibilities. Field guides use this method because it removes guesswork, and it works particularly well with children because each step only asks one thing at a time.
Start here:
- Three body parts and six legs? If yes, it’s an insect. If no, check the non-insect lookalikes section.
- Does it have wings? No wings suggests ants, some beetles, or young insects. If it does have wings, move to the next question.
- How many pairs of wings? One pair usually points to flies and hoverflies. Two pairs opens up butterflies, moths, bees, wasps, and most beetles, according to the same field guide’s branching logic.
- Long or short antennae? Long, thread-like antennae point towards grasshoppers, crickets, and katydids. Short or clubbed antennae suggest beetles or flies.
- Any pincers or a coiled mouthpart? Earwigs have visible rear pincers. Butterflies and moths often show a curled proboscis when not feeding.
- What shape is the body? A hard, shield-like oval usually means beetle or ladybird. A slender, fuzzy body with a long tongue points to butterflies or moths.
For a printable or on-screen aid, sketch a simple diagram labelling head, thorax, abdomen, antennae, and legs, then let children tick off what they see against the drawing. It turns an abstract checklist into something visual and memorable.
Pro Tip: Keep a cheap magnifying lens or your child’s own camera in your pocket during garden walks. Zooming in on antennae or leg count avoids picking the insect up at all, and it usually gets a far better look than the naked eye manages.
What are the most common garden insects to spot?
Most back gardens host a fairly predictable cast of characters. Learning to recognise them by sight, rather than trying to remember Latin names, is the fastest route to real confidence.
Butterflies and moths flutter in slow, wandering loops and carry large, often colourful wings covered in tiny scales. Fun fact worth sharing with children: those wing scales rub off like powder if handled, so a gentle observation from a distance protects the insect far better than a hand.
Bees, wasps, and hoverflies buzz with a more direct, purposeful flight path. Bees tend to be fuzzy and rounder; wasps look sleeker with a narrow waist; hoverflies mimic both but have just one pair of wings and hover motionlessly, almost like a tiny helicopter. Observe from a distance and never block their flight path back to a nest or hive.
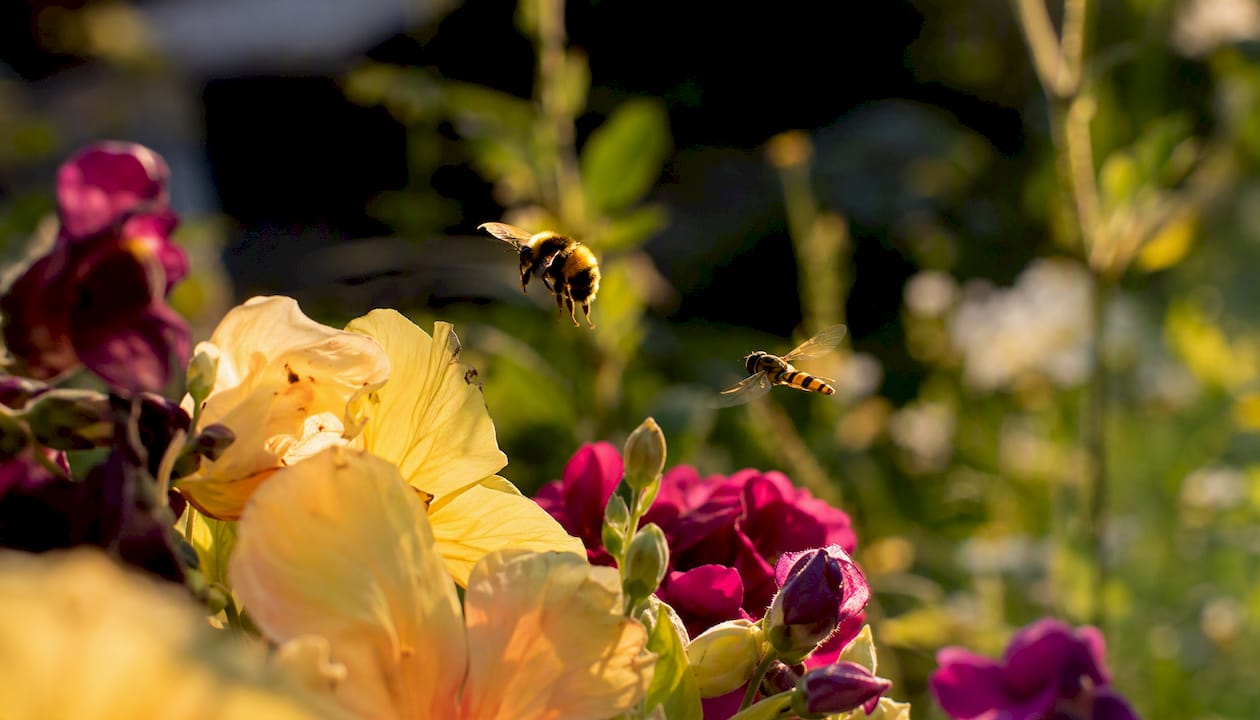
Beetles and ladybirds wear a hard, shield-shaped case over their wings and tend to crawl rather than fly, though many can do both. Ladybirds are an easy win for young spotters. Spot count varies by species, which makes for a nice counting game.
Ants move in purposeful lines, rarely alone, and lack wings except during their brief mating flights. Watching a trail of ants carrying food is one of the most reliable garden spectacles going.
Grasshoppers, crickets, and katydids have powerful back legs built for jumping and long antennae (though grasshoppers run shorter than crickets). Listen for them before you see them; the chirping usually gives them away first.
Dragonflies and damselflies hover and dart near water with two pairs of long, transparent wings held either flat out (dragonflies) or folded along the body (damselflies).
Cicadas and leafhoppers vary hugely in size. Some leafhoppers measure as little as 0.10 to 0.25 inches, so a scale reference in a photo genuinely matters here.
Earwigs are easy to spot thanks to the pincers at the tail end, though they’re harmless to handle carefully and mostly active after dark.
| Group | Wings | Antennae | Typical habitat | Best season to spot |
|---|---|---|---|---|
| Butterflies/moths | Two pairs, scaled | Long, clubbed or feathery | Flowers, hedgerows | Spring to autumn |
| Bees/wasps/hoverflies | Two pairs (hoverflies: one) | Short to medium | Flowers, nests, eaves | Spring to late summer |
| Beetles/ladybirds | Two pairs, hardened front pair | Short | Leaves, bark, soil | Spring to autumn |
| Ants | Usually none | Short, bent | Soil, logs, paving | Year-round in mild climates |
| Grasshoppers/crickets/katydids | Two pairs, often folded | Long | Grass, shrubs | Summer to early autumn |
| Dragonflies/damselflies | Two pairs, transparent | Very short | Near ponds, streams | Late spring to summer |
| Cicadas/leafhoppers | Two pairs | Short | Tree trunks, stems | Summer |
| Earwigs | Short, rarely used | Medium | Damp soil, under bark | Spring to autumn |
Is it really an insect, or something else entirely?
Plenty of garden creatures get mistaken for insects, and the mix-up is completely understandable. The fix is a handful of quick checks.
- Spiders have eight legs, not six, and no antennae at all. That leg count alone settles most arguments.
- Centipedes and millipedes show far more than six legs, with one pair per segment (centipedes) or two pairs per segment (millipedes), and long, obviously segmented bodies.
- Pillbugs and woodlice aren’t insects either; they’re crustaceans, and pillbugs famously roll into a tight ball when disturbed, which is the single easiest identifier going.
- Slugs and snails have no legs, no antennae in the insect sense (their feelers are soft and retractable), and move on a trail of slime. Snails carry a spiral shell; slugs don’t.
Even non-insects deserve gentle handling. Some centipedes can give a mild pinch, and certain caterpillars carry irritating hairs, so treat anything unfamiliar with care and return it to exactly where you found it once you’ve had a good look.
How can children safely handle and observe garden bugs?
Confidence with insects grows from small, well-supervised wins, not from a single dramatic encounter. A short, structured approach protects both the child and the creature.
- Supervise every interaction, especially with children under seven.
- Never approach a nest or hive directly; observe flight paths from several metres away instead.
- Avoid touching anything with bright warning colours (black and yellow banding, for instance) unless you’re confident it’s a harmless species.
- Wash hands after handling any insect or container, even briefly.
- Return the creature quickly to where it was found rather than keeping it for hours.
Age matters here. Preschoolers do best with looking, photographing, and perhaps a brief moment letting an insect crawl across a flat, open palm rather than being pinched between fingers, a technique classroom practitioners recommend specifically to avoid triggering a fear response. School-age children can manage slightly longer observation in a clear container with air holes, provided the session stays brief.
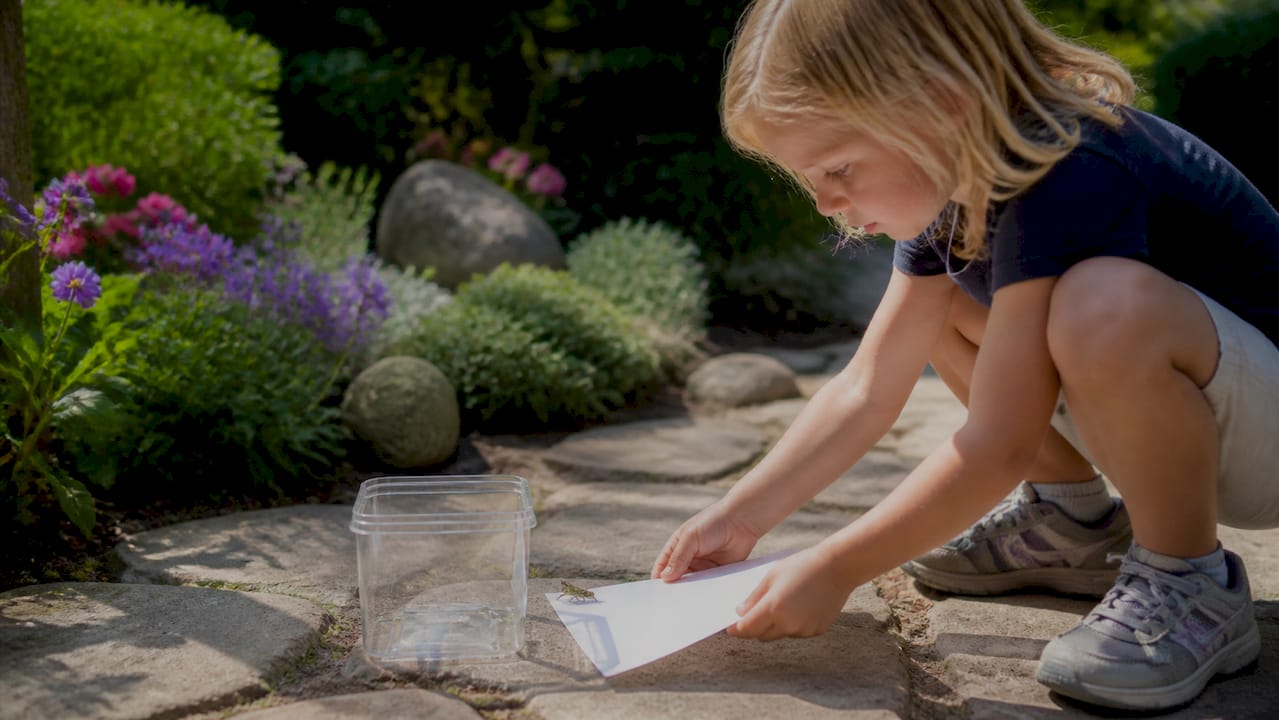
For catching insects without handling them at all, a simple paper trick works well: slide a piece of paper in front of a walking insect and guide it gently into a container, or place the container over a stationary insect and slip paper underneath. Keep observation periods short, since prolonged captivity stresses insects and can harm local populations if repeated too often.
Pro Tip: If you’ve swept a net through long grass, tip the contents onto a white tray or old bedsheet rather than picking insects off one by one. Everything shows up clearly against the pale background, and nobody needs to touch a single leaf.
What should you photograph and write down for later identification?
A good photo does half the identification work for you, especially when the creature has already flown off by the time you reach for a field guide.
Aim for these shots where possible:
- A top-down view showing the whole body outline.
- A side profile, useful for wing shape and leg position.
- A close-up of the head and antennae.
- A wing close-up if the insect holds still long enough.
- A shot including a finger or ruler for scale, particularly valuable for anything leafhopper-sized.
- A wider habitat shot showing the plant or ground where you found it.
Alongside the photos, a short written note fills in the gaps a camera can’t capture: what the insect was doing (feeding, flying, crawling), the time of day, and the weather.
| Field note | What to record |
|---|---|
| Date and time | e.g. June afternoon |
| Location | Which plant, or ground level, fence, wall |
| Weather | Sunny, overcast, after rain |
| Behaviour | Feeding, flying, resting, crawling |
| Notable features | Colour, markings, sound if any |
Keep the whole exercise brief. Chasing an insect for the perfect angle stresses the animal and rarely produces a better photo anyway; a patient thirty-second window usually beats a two-minute pursuit.
Fun ways to teach garden insect identification
Learning sticks better through play than through instruction, and short bursts work far better than one long session, particularly with younger children.
- Scavenger hunt (5 to 10 minutes, preschool): find a fuzzy insect, a two-winged insect, and one insect resting on a flower. Tick each one off a simple printed list.
- Sorting game (15 to 20 minutes, school-age): print or draw six to eight insects and sort them into groups by wing count or antennae length.
- Sketching exercise (10 minutes, any age): draw one insect from observation, labelling the three body parts as a check on what was actually seen.
- Insect hotel watch (20 to 30 minutes, school groups): observe which insects visit a simple habitat feature over a set period and log the results.
HeadStart’s guidance on child-led bug hunts points to a useful principle here: let the child set the pace, offer a notebook or camera as a documentation tool, and build in low-touch options for anyone hesitant about handling. Not every child wants to hold anything, and that’s fine; watching and recording count just as much as touching.
Pro Tip: Pair each activity with a thirty-second fun fact. “Did you know a ladybird can eat around fifty aphids in a day?” tends to hold attention far longer than the activity alone.
Why a calm, curious approach changes everything
The single biggest factor in how a child responds to an insect isn’t the insect at all. It’s the adult standing next to them. Children pick up on hesitation, flinching, and disgust almost instantly, and they mirror it. Classroom research backs this up plainly: adults set the emotional tone during these encounters, and a neutral or genuinely curious response from the grown-up in the room does more to build a child’s confidence than any fact sheet ever could.
That’s why short, repeated encounters work better than one big dramatic “nature day.” A five-minute look at an ant trail on a Tuesday, followed by a longer session with a magnifying lens the following weekend, builds familiarity in layers. Each small success, correctly naming a ladybird, safely observing a bee from a distance, teaches a child that curiosity is rewarded rather than risky.
If you take one thing from this guide, let it be this: put down your own discomfort first. Model calm. Ask questions out loud (“I wonder what it’s eating?”) rather than issuing warnings. Then find ten minutes this week, even just at the edge of a school playground or a patch of garden, and go looking for something with six legs.
A practical camera for young garden explorers
Photographing insects without touching them is often the safest identification method going, and it’s exactly where a child-sized camera earns its keep. A properly designed kids’ camera lets a five or six year old get close enough for a decent shot without the fumbling, and often frustrating, experience of an adult’s phone screen and settings.

Thezoofamily builds cameras and binoculars specifically sized and simplified for children, alongside practical resources like a step-by-step bug photography guide covering exactly the shots described above. Every camera sold also funds a tree planted, a small but genuine link between a child’s afternoon spotting ladybirds and the wider goal of restoring green spaces. None of this equipment is required to identify a garden bug; the checklist and key above work with nothing more than your eyes. But if you’re looking to make the hobby stick, browse the Thezoofamily range and see which camera suits your child’s age.
Where to find more garden bug resources
A few sources are worth bookmarking, or printing, before your next bug hunt.
- The UMMNH Bug Field Guide for a fuller dichotomous key and species photos.
- The Backyard Insect Safari guide for equipment lists and low-impact capture methods.
- HeadStart’s bug hunt guidance for classroom-ready, inclusive activity ideas.
- Thezoofamily’s guides on creating a wildlife-friendly garden and building an insect hotel for turning single sightings into a habitat worth revisiting. If you’re also sourcing simple outdoor equipment, the garden tools marketplace guide is a useful reference point too.
Print one of these before your next outing, tuck it in a coat pocket, and let the checklist do the thinking while your child does the looking.
Frequently asked questions about garden bugs identification
How do you know if something is an insect and not a spider or bug? Count the legs. Insects have six; spiders have eight and no antennae at all. That single check resolves most confusion in seconds.
What’s the easiest garden insect for a young child to identify? Ladybirds tend to be the easiest starting point: round, brightly coloured, slow-moving, and safe to observe up close without handling.
Is it safe to let a child pick up a garden insect? Letting an insect crawl onto a flat, open palm is generally low-risk for common species like ladybirds or beetles. Avoid anything with bright warning colouring, and always supervise closely.
How long should an observation session last? Keep it brief, a few minutes at most, then return the insect to where you found it. Short sessions reduce stress on the creature and keep a child’s attention fresh for the next find.
What if we can’t identify something even with the key? Take clear photos from multiple angles, note the location and behaviour, and check a fuller field guide later. Not every sighting needs an answer on the spot.
Sources
- Backyard Insects (UMMNH Bug field guide)
- Backyard Insect Safari (Illinois IGB)
- Headstart
- Teaching preschool students about insects (Edutopia)