

Family stargazing evenings are a structured outdoor astronomy practice that combines sky observation with child-led exploration, requiring no specialist equipment and delivering measurable benefits for family bonding and scientific curiosity. The night sky is one of the few genuinely free classrooms available to every family, and the barrier to entry is lower than most parents expect. A blanket, a red torch, and a clear night are enough to begin. This guide covers everything you need to plan, run, and repeat successful stargazing sessions with children of any age, drawing on current 2026 family astronomy guidance to keep sessions safe, short, and genuinely enjoyable.
What makes family stargazing evenings work?
The single most important factor in a successful stargazing session is keeping it short. Sessions of 20–30 minutes for children under 7 prevent boredom and build a positive emotional connection to the night sky. That is a counterintuitive truth for parents who want to make the most of a clear night. The goal is not to see everything. The goal is to leave children wanting more.
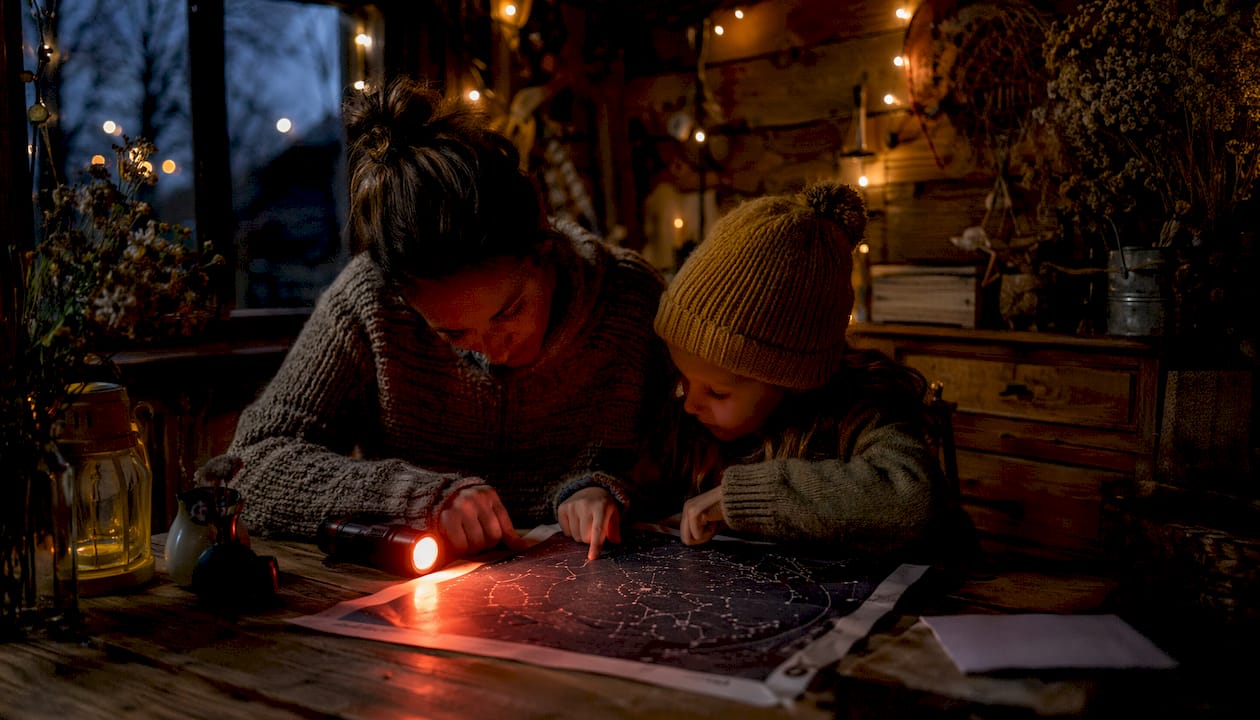
Regular stargazing routines create lasting enthusiasm and deeper learning than isolated one-off events. A child who looks at the Moon every friday evening for a month learns far more than one who attends a single two-hour session. Repetition builds familiarity, and familiarity builds confidence.
Outdoor family astronomy, as it is known in educational circles, sits at the intersection of science, storytelling, and sensory experience. It does not require technical knowledge from parents. Curiosity is the only qualification needed.
How do you prepare for a family stargazing evening?
Preparation takes about 15 minutes and costs nothing if you already own a torch and a blanket. The key is removing friction before you go outside, so the session feels relaxed rather than rushed.
What to bring
The table below separates the items you genuinely need from those that are nice to have once your family is comfortable with the routine.
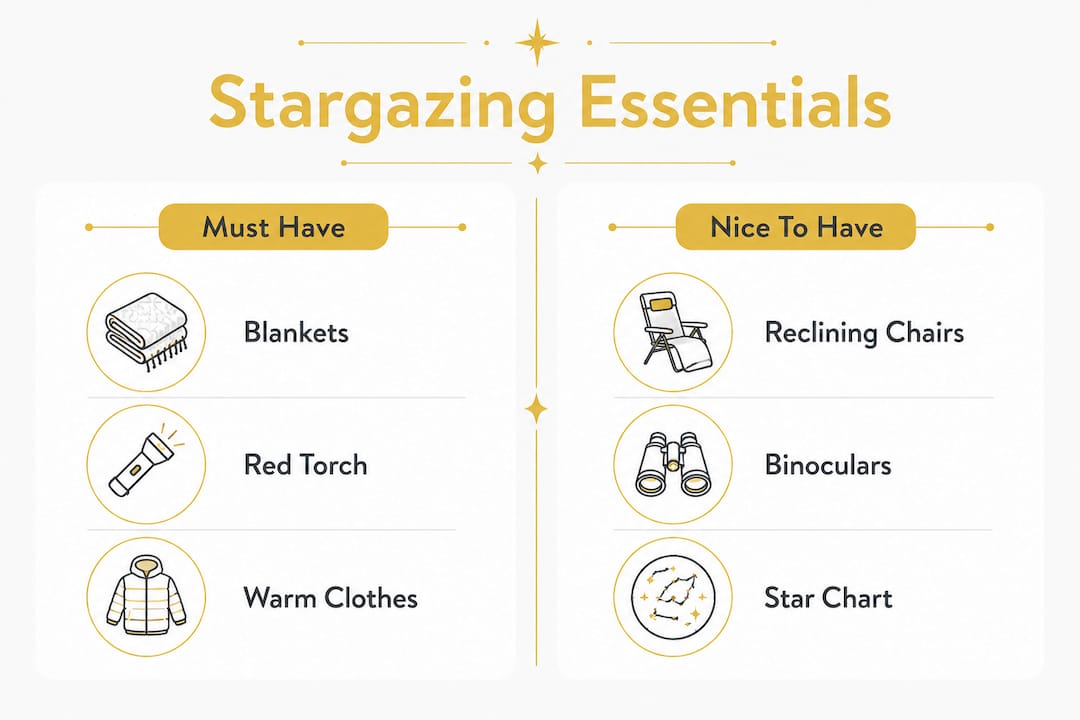
| Must-have | Nice to have |
|---|---|
| Warm blankets or sleeping bags | Reclining camping chairs |
| Red torch or red cellophane over a white torch | Printed star chart or sky app |
| Warm clothing and hats | Binoculars |
| Snacks and a warm drink | Moon phase calendar |
| A clear, open outdoor space | Notebook and pencil for sky journalling |
White light torches destroy night vision, which takes 20–30 minutes to recover. A dim red light preserves your eyes’ adaptation to the dark and keeps the session running smoothly. This single tip makes a bigger difference than any piece of equipment you could buy.
Choosing your location
Familiar, safe locations work best for early sessions because children focus on the sky rather than their surroundings. Your back garden is ideal. A local park with low light pollution is a strong second choice. You do not need to travel to a dark sky reserve for your first few outings.
Pro Tip: Check the weather forecast and the Moon phase before you go out. A new moon night offers the darkest sky and the most visible stars. A full moon is spectacular for younger children but washes out fainter objects.
Equipment: keep it simple
Telescopes frustrate beginners because their narrow field of view makes finding objects genuinely difficult. Naked-eye observation builds the spatial awareness children need before a telescope becomes useful. A pair of binoculars from Thezoofamily is the natural next step, giving a wider, brighter view without the alignment challenges of a telescope.
How do you keep children engaged during stargazing?
Age-appropriate activities are the difference between a session that ends in tears and one that ends with “can we do this again?” The activities below are grouped by age to make planning straightforward.
Ages 3–5: sensory and story-led
- Point out the Moon and name its colour and shape together.
- Tell a simple story using three or four stars as characters.
- Listen quietly for night sounds: owls, wind, distant traffic.
- Count how many stars you can see in one hand-span of sky.
Young children do not need to learn constellation names. They need to feel that the night sky is a safe, magical place worth returning to.
Ages 6–9: pattern and tracking activities
- Identify one or two well-known constellations such as Orion or the Plough.
- Count satellites crossing the sky in ten minutes.
- Track the Moon’s phase once a week for a month and draw what you see.
- Play constellation bingo using a printed chart.
Tracking patterns over time makes the night sky feel personal and predictable. Children in this age group respond strongly to the idea that they are “scientists recording data.”
Ages 10 and above: deeper investigation
- Use a printed or digital star chart to navigate between constellations.
- Watch a meteor shower and count how many fall in 30 minutes.
- Keep a sky journal with sketches, dates, and weather conditions.
- Research one object before the session and try to find it outside.
Pro Tip: Use a ball and a torch indoors before your session to demonstrate Moon phases. Hold the ball at arm’s length and shine the torch from different angles. Children who understand the model outside find the real Moon far more interesting.
For more child-friendly science ideas that complement a night under the stars, the outdoor science activities on the Thezoofamily blog are worth bookmarking.
How to run your stargazing session step by step
A clear structure prevents the session from drifting and keeps children engaged from start to finish.
- Arrive 10 minutes early. Set up blankets and chairs before it gets fully dark. Familiarise children with the space while they can still see clearly.
- Start with the Moon. It is the brightest, easiest object and gives children an immediate success. Name its phase together.
- Move to bright stars and planets. Venus, Jupiter, and Mars are visible to the naked eye and easy to spot. Point out their steady glow compared to the twinkling of stars.
- Watch for satellites. A slow, steady light crossing the sky in a straight line is almost always a satellite. Children find this genuinely exciting.
- Use your red torch for any chart reading. Keep white light sources switched off or covered throughout.
- Serve snacks and a warm drink. Comfort extends attention spans more reliably than any activity.
- End on a high note. If a child is cold, tired, or restless, wrap up early.
Ending a session while children are still engaged is the single most effective way to build enthusiasm for the next one. A child who leaves the garden asking questions will be back. A child who is dragged inside cold and bored may not want to return.
Safety is straightforward but non-negotiable. Know your exit route before it gets dark. Keep children within arm’s reach near any uneven ground. Carry a fully charged phone. These precautions take seconds and remove the only real risks involved.
What do you do when things go wrong?
Every family hits obstacles. The good news is that most common problems have simple solutions.
- Cloudy skies. Move indoors and use a free planetarium app projected onto a wall, or build a Moon phase model with a torch and a ball. The session still happens; it just moves inside.
- Short attention spans. Switch activities every five minutes. If the sky is not holding attention, move to a game or a story. Ending early is always better than pushing through.
- Equipment frustration. Put the binoculars away if they are causing stress. Return to naked-eye observation. The sky is interesting without any equipment at all.
- A disengaged child. Ask one open question: “What does that star remind you of?” Children who feel heard re-engage faster than those who are directed.
- Cold or tired children. Have a warm indoor space ready. A hot chocolate and a star book on the sofa is a perfectly valid end to a stargazing session.
Starting with no-cost backyard routines removes pressure from parents and children alike. When there is nothing to “get right,” everyone relaxes, and relaxed sessions are the ones children remember fondly.
Pro Tip: Keep a simple “sky diary” on the kitchen table. After each session, let children draw one thing they saw. Over time, this becomes a record of their growing knowledge and a powerful motivator to go out again.
Key takeaways
Successful family stargazing evenings depend on short sessions, simple equipment, age-appropriate activities, and the discipline to end before children lose interest.
| Point | Details |
|---|---|
| Keep sessions short | Limit outings to 20–30 minutes for under-7s to build positive associations. |
| Use a red torch | White light destroys night vision; red light preserves it for the whole session. |
| Start with the Moon | The Moon gives children an immediate, satisfying success and anchors every session. |
| Match activities to age | Storytelling works for under-5s; pattern tracking and journalling suit older children. |
| End on a high note | Leaving while children are still curious is the best way to guarantee a next session. |
Why I stopped trying to teach and started trying to wonder
The first time I took my children outside to look at the sky, I had a printed star chart, a list of constellations to find, and a plan. We found Orion, I explained the mythology, and within twelve minutes both children were asking to go inside. I had turned a magical experience into a lesson.
The shift that changed everything was small. I stopped pointing and explaining, and started asking. “What shape does that group of stars make to you?” The answers were absurd and wonderful. A dinosaur. A broken bicycle. A sleeping cat. None of them were correct. All of them were right.
Parents often overemphasise technical achievement over enjoyment, and the result is sessions that feel like homework. The night sky does not need to be explained to be loved. Children who are allowed to project their own imagination onto it develop a genuine affection for astronomy that no amount of correct constellation names can replicate.
My honest recommendation is to go outside with no agenda for the first three sessions. Bring snacks. Lie on your back. Let the children lead. Once they are comfortable in the dark and genuinely curious, the facts and the names will land naturally. You can find ideas for weaving stargazing into broader outdoor family rituals that build the same kind of relaxed, repeated connection.
The families I know who have kept stargazing going for years are not the ones with the best telescopes. They are the ones who made it feel like a treat rather than a task.
— ALAIN
Thezoofamily: tools and ideas for curious families
Thezoofamily builds products and resources for families who want to spend more time exploring the natural world together. From kids’ binoculars designed to make outdoor observation genuinely accessible, to a growing library of ideas for science-led family outings, the brand exists to make curiosity a habit rather than an occasion.
For families ready to take their night sky sessions further, Thezoofamily’s range of child-friendly binoculars and cameras gives children the tools to observe and record what they see. Every camera sold plants one tree, so each session under the stars contributes to the natural world your children are learning to love. Visit the Thezoofamily website to find the right kit for your family’s next evening outside.
FAQ
How long should a family stargazing session last?
Sessions of 20–30 minutes are ideal for children under 7. Older children can comfortably extend to 45–60 minutes once they are familiar with the routine.
Do you need a telescope for stargazing with kids?
A telescope is not necessary for beginners. Naked-eye observation or basic binoculars build the sky awareness children need before a telescope becomes useful or enjoyable.
What is the best time of year for family stargazing evenings?
Clear, dry nights in autumn and winter offer the darkest skies and the most visible stars in the UK. Summer evenings are warmer and more comfortable for young children, making them a good starting point for new families.
How do you keep children interested in stargazing?
Tracking patterns over time, such as recording the Moon’s phase weekly, keeps children engaged far more effectively than trying to memorise star names. Games, sky journals, and open questions also sustain attention.
What should you do on a cloudy night?
Move the session indoors and use a free planetarium app or build a Moon phase model with a torch and a ball. Simple physical models make abstract space concepts tangible and keep the learning going regardless of the weather.