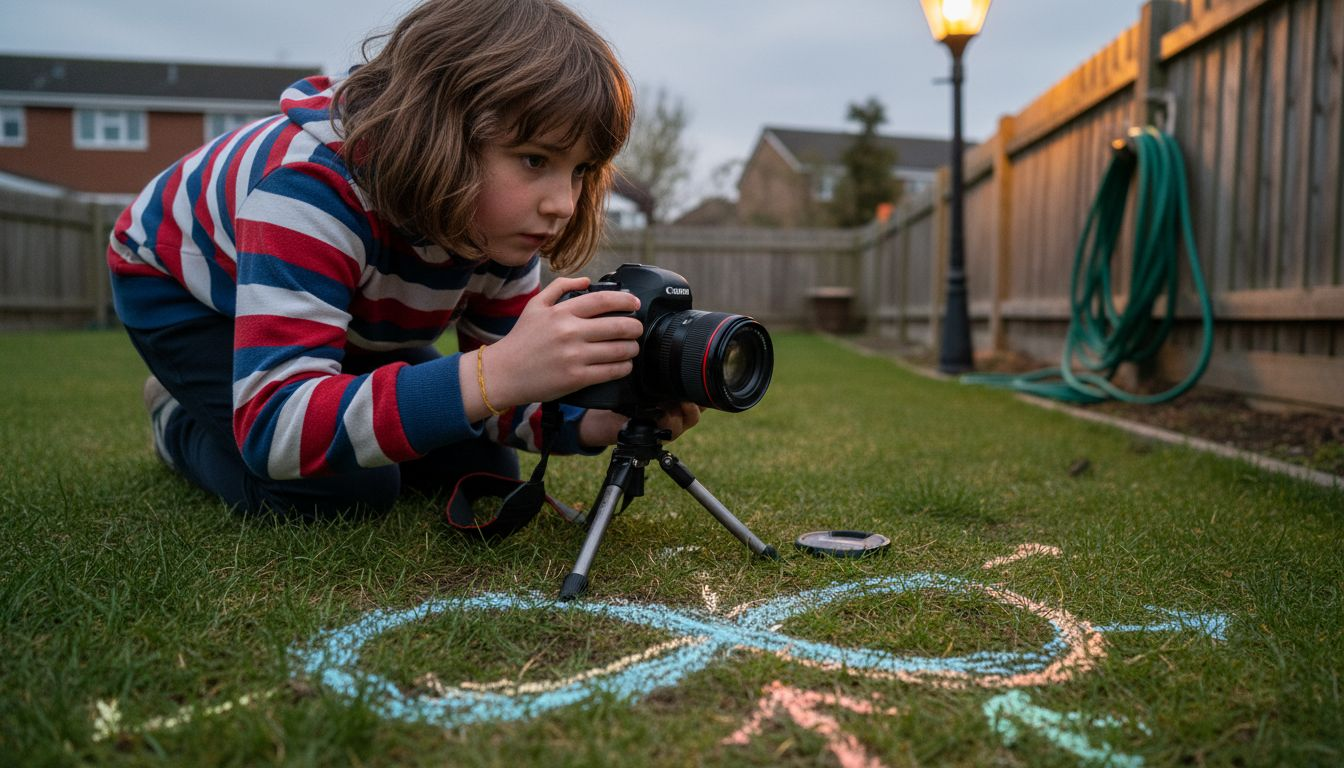
Capturing the night sky with your children can feel overwhelming when you’re juggling camera settings, fidgety little ones, and the mystery of why your star photos turn out blurry. Many parents want to foster their children’s creativity through nature photography but struggle with technical barriers like exposure times, focus, and light pollution. This guide simplifies the process with practical camera settings and techniques, helping you create magical memories under the stars whilst nurturing your child’s curiosity about our planet.
Table of Contents
- Understanding Light And Timing For Night Sky Photography
- Essential Camera Settings And Equipment For Night Sky Photos With Kids
- Calculating Exposure Times To Prevent Star Trails: The 500 Rule Vs NPF Method
- Step By Step Guide To Capturing And Editing Night Sky Photos With Your Children
- Troubleshooting Common Issues And Verifying Your Night Sky Photos
- Explore More Resources With The Zoofamily
- Frequently Asked Questions
Key takeaways
| Point | Details | |-------|---------|| | Light pollution drastically reduces star visibility | Urban areas can reduce visible stars by over 75%, making darker locations essential for family shoots | | Two methods calculate ideal exposure times | The 500 Rule offers quick calculations whilst the NPF method provides precision for sharper stars | | Manual settings and sturdy equipment are crucial | Use manual mode, widest aperture, focus to infinity, and a tripod to capture clear night skies | | Timing enhances photographic results | Golden and Blue Hours provide stunning natural light that enriches sky photos and engages children | | RAW format enables better editing | Shooting in RAW captures more data, allowing flexibility to enhance star details and colours in post-processing |
Understanding light and timing for night sky photography
Planning your night sky photography adventure starts with understanding how light pollution and timing affect what your children can see and capture. Light pollution can reduce star visibility by over 75% in urban areas, meaning the sparkling cosmos children imagine often disappoints near cities. Choosing a darker location away from streetlights and buildings transforms the experience, revealing thousands of stars that ignite wonder and excitement in young minds.
Timing your shoot around natural light phases makes a dramatic difference. Golden Hour and Blue Hour offer stunning lighting that transforms landscapes and skies, providing soft, ethereal tones perfect for family photos. These magical periods occur just after sunset or before sunrise, when the sky glows with colour whilst stars begin to emerge, creating an inviting atmosphere that holds children’s attention.
Pro Tip: Scout your location during daylight hours to identify safe spots, interesting foreground elements like trees or hills, and potential hazards. Bring a red torch for navigating in darkness without ruining night vision, keeping the experience safe and enjoyable for everyone.
Successful night sky sessions require thoughtful planning:
- Check moon phases and aim for new moon nights when skies are darkest
- Use light pollution maps to find nearby dark sky locations within reasonable travel distance
- Monitor weather forecasts for clear skies and minimal cloud cover
- Choose safe, accessible spots where children can move around comfortably
- Pack warm layers and snacks to keep young photographers happy during longer sessions
These environmental factors create natural learning moments about light, Earth’s rotation, and our relationship with nature. When children witness the difference between city skies and truly dark locations, they develop appreciation for understanding light pollution and environmental conservation that extends beyond photography.
Essential camera settings and equipment for night sky photos with kids
Getting sharp, beautiful star photos requires understanding a few fundamental camera settings that work together to gather enough light whilst keeping stars crisp. Manual mode provides full control over your camera’s behaviour, essential because automatic modes struggle in low light conditions and often produce disappointing results.
Start by setting your focus manually to infinity, ensuring stars appear sharp rather than blurry dots. Autofocus fails in darkness, so switch your lens to manual focus and turn the focus ring to the infinity symbol. Test focus on a distant light or bright star, zooming in on your camera’s screen to verify sharpness before beginning your shoot.
Choose your lens’s widest aperture to gather maximum light from the night sky. Aperture is measured in f-numbers, where lower numbers mean wider openings. An f/2.8 lens allows significantly more light than f/5.6, making star photography easier and more successful. If your kit lens only opens to f/3.5 or f/4, it can still work with adjusted settings.
Pro Tip: Mark your lens’s infinity focus point with tape during daylight practice sessions. This simple trick lets you quickly set perfect focus in darkness without fumbling, keeping children engaged rather than waiting whilst you troubleshoot technical issues.
ISO controls your camera sensor’s light sensitivity. Begin with ISO 1600 to 3200 for most night sky photography, balancing star visibility against digital noise. Higher ISO values like 6400 capture fainter stars but introduce graininess that degrades image quality, particularly noticeable when editing or printing photos.
Shutter speed determines how long light hits your sensor, critical for avoiding star trails caused by Earth’s rotation. This setting requires calculation based on your lens focal length, covered in detail in the next section. Generally, expect exposure times between 10 to 25 seconds for sharp stars.
Essential equipment checklist:
- Camera with manual controls
- Wide angle lens with widest possible aperture
- Sturdy tripod to prevent blur during long exposures
- Remote shutter release or camera timer
- Spare batteries, as cold drains power quickly
- Red torch for preserving night vision
- Warm clothing and comfortable seating
| Setting | Recommended Range | Purpose |
|---|---|---|
| Aperture | f/1.4 to f/2.8 (widest available) | Maximises light gathering |
| ISO | 1600 to 3200 | Balances sensitivity and noise |
| Shutter Speed | 10 to 25 seconds | Depends on focal length calculation |
| Focus | Manual infinity | Ensures sharp stars |
| Format | RAW | Preserves editing flexibility |
These foundational settings create the framework for successful night sky photography that helps master photographing the night sky whilst teaching children about light, technology, and patience. Once configured correctly, you can focus on composition and enjoying the experience together.
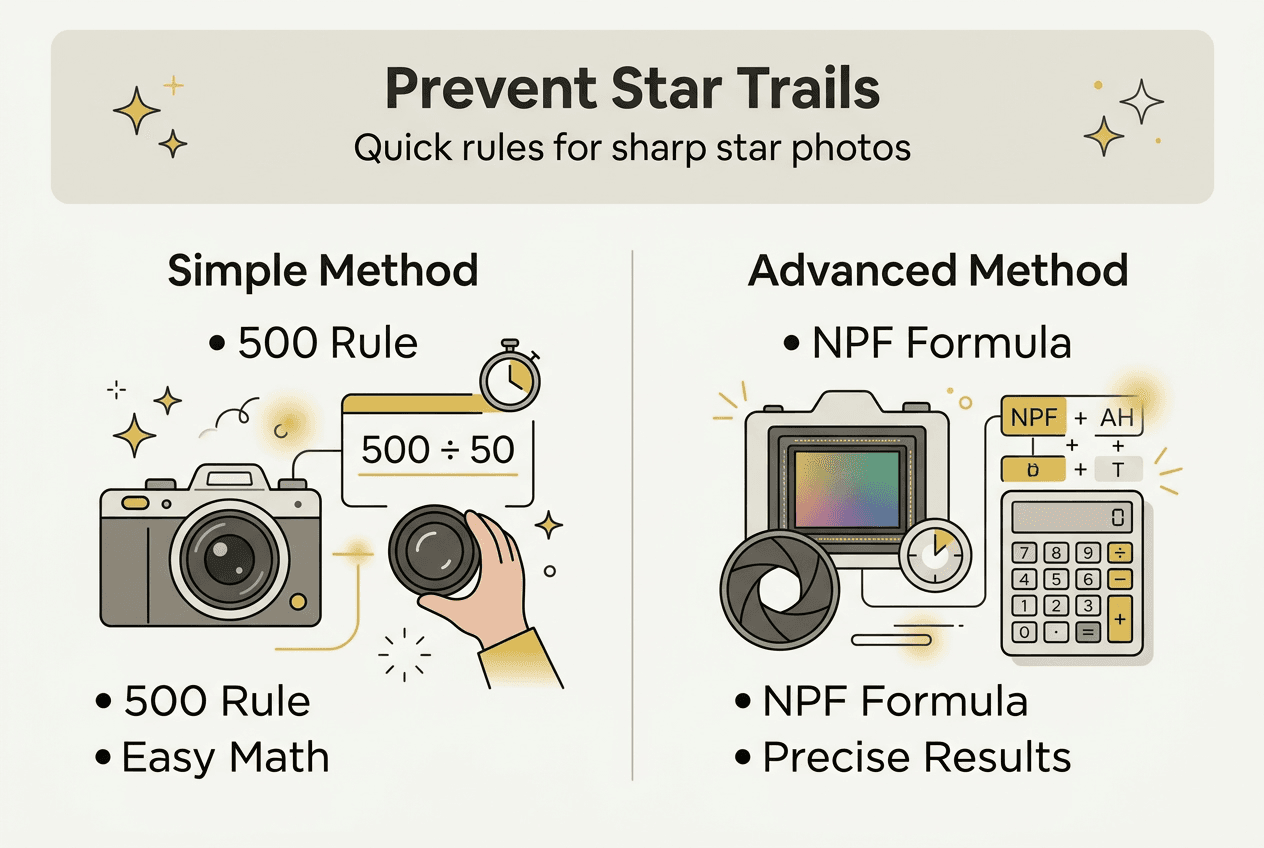
Calculating exposure times to prevent star trails: the 500 Rule vs NPF method
Determining how long to expose your photo without creating star trails puzzles many parents new to night sky photography. Stars appear stationary to our eyes, but Earth’s rotation makes them trace arcs across the sky during longer exposures, creating distracting streaks rather than crisp points of light. Two methods help calculate maximum exposure times for sharp stars.
The 500 Rule provides quick calculations by dividing 500 by your lens focal length, yielding maximum exposure seconds. For example, using an 18mm lens allows roughly 27 seconds (500 ÷ 18 = 27.7) before star trails become visible. A 50mm lens permits only 10 seconds (500 ÷ 50 = 10), demonstrating how longer focal lengths require shorter exposures.
This simple formula works brilliantly for quick field calculations when you’re managing excited children and want immediate results. However, it doesn’t account for camera sensor variations, meaning results may show slight trailing on high resolution sensors or crop sensor cameras.
The NPF method offers sophisticated precision by factoring pixel pitch, aperture, and focal length into calculations. This approach considers your specific camera sensor’s pixel density, providing more accurate exposure times that minimise trailing even on modern high resolution cameras. The formula is complex, but online NPF calculators make it accessible.
Pro Tip: Start with the 500 Rule for simplicity during your first few shoots. Once you’re comfortable with basic night sky photography and want to refine results, explore NPF calculators to squeeze every second of exposure from your equipment.
Step by step exposure calculation:
- Identify your lens focal length from the lens barrel marking
- For 500 Rule, divide 500 by focal length to get maximum seconds
- For NPF method, input your camera model and lens into an online calculator
- Round down slightly for safety, ensuring sharp stars
- Test your calculated setting and review results at full magnification
- Adjust if you notice trailing, reducing exposure by 2 to 3 seconds
| Method | Calculation Complexity | Accuracy | Best For |
|---|---|---|---|
| 500 Rule | Simple division | Good approximation | Quick field use, beginners |
| NPF Method | Requires calculator | Highly precise | Advanced users, crop sensors |
Understanding these calculations prevents frustration from repeatedly capturing blurry or trailed stars. Children learn valuable lessons about Earth’s movement and the relationship between time and motion when you explain why stars appear to move and how camera settings compensate. This knowledge foundation helps with photographing stars confidently in various conditions.
Step by step guide to capturing and editing night sky photos with your children
Executing a successful night sky photography session involves methodical preparation and simple steps that children can help with, making the experience collaborative and educational. Following this sequence ensures you capture stunning images whilst keeping young photographers engaged throughout.
Shooting process:
- Arrive at your chosen location during twilight to set up before full darkness
- Mount your camera securely on the tripod at comfortable viewing height
- Switch camera to manual mode and set aperture to widest available
- Focus manually to infinity, testing on a bright star or distant light
- Calculate shutter speed using 500 Rule or NPF method for your lens
- Set ISO between 1600 and 3200 based on sky darkness
- Select RAW format to capture maximum image information
- Frame your composition including interesting foreground elements
- Enable camera timer or use remote shutter to eliminate shake
- Take test shot and review at 100% magnification for sharpness
- Adjust settings if needed and capture multiple variations
- Show children each result, explaining what worked and why
Involve children by letting them trigger the shutter, frame compositions, or spot constellations whilst the camera exposes. This hands-on participation transforms technical photography into creative adventure, nurturing their connection with nature and technology simultaneously.
Post processing enhances star details and colours that cameras capture but don’t always render beautifully straight from the sensor. Basic adjustments dramatically improve night sky photos:
- Increase exposure slightly to brighten stars without overexposing
- Boost contrast to separate stars from sky background
- Adjust white balance to achieve natural or creative colour tones
- Reduce noise carefully to smooth grain without softening stars
- Sharpen moderately to enhance star definition
- Crop to improve composition and remove distracting edges
Keep editing sessions fun by showing children before and after comparisons, demonstrating how subtle tweaks reveal hidden details and transform raw captures into stunning finished images. This process teaches valuable lessons about patience, refinement, and the difference between capturing and creating photographs. Dark sky photography techniques become accessible when broken into these manageable steps.
Troubleshooting common issues and verifying your night sky photos
Even experienced photographers encounter challenges when capturing night skies, so recognising and fixing common problems helps maintain momentum and prevents discouragement during family shoots. Most issues trace back to settings, focus, or environmental factors that simple adjustments can resolve.
Blurry or soft stars typically result from incorrect focus, camera shake, or excessive exposure time. Verify infinity focus by zooming to 100% magnification on your camera screen when reviewing test shots. Stars should appear as crisp points, not fuzzy circles. If blurry, refocus manually and test again before continuing.
Earth’s rotation causes stars to move across the sky, creating trails during long exposures.
Star trails indicate your exposure exceeded maximum time for your focal length. Recalculate using the 500 Rule or NPF method, reducing shutter speed by several seconds. Shorter exposures keep stars sharp, though you may need to increase ISO slightly to maintain brightness.
Excessive noise creates grainy, speckled images that lack smoothness and detail. Lower your ISO from 3200 to 1600 or 2000, accepting slightly dimmer results that edit more cleanly. Balance ISO against shutter speed within your calculated limits, finding the sweet spot for your specific camera sensor.
Pro Tip: Keep a small notebook recording settings that worked well for each location and condition. These notes become invaluable references for future shoots, letting you dial in successful configurations quickly rather than experimenting whilst children grow restless.
Common troubleshooting checklist:
- Verify focus set precisely to infinity
- Confirm tripod stability on level ground
- Check calculated exposure time matches lens focal length
- Ensure image stabilisation disabled when using tripod
- Review ISO appropriate for your camera’s noise characteristics
- Examine composition includes interesting foreground elements
- Confirm timer or remote shutter used to prevent shake
Verifying success means reviewing images at full magnification immediately after capture, checking star sharpness, exposure, and composition whilst you can still reshoot if needed. Encourage children to examine results together, celebrating successes and discussing what could improve next time. This collaborative verification helps master night sky techniques through experiential learning rather than frustration.
Explore more resources with The Zoofamily
Your night sky photography journey has just begun, and The Zoofamily offers extensive resources designed specifically for parents nurturing children’s creativity through nature and technology. Our website provides detailed guides on camera settings, engaging young photographers, and planning outdoor adventures that combine learning with wonder.

Explore practical articles covering everything from basic techniques to advanced tips, all written with family participation in mind. Discover tools and inspiration for capturing stellar photos together whilst building memories that last lifetimes. Join our supportive community where creativity meets conservation, helping restore natural beauty for generations to come. Visit The Zoofamily to continue your family’s photographic adventure under the stars.
Frequently asked questions
What camera settings are best for beginners photographing stars with children?
Use manual mode with your lens’s widest aperture, ISO between 1600 and 3200, and shutter speed around 10 to 20 seconds depending on focal length. Focus manually to infinity and mount your camera on a sturdy tripod to ensure sharp images.
How do I calculate exposure time to avoid star trails when photographing at night?
Divide 500 by your lens focal length for maximum exposure seconds using the simple 500 Rule. Alternatively, use the NPF method with online calculators for greater precision if you’re comfortable with technical details.
How can I involve my children to keep night sky photography fun and educational?
Explain star movement and light phases in simple terms that spark curiosity. Let kids handle settings like triggering the shutter under supervision, and celebrate each successful photo to encourage their creativity and confidence.
What equipment is essential for successful night sky photography with families?
Bring a camera with manual controls, sturdy tripod, and remote shutter or timer as core essentials. A wide aperture lens is preferred but basic kit lenses work with adjusted settings, plus warm clothes and torches for safety and comfort.
Why do my star photos show trails instead of sharp points of light?
Star trails occur when exposure time exceeds the limit for your focal length, capturing Earth’s rotation. Recalculate using the 500 Rule, reducing your shutter speed by several seconds to keep stars crisp and stationary.