

Setting up safe play zones is defined as designing distinct, hazard-free outdoor areas where children can explore, move freely, and play without preventable injury risks. The recognised industry term for this practice is playground safety design, a framework governed by standards such as ASTM F1487 and guidelines from the Consumer Product Safety Commission (CPSC). Getting this right matters more than most parents realise. Over 190,000 children visit emergency rooms in the United States each year due to playground injuries. The principles behind those statistics apply equally to home gardens, and this guide gives you a clear, practical path through every decision.
How to set up safe play zones: location and layout first
The location of your play zone determines how safe it is before a single piece of equipment arrives. Choose a spot with clear sightlines from the house so you can supervise without standing in the garden. Level, well-drained ground prevents pooling water, which makes surfaces slippery and accelerates equipment corrosion.

Keep the area away from fences, garden walls, and overhead power lines. These are fixed hazards that no amount of surfacing or equipment choice can compensate for. A child running at full speed toward a fence line has no safe stopping distance.
Experts recommend 2–3 square metres of space per child in outdoor play zones to allow free movement and reduce collision risk. That figure is a minimum, not a target. If your garden is generous, use the extra space to separate activity types rather than pack in more equipment.
The Play, Rest, Grow zoning method divides a yard into three distinct pockets: an active zone for climbing and running, a calm zone for reading or quiet play, and a nature zone for digging, planting, or observing. This structure reduces noise overlap, makes supervision easier, and gives children a richer range of experiences within one garden.
- Active zone: climbing frames, swings, and open running space
- Rest zone: a shaded bench, a sandpit with a cover, or a simple den
- Nature zone: raised beds, a bug hotel, or a small water feature with a shallow tray
Pro Tip: Mark zone boundaries with low edging, different ground textures, or a change in surfacing colour. Children respond to physical cues and will naturally stay within defined areas.
What surfacing meets playground safety guidelines?
Surfacing is the single most consequential decision in playground safety design. Over 70% of playground injuries result from falls onto unsafe surfaces. That means the ground beneath your equipment carries more responsibility than the equipment itself.
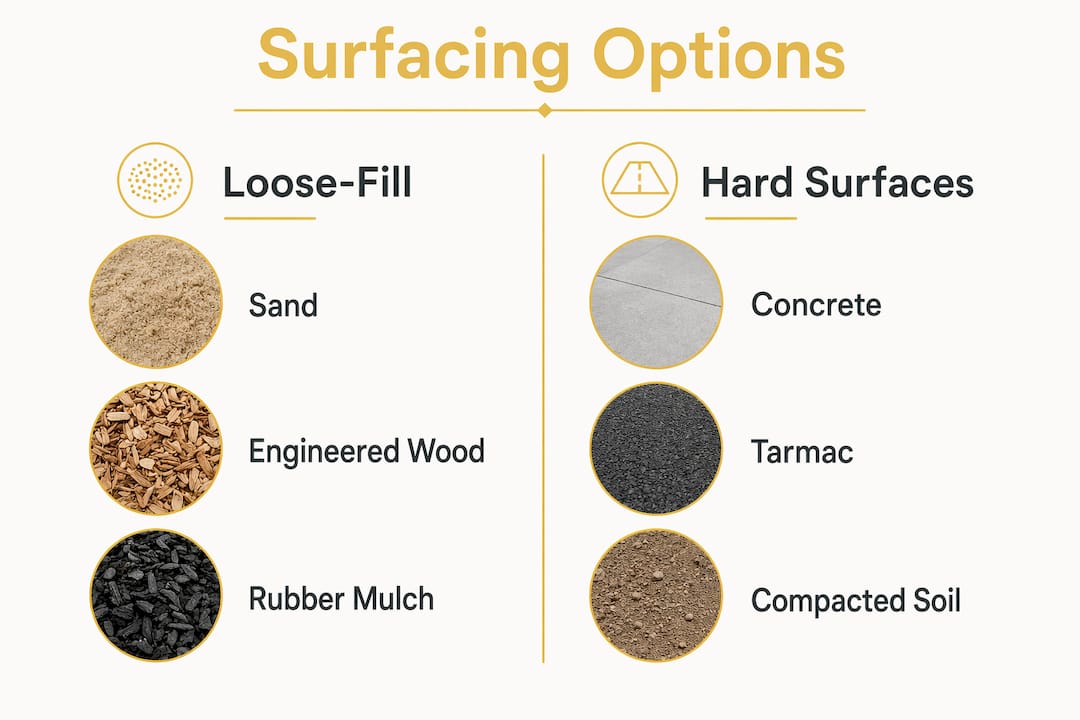
ASTM F1487 mandates impact-attenuating surfacing under any equipment with a fall height above 30 inches (76 cm). The standard specifies minimum depths based on fall height, and it sets inspection criteria that apply to home installations as much as public playgrounds.
Surfacing options compared
| Surfacing type | Protective quality | Maintenance demand | Cost level |
|---|---|---|---|
| Rubber mulch | High | Low | Medium |
| Engineered wood fibre | High | Medium | Low |
| Sand | Medium | High | Low |
| Poured rubber | Very high | Very low | High |
Loose-fill materials like sand and engineered wood fibre compress over time. A 12-inch depth of loose-fill settles to around 9 inches through regular use, which can reduce its protective value below the required threshold. Top up loose-fill surfacing at least twice a year, and rake it level after every heavy rain or period of intense use.
Hard surfaces, including concrete, tarmac, and compacted soil, are never acceptable under climbing or swinging equipment. Even a fall from a low height onto a hard surface can cause a serious head injury.
Pro Tip: Buy a slightly deeper initial layer than the standard requires. Starting at 14 inches rather than 12 inches gives you a buffer against compression between top-up sessions.
How do you choose age-appropriate equipment for a kids’ play zone?
Age-appropriate equipment is the foundation of a secure outdoor play space. Toddlers aged 2–5 need lower platforms, shorter slides, and equipment with enclosed sides. Children aged 5–12 can use taller structures, monkey bars, and more complex climbing challenges. Mixing equipment designed for different age groups on the same structure creates mismatched risk levels.
When selecting and positioning equipment, work through these steps in order:
- Check fall height. Any platform above 30 inches requires compliant impact-attenuating surfacing beneath it. Equipment below 18 inches still demands attention to hardware, entrapment hazards, and protrusions, even if specialised surfacing is not strictly required.
- Inspect for entrapment hazards. ASTM F1487 requires that any opening capable of trapping a child’s head or torso be eliminated. Use a standard entrapment probe or a 9-inch diameter circle template to test gaps in railings, ladder rungs, and decorative elements.
- Apply the 6-foot use zone rule. The use zone around equipment extends at least 6 feet in every direction. This is the minimum clear space required to prevent collision injuries if a child falls or jumps off.
- Avoid use zone overlap. Placing two pieces of equipment with overlapping use zones is a leading cause of collision injuries. Separate structures so their 6-foot zones never intersect.
- Check hardware and structure. Look for protruding bolt ends, sharp edges, and any wooden components showing splinters or rot. Metal parts should show no rust at load-bearing joints.
Choosing equipment from a reputable supplier that references ASTM F1487 compliance gives you a starting point, but it does not replace your own inspection. Standards govern design, not installation or ongoing condition.
What supervision and safety rules actually prevent accidents?
Physical safety measures reduce risk. Active adult supervision eliminates the gap between a hazard forming and a child being hurt. These two things work together. Neither replaces the other.
Routine inspection is the practical expression of supervision. Walk the play zone monthly and check for loose bolts, splinters, rust, and any new protrusions. Carry out a more thorough seasonal inspection each spring before heavy use begins and each autumn before wet weather sets in.
Simple household rules prevent the most common accidents:
- One child per swing at a time
- No climbing on wet equipment
- No loose scarves, drawstring hoods, or jewellery during play
- Shoes on at all times near climbing structures
- No pushing on platforms or at the top of slides
Clothing is an underrated hazard. Drawstrings on hooded tops can catch on equipment protrusions and create a strangulation risk. Dress children in close-fitting layers without toggles or long cords before outdoor play.
Pro Tip: Involve children in the monthly inspection. Give them a simple checklist with pictures. Children who understand why rules exist follow them more consistently than those who are simply told what to do.
For ideas on combining safety with nature-based play, the Montessori outdoor toy checklist from Best Kids Toys offers a practical starting point for selecting equipment that supports both independence and safe boundaries.
Common challenges when designing kids’ play zones
Space constraints are the most common obstacle parents face. A small garden does not prevent a safe play zone. It requires more deliberate planning. Prioritise one well-surfaced, properly cleared piece of equipment over several crowded structures with overlapping use zones.
Surfacing compression catches many parents off guard. A play zone that passes inspection in april can fall below safe depth by august if the surfacing is not topped up. Build a simple maintenance calendar: rake monthly, top up in may and september, and carry out a full depth check after any significant rainfall.
Seasonal maintenance also means checking for frost damage each spring. Freeze-thaw cycles loosen bolts, crack wooden components, and shift ground-level anchors. A post-winter inspection before children return to the equipment is non-negotiable.
Parents with very small gardens sometimes layer the play zone rather than zone it horizontally. A single well-chosen climbing structure with a slide, a sandpit at ground level, and a small planting trough along one fence line can deliver active, calm, and nature play within a compact footprint. The DIY outdoor play area guide from Thezoofamily covers this approach in detail for gardens where space is genuinely limited.
Key takeaways
Safe outdoor play zones require compliant surfacing, correct equipment spacing, and consistent adult supervision working together as a system.
| Point | Details |
|---|---|
| Surfacing is the priority | Over 70% of playground injuries come from falls; use impact-attenuating material at the correct depth. |
| Space per child matters | Allow 2–3 square metres per child as a minimum to reduce collision risk. |
| Use zone clearance | Maintain at least 6 feet of clear space around every piece of equipment, with no zone overlap. |
| Inspect and top up regularly | Loose-fill surfacing compresses; check depth monthly and replenish at least twice a year. |
| Rules and supervision work together | Active adult oversight and simple household rules prevent accidents that equipment design alone cannot stop. |
Why I think most parents underestimate the ground beneath the equipment
Most of the parents I speak with focus on the climbing frame. They research the height, the weight limit, the brand. Then they lay the equipment on compacted soil or a thin layer of bark chips and consider the job done. That is the wrong order of priorities.
The ground is where injuries happen. The equipment is just the mechanism that gets a child airborne. I have seen beautifully designed play spaces rendered genuinely dangerous by surfacing that was too thin, too compressed, or simply the wrong material for the fall height involved. Conversely, I have seen modest, inexpensive equipment sitting on a properly maintained 12-inch layer of engineered wood fibre that I would trust completely.
The second thing parents underestimate is how quickly a safe zone becomes unsafe without maintenance. A play area is not a one-time installation. It is a system that needs monthly attention. The parents who treat it that way, who walk the zone, rake the surface, and check the bolts, have children who play in genuinely safe spaces. The parents who install and forget are the ones who discover a problem after an accident.
My honest recommendation: spend less on the equipment and more on the surfacing. Then spend time, not money, on regular inspection. That combination outperforms any expensive structure sitting on inadequate ground.
Thezoofamily’s approach to backyard natural playground ideas reflects exactly this thinking: safety and nature play are not in tension. They reinforce each other when the fundamentals are right.
— ALAIN
Thezoofamily: safe outdoor play, designed with nature in mind
Thezoofamily builds products that connect children with the natural world, from kids’ cameras and binoculars to walkie-talkies designed to make outdoor exploration feel like an adventure. Every product sold plants one tree, which means your child’s play time contributes directly to the world they are growing up in.

If you are planning or improving an outdoor play space, the Thezoofamily blog covers everything from DIY backyard play ideas to sustainable playground design for nature-loving children. The guides are practical, parent-written, and grounded in the same safety principles covered here. Visit Thezoofamily to find inspiration that puts safety and nature at the centre of every idea.
FAQ
What is ASTM F1487 and does it apply to home play zones?
ASTM F1487 is the American standard governing playground equipment safety, covering surfacing, entrapment prevention, and use zone clearance. Its principles apply to home installations as much as public playgrounds, and following it is the most reliable way to design a safe backyard play zone.
How deep should surfacing be under a climbing frame?
The required depth depends on the fall height of the equipment. As a general rule, loose-fill surfacing should start at 12 inches and be topped up regularly, since compression reduces protective depth over time.
How much space does each child need in an outdoor play zone?
Safety guidelines recommend a minimum of 2–3 square metres per child to allow free movement and reduce the risk of collisions during active play.
How often should I inspect a home play zone?
Carry out a visual check monthly and a thorough structural inspection each spring and autumn. Check surfacing depth after heavy rain and top up loose-fill material at least twice a year.
What clothing is unsafe for outdoor play equipment?
Drawstring hoods, loose scarves, jewellery, and clothing with long cords or toggles all create entrapment and strangulation risks on play equipment. Dress children in close-fitting layers without these features before play.