

This collection gives you ready-to-run outdoor STEM activities, each with materials, timing and a clear learning outcome, sorted by theme and age. Every idea works with everyday items, scales from age 3 to 13, and fits into a 20 to 45 minute session, so educators and parents can pick one up and start today.
TL;DR:
- Outdoor STEM activities encourage exploration and problem-solving through natural, low-cost materials, suitable for children aged 3 to 13 within 20-45 minutes.
- Activities like insect hunts, shadow mapping, and water-flow projects promote biodiversity awareness, Earth rotation understanding, and gravity concepts.
- Difficulty can be adjusted by changing question complexity, measurement precision, and skill level, making activities adaptable across ages and abilities.
- A structured 45-minute lesson includes setup, exploration, data recording, and reflection, emphasizing safety and genuine assessment methods like photo journals.
- Using durable, child-friendly observation tools and practicing low-impact, sustainable habits enhances inclusivity, environmental stewardship, and engagement.
Table of Contents
- Why teach STEM outdoors?
- Ready-to-run outdoor STEM activities by theme
- Scaling activities across ages and abilities
- Planning, safety and a 45-minute lesson structure
- Building a portable observational kit
- Environmental impact and sustainability in outdoor STEM
- Making outdoor STEM inclusive for every learner
- A morning that changed how one parent saw “messy” play
- Add a Thezoofamily kit to your outdoor sessions
- Further activity packs and reading
- Sources
Why teach STEM outdoors?
Learning outside changes what children practise, not just where they sit. Outdoor STEM games emphasise process over product and build persistence, creativity and teamwork in ways a worksheet rarely manages, because a rocket that flops or a bridge that collapses forces children to problem-solve on the spot rather than wait for a correct answer.
The real-world setting also does the curriculum-linking for you. Weather, insects, water flow and structures are already outside; children just need a reason to measure them. Experts increasingly frame outdoor STEM as inquiry-driven exploration rather than a rigid lesson plan, which matters because a fixed script kills the curiosity that makes outdoor learning stick. Focus on the investigating, not a tidy final answer, and children stay engaged far longer than a classroom session usually allows.
Ready-to-run outdoor STEM activities by theme
You don’t need a lab or a shopping list. Many activity roundups stress that outdoor STEM does not require complex kits; natural materials and things already in the recycling box cover most of these.
Nature investigations
- Scavenger hunt with a photo journal. Children search for set categories (a leaf with jagged edges, something symmetrical, a sign of an animal) and photograph each find instead of collecting it. Learning outcome: observation skills and basic classification. Materials: a camera or phone, a simple checklist. Age: 3 to 13, adjust the categories. Time: 30 to 45 minutes.
- Insect hunt and count. Turn over logs and leaf litter, tally what you find, and sketch or photograph anything unfamiliar. Learning outcome: biodiversity awareness and data recording. Materials: magnifying glass, notebook, small clear containers for temporary viewing. Age: 4 upwards. Time: 20 to 30 minutes. For a habitat extension, an animal shelter build turns this into a multi-session engineering project.
- Sundial and shadow mapping. Trace a stick’s shadow on the ground every 20 minutes and mark the time. Learning outcome: understanding Earth’s rotation through direct observation. Materials: a straight stick, chalk or pegs, a watch. Age: 6 upwards. Time: spread across a morning, 5 minutes per check.
Engineering challenges
- Build-a-bridge or stick-tower challenge. Using only sticks, string and tape, teams build a structure that must span a gap or hold weight. Learning outcome: load, balance and structural thinking. Materials: sticks, garden string, masking tape, a small weight for testing. Age: 5 to 13. Time: 30 to 45 minutes.
- Water-wall engineering. Attach guttering offcuts, bottles and funnels to a fence and pour water through, redirecting the flow. Learning outcome: gravity, flow and cause-and-effect. Materials: plastic bottles, tubing offcuts, cable ties. Age: 3 to 8. Time: 20 to 30 minutes, open-ended.
- Boat float and sink test. Build small vessels from foil, corks or bottle caps and test how much weight (coins or pebbles) each holds before sinking. Learning outcome: buoyancy and fair testing. Materials: foil, corks, a tub of water, coins. Age: 4 upwards. Time: 25 minutes.
Flight and launch
- Paper or bottle rocket launch. Fold paper rockets or build a simple bottle rocket launcher, then measure distance travelled. Science Buddies has detailed step-by-step instructions for launcher builds that scale well for older groups. Learning outcome: force, thrust and measurement. Materials: paper or plastic bottles, tape, a measuring tape. Age: 6 to 13. Time: 40 to 45 minutes.
Weather and measurement
- DIY weather station or anemometer. Build a simple wind-speed gauge from cups and a pencil, and log daily readings alongside temperature. Learning outcome: data collection over time and pattern recognition. Materials: paper cups, a pencil, a pin, a thermometer. Age: 7 upwards. Time: 20 minutes to build, then ongoing logging. This pairs well with outdoor maths activities that turn the readings into a graph.
Messy chemistry
- Baking-soda volcano. Build a mound, insert a container, and combine baking soda and vinegar for a controlled eruption. Learning outcome: chemical reactions and cause-and-effect prediction. Materials: baking soda, vinegar, food colouring, a small container. Age: 3 to 9. Time: 20 minutes.
Weather stations, rockets, engineering challenges and insect habitats consistently rank among the highest-value outdoor STEM projects because they combine a clear task with visible, immediate results.
Scaling activities across ages and abilities
Three levers change any activity’s difficulty without changing the equipment: the complexity of the question you ask, the precision of the measurement you demand, and the assembly skill required.
- Boat buoyancy test: for ages 3 to 5, ask “does it float?”; for ages 6 to 9, ask “how many coins before it sinks?”; for ages 10 to 13, ask them to graph weight against float time.
- Paper rockets: younger children fold and launch; older children vary fold angle or nose weight and measure distance across trials.
- Insect hunts: young children spot and name; older children tally by species and calculate rough proportions.
For mixed-age groups, pair an older child as “recorder” with a younger “spotter” so both roles matter and neither is left watching. Outdoor investigations for Years 5 to 6 already lean on this approach, having pupils test variables and gather data with stopwatches and thermometers rather than simply observing.
Planning, safety and a 45-minute lesson structure
A tight structure keeps energy high without losing the science. Here’s a session that fits a single lesson slot:
- Setup (5 to 7 minutes): lay out materials, state the one question the group is investigating.
- Guided exploration (20 to 25 minutes): children build, test or observe with minimal intervention.
- Data recording (8 to 10 minutes): tally charts, quick sketches or photographs of results.
- Class reflection (5 to 10 minutes): two or three groups share one finding each.
Before you start, run a quick risk check: clear the ground of trip hazards, check for allergies if using natural materials, keep scissors and tools age-appropriate, and agree a clean-up rule before the session begins (everything back in its container, nothing left on the ground).
Assessment doesn’t need a written test. Photo journals, tally charts and a 30-second peer presentation (“what did you find, what would you change”) capture more genuine evidence of learning than a worksheet, and they take less time to mark.
Pro Tip: Keep one spare container of “extra” materials on hand. When a fast group finishes early, adding one variable (a heavier coin, a longer rocket fin) extends the investigation instead of ending it.
Building a portable observational kit
A small kit turns wandering outdoors into structured data collection. Pack a kid-friendly camera, a compact pair of binoculars, a magnifying glass, a notebook and pencil, and two or three small containers for temporary specimen viewing.
Photos become data the moment you sort them: count how many photos show a particular leaf shape, classify insects by leg count, or print favourites into a physical nature journal that builds across a term. Giving children tools like a camera or binoculars lets them take on the role of scientist, documenting rather than just describing what they saw.
- Camera or phone: photo evidence and later sorting.
- Binoculars: distant observation without disturbing wildlife.
- Magnifier: close detail on leaves, bark and insects.
- Notebook and pencil: tallies, sketches, quick notes.
Pro Tip: A jam jar with holes punched in the lid works as a free substitute for a bug-viewing container. Durability matters more than cost outdoors; a tool that survives being dropped in mud gets used far more than one that doesn’t.
Environmental impact and sustainability in outdoor STEM
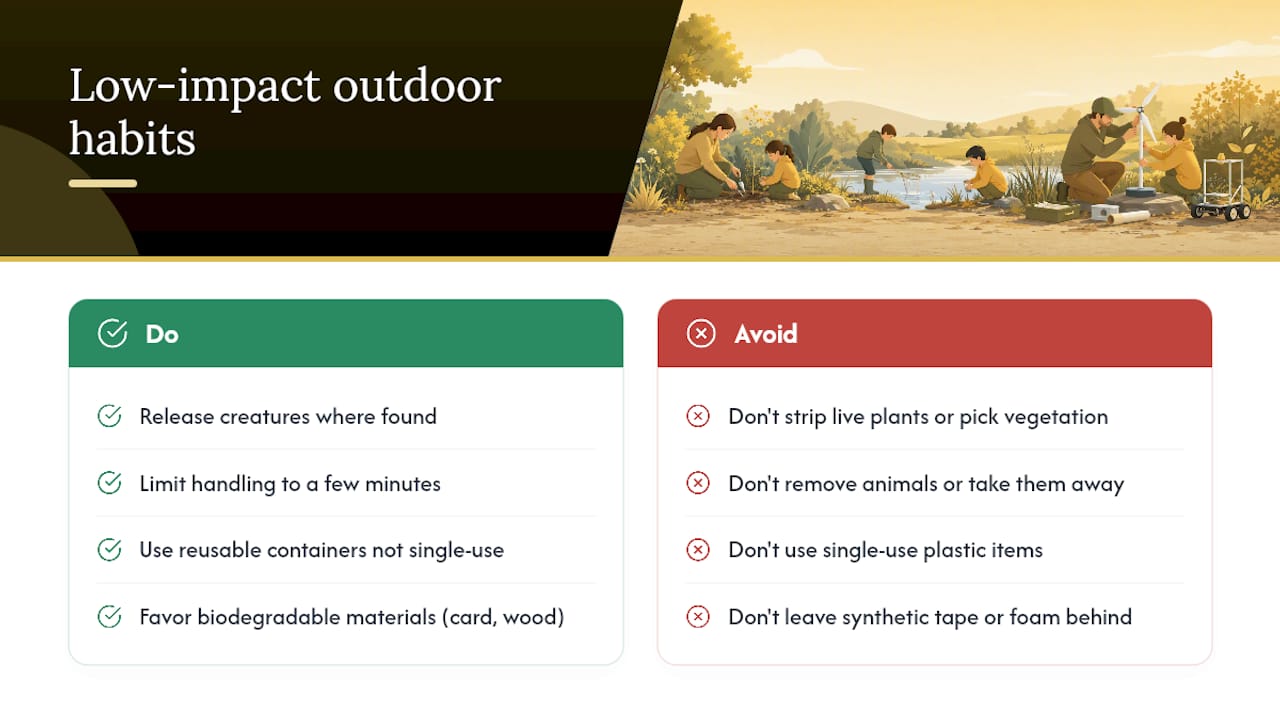
Outdoor learning should leave the site better than it found it, not just borrow it for an hour. A few habits keep activities low-impact. Always release insects and small creatures where you found them, and limit handling time to a few minutes. Choose reusable containers over single-use plastic wherever possible, and favour biodegradable materials, string, card, wood offcuts, for engineering builds rather than synthetic tape and foam that end up in landfill.
Scavenger hunts and photo journals are inherently low-impact because nothing is removed from the environment; that’s part of why a “photograph, don’t pick” rule works so well as a default for nature investigations. When an activity does need natural materials, such as sticks for a bridge challenge, collect only fallen or loose material and avoid stripping live plants.
Sustainability also fits neatly as a teaching point rather than a separate rule. Ask children why a plastic bottle rocket gets reused for the next class instead of thrown away, or why the weather station uses a jam jar rather than a new plastic tub. These small framing questions turn resource choices into part of the science conversation, not an afterthought bolted on at clean-up.
Building or maintaining a wildlife-friendly garden space alongside these activities also gives children a stake in the same patch of ground over time, which tends to make them more careful with it, not less.
Making outdoor STEM inclusive for every learner
Outdoor space removes some barriers and creates others, so adapting activities takes a bit of forethought rather than a single fix. Physical access matters first: choose flat, firm ground for wheelchair users and mobility aids, and offer a seated or table-height version of any activity that normally happens crouched on the floor, such as raising the insect-hunt containers onto a bench.
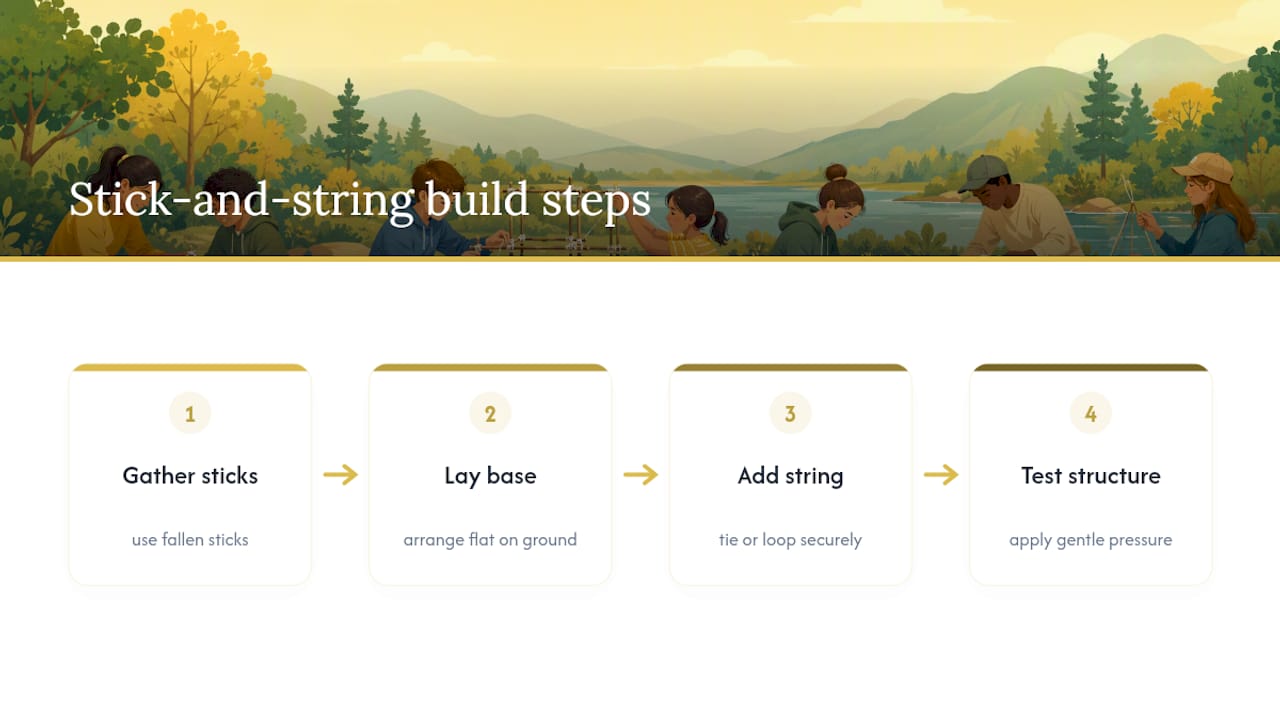
For children with sensory sensitivities, offer noise-cancelling ear defenders for anything involving pouring, popping or launching, and give advance warning before a “surprise” moment like the baking-soda volcano. Visual supports help enormously with sequencing: a simple picture card showing each step of a build (gather sticks, lay base, add string, test) lets a child follow along without relying purely on spoken instructions.
For children who process language differently, cut instructions to single actions rather than multi-step sentences, and demonstrate rather than describe wherever you can. Pairing works well here too, matching a child who needs more processing time with a patient peer rather than always with an adult, so independence stays part of the exercise.
None of this requires specialist equipment. A laminated picture sequence, a seated station and a five-minute warning before loud activities cost nothing and cover most of what’s needed to make a session work for the whole group, not just the children who find outdoor settings easy.
A morning that changed how one parent saw “messy” play
A parent once described her daughter’s insect count, tallied by hand under a hedge, as the first time the child had ever asked to keep going past the “finish” point of a task. The takeaway: let children record their own tally; ownership of the data is what keeps them at it.
— ALAIN
Add a Thezoofamily kit to your outdoor sessions
Thezoofamily is the practical add-on for turning outdoor STEM sessions into something children actually document, not just wander through. A child-friendly camera or a compact pair of binoculars gives every scavenger hunt, insect count or weather log a way to capture evidence on the spot, built tough enough for muddy hands and grass-stained knees.
This isn’t a replacement for the jam jars and homemade anemometers already in your kit; it’s an option for when you want more durability, a design that pulls children in, and photos that turn straight into a printed nature journal afterwards. Every camera sold also funds a tree planted, so the kit connects directly to the sustainability habits covered above. If that fits how your group already works outdoors, browse the range of kids’ cameras and binoculars to see what would suit your next session.
Further activity packs and reading
- British Science Week activity packs: free, age-graded downloads with curriculum links.
- Science Buddies middle-school STEM activities: step-by-step instructions for rockets and more.
- 7 exciting outdoor science activities: more ideas for observation and measurement.
- Engaging science experiments outdoors for kids: further step-by-step experiments by age.
Sources
- 6 Outdoor STEM Game Ideas | National Inventors Hall of Fame®
- British Science Week activity packs
- Science Buddies – middle school STEM activities
- 25 Outdoor STEM Activities to Explore Science in Nature
- National Inventors Hall of Fame (partnership overview) | Overdeck Foundation