

Yes, you can make pleasing wind chimes at home in an afternoon, using metal tubing, bamboo or recycled items pulled straight from your kitchen drawer. Each route gives you something different: metal tubing rings clean and bell-like, bamboo knocks with a warm, hollow clack, and upcycled items (bottle caps, cutlery, tin lids) rattle and chime with a more playful, unpredictable voice.
Budget an afternoon for any of the three, start to finish. Cost sits near £0 if you’re upcycling, or a modest amount if you’re buying copper pipe and hardware new.
- Metal pipe chime — clearest tone, most durable, best for a calm garden corner.
- Bamboo chime — natural look, softer knocking sound, ideal near a patio or reading spot.
- Upcycled kids’ chime — near-zero cost, best for little hands and a first project together.
Key Takeaways
Making wind chimes at home takes one afternoon and near-£0 in materials when you build with metal offcuts, seasoned bamboo, or upcycled household items.
| Point | Details |
|---|---|
| Choose your method first | Metal gives the clearest tone, bamboo a warmer knock, upcycled items the lowest cost and most kid involvement. |
| Drill with the right bit | A 1/8 inch (3 mm) bit suits most chimes; switch to a diamond bit for ceramic or terracotta. |
| Keep materials consistent | Mixing very different densities in one set causes clashing rather than pleasant tones. |
| Weatherproof the hardware | Stainless eyelets and UV-resistant cord outlast standard nylon line by years outdoors. |
| Consider a ready-made alternative | Thezoofamily’s nature-themed cameras and binoculars offer instant outdoor engagement, with a tree planted per camera sold. |
Table of Contents
- How to start making wind chimes: what you actually need
- Three step-by-step wind chime recipes
- How do length and material affect the sound?
- Finishing touches and weatherproofing for the outdoors
- Fixing common wind chime problems
- Making wind chimes with kids: what they’ll actually learn
- Why the simplest chimes are usually the best ones
- A ready-made alternative for nature-focused family play
- Sources
How to start making wind chimes: what you actually need
Every wind chime, whatever it’s made from, breaks down into the same five parts: a top plate to hang everything from, the chimes themselves, a clapper (the piece that knocks the chimes together), a sail or catcher to pull the clapper in the wind, and cord to hang it all. Get these sorted before you cut anything, and the build goes together in under an hour.
For a metal pipe chime, gather:
- Copper pipe or electrical conduit cut into varied lengths
- A wooden disc, pie tin or embroidery hoop for the top plate
- Fishing line or braided nylon cord
- A hacksaw or pipe cutter
- A drill with a 1/8 inch (about 3 mm) bit, the size most copper-pipe projects recommend
For a bamboo chime, gather:
- Seasoned (dried, not green) bamboo poles
- A plywood disc for the top plate and a smaller wooden disc for the clapper
- A saw, a drill with a 1/8 inch bit, and sandpaper
For an upcycled kids’ chime, gather:
- Bottle caps, old cutlery, tin can lids, or shells
- Beads for spacing
- A hoop, offcut of wood, or an old CD as the top plate
- Strong garden twine or cotton cord
A word on tools: drilling metal or ceramic needs care. A punch mark first stops the drill bit skating off centre, and slower drill speeds prevent overheating on tougher materials. If you’re drilling anything ceramic, like a terracotta pot rim, switch to a diamond-tipped bit rather than a standard one, which will simply skid and chip the glaze.
Cutting and drilling are adult-only tasks. Kids can measure, choose colours, thread beads and paint, but a hacksaw or power drill stays in adult hands. Tape any freshly cut metal edges immediately; a burr on copper pipe is sharp enough to cut a finger before you’ve even sanded it. Dremel’s own project notes for repurposing items like pie tins and spoons follow the same rule: cut and drill first, hand off to the kids once edges are safe.
Pro Tip: Keep a shallow tray nearby while drilling metal. It catches the tiny curls of swarf that otherwise end up on the floor, in socks, or under bare feet.
Three step-by-step wind chime recipes
Pick the recipe that matches your materials and skill level. All three follow the same basic order: build the top plate, cut and prepare the chimes, drill the holes, thread everything together, then hang and test.
Recipe 1: metal pipe chime
- Cut your lengths. Aim for a spread between roughly 15 cm and 45 cm (about 6 to 18 inches), which is the range that gives the widest tonal variety without one pipe drowning out the rest.
- Deburr every cut edge with a file or sandpaper. Copper pipe leaves a sharp lip that will fray your line otherwise.
- Drill a hole roughly 3 mm wide near the top of each pipe, about 1 to 2 cm down from the end.
- Thread fishing line through each hole and knot it securely. A dab of superglue on the knot stops it slipping loose in the wind.
- Arrange the pipes by length around your top plate, spacing them evenly so no two touch when still.
- Hang a clapper (a wooden ball or thick disc) in the centre, positioned so it can swing and strike two or more pipes.
- Test-hang it and adjust. If a pipe stays silent, shorten its cord slightly so the clapper reaches it properly.
Recipe 2: bamboo chime
- Check your bamboo is properly seasoned. Green bamboo will crack and dull as it dries out, so use poles that have already cured for several months.
- Cut staggered lengths, following the wikiHow method of varying section lengths so each tube produces its own note.
- Drill 1/8 inch holes near the top of each tube, close to a natural node if possible, since bamboo is more likely to split near a bare cut edge.
- Sand any rough openings smooth, inside and out.
- Cut a plywood disc for the top plate and a smaller disc to act as the central striker.
- Thread and knot the tubes, spacing them so the striker disc can knock against two or three at once when it swings.
- Attach a wide sail beneath the striker (a flat wooden shape works well) so gentle wind sets it moving.
Recipe 3: upcycled kids’ chime
This is the version to build with children, once the sharp-edged prep work is done.
Adult pre-handling first:
- Tape the rim of any tin can lids so no exposed edge remains
- Pre-drill holes in bottle caps or shells (fiddly, small items are hard for little hands to hold steady under a drill)
- Sand any splintered wood on the top plate
Then hand it to the kids:
- Paint or decorate the top plate and any wooden pieces
- Thread beads onto cord for spacing between hanging items
- Choose which caps, shells or lids go where, then tie them onto the frame
- Attach a final cord loop for hanging
Bottle caps and tin lids won’t ring like copper, but they clatter and jingle in a way that toddlers and young children genuinely love. It’s also one of the best low-cost ways to teach sequencing and dexterity through a hands-on project.
How do length and material affect the sound?
Two rules govern almost everything about wind chime tone. Shorter pieces ring higher; longer pieces ring lower. Denser materials, like copper or thick bamboo, hold a clearer note for longer, while thin or lightweight materials produce a duller thud that fades fast.
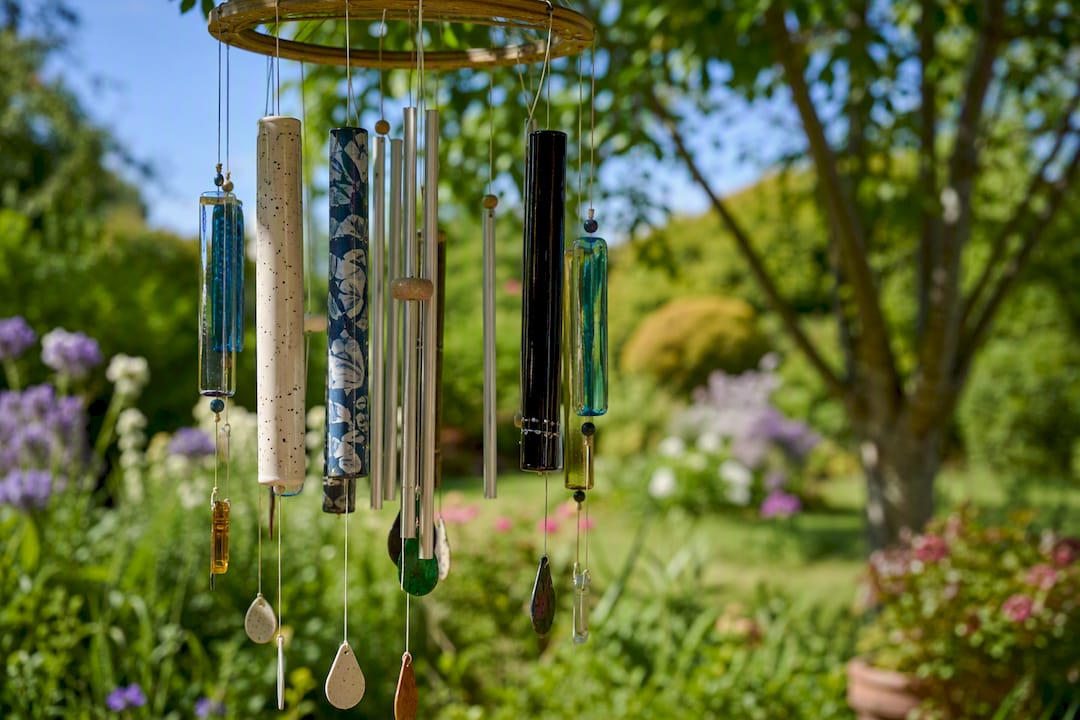
Test each piece before final assembly: hold it loosely between two fingers near one end and give it a light tap. That’s roughly the note it’ll produce once hung. Consistency in the materials you use for a set makes a real difference here, too. Mixing very different densities in one chime tends to produce a muddled, clashing sound rather than a harmonious one.
For a beginner-friendly layout that avoids dissonance:
- Arrange pipes or tubes from longest to shortest around the top plate, spiral fashion, rather than randomly.
- Group similar lengths loosely together rather than scattering them, so neighbouring chimes strike cleanly instead of clanging.
- If something sounds harsh or muted once hung, small adjustments fix it fast: nudge the clapper’s resting position, widen the gap between two chimes that are touching, or trim a few millimetres off a pipe to nudge its pitch upward.
Finishing touches and weatherproofing for the outdoors
A wind chime left unfinished will dull, rust or split within a season. Wood needs an outdoor-rated sealant or varnish, applied in thin coats and left to dry fully between layers, usually overnight. Metal benefits from a clear protective spray to slow tarnishing, particularly on copper, which will otherwise turn a patchy green within months outdoors.
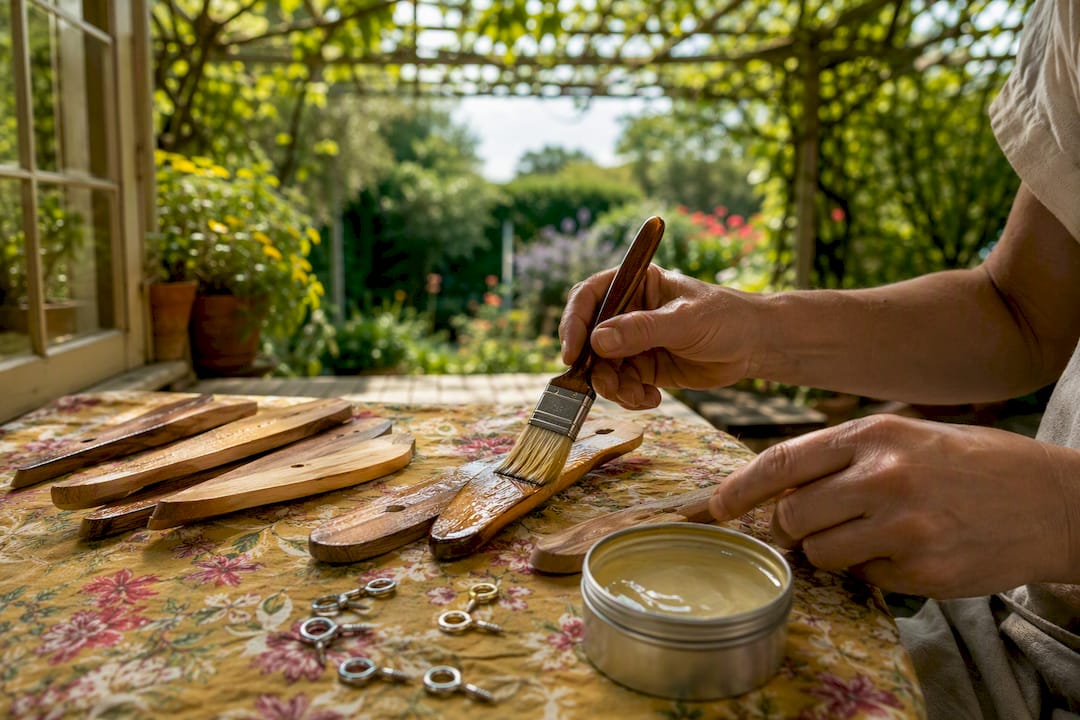
Hardware choices matter more than most people expect. Cheap cord frays and snaps within a single windy winter; a stainless-steel eyelet and UV-resistant cord cost very little extra and will outlast standard nylon line by years. Tie hanging knots twice, and add a small dot of glue to stop them working loose over time.
Placement affects both sound and lifespan. Hang your chime somewhere with a steady, gentle breeze rather than a spot that catches every strong gust, since constant hard wind wears components faster and produces a harsher, more constant noise than most people want from a garden feature. Leave at least 30 cm of clearance below and around the chime elements so they can swing freely, and think about your neighbours before hanging one near a shared fence or a bedroom window.
Pro Tip: If you’re short on garden space, a budget-friendly makeover corner near a porch or covered area often gives a chime the steady airflow it needs without direct rain exposure.
Fixing common wind chime problems
Chime hanging crooked? Check that all cords are knotted at the same height on the top plate, and that the plate itself is centred on its main hanging cord. An off-centre top plate is the usual culprit.
Sound too quiet or muffled? Reposition the clapper so it makes firmer contact, or increase the gap between chimes slightly so they don’t deaden each other’s ring.
Notes clashing rather than blending? Check for a mismatched material sneaking into the set. One denser or lighter piece among otherwise matched chimes throws the whole set off.
A short seasonal routine keeps a chime performing for years:
- Inspect cords and knots after any storm or strong wind event.
- Replace frayed or sun-bleached cord before it snaps.
- Re-seal wooden components annually, ideally before the wetter months.
- Bring delicate or unsealed pieces indoors during severe winter weather.
Making wind chimes with kids: what they’ll actually learn
Children can safely handle plenty of the process: choosing colours, threading beads for spacing, painting the top plate, and deciding which shells or caps go where. Cutting, drilling and any sharp-edge prep stays with an adult, every time, no exceptions.
Beyond the finished object, the process teaches real skills. Threading beads and tying knots builds fine motor control. Listening to how different lengths produce different notes is a gentle, hands-on introduction to sound and measurement, and it’s an easy prompt to ask a child why the short pipe rings higher than the long one.
At Thezoofamily, craft projects like this sit alongside our wider focus on getting kids curious about the natural world, whether that’s through recycled art projects or nature ornament ideas for a first outdoor craft session. It’s the same thinking behind our animal-themed cameras and binoculars: give a child a reason to look closer at the world outside, and a wind chime hanging by the back door does exactly that every time the breeze picks up.
Why the simplest chimes are usually the best ones
The internet is full of wind chime tutorials chasing perfect pitch, precisely tuned scales, and matched-frequency tubing cut to the millimetre. Most of that is overkill for a home project, and it puts people off starting at all.
What the research on this actually supports is simpler: consistency of material beats precision of measurement. A set of mismatched metals or wildly different densities will sound muddled no matter how carefully you cut the lengths, while a set of similar materials, even roughly spaced, tends to sound pleasant almost by accident. Conventional advice overweights exact tuning and underweights the one thing that genuinely matters: pick one material family and stick with it.
My honest read is that the upcycled route gets undersold. Bottle caps and tin lids won’t win a design award, but they teach a child more about cause and effect, sound, and craft sequencing than a beautifully tuned copper set ever will, precisely because a child helped build it. Start there. Precision can come later, once the first chime is already ringing.
— ALAIN
A ready-made alternative for nature-focused family play
Building a wind chime from scratch is genuinely satisfying, but not every afternoon allows for a trip to the hardware shop and an hour with a drill. Thezoofamily exists for exactly those days: animal-themed cameras, binoculars and walkie-talkies designed to pull children outdoors and get them noticing the natural world, without any cutting or drilling required.

We’re upfront that this is a different route to the same goal. A homemade chime teaches sequencing and craft; a Thezoofamily camera or set of binoculars teaches observation and curiosity the moment it’s unboxed, ready for a garden walk or a woodland trail the same afternoon. For every camera sold, we plant one tree, so the nature connection runs through the business itself, not just the products. If you’re weighing up a craft afternoon against a ready-made nature gift, browse the Thezoofamily shop and see which fits your family’s next outdoor moment.
Sources
- How to make DIY wind chimes with copper pipes | HGTV
- How to Make Wind Chimes | Dremel
- Make a Bamboo Wind Chime - wikiHow