Finding engaging outdoor activities that combine creativity, learning, and connection with nature can feel overwhelming for busy parents. Night sky photography offers a perfect solution, blending art, science, and wonder in a way that captivates children while teaching them about the cosmos. This guide shows you how to prepare for, execute, and enjoy memorable stargazing photography sessions with your family at Europe’s best dark sky parks, turning ordinary evenings into extraordinary adventures that inspire curiosity and environmental awareness.
Table of Contents
- Choosing The Best Dark Sky Parks For Night Sky Photography With Kids
- Essential Preparation And Equipment For Night Sky Photography With Young Children
- Step By Step Guide To Capturing Clear Night Sky Photos With Children
- Common Challenges In Night Sky Photography With Kids And How To Overcome Them
- Discover Photography Gear And Family Friendly Guides At The Zoofamily
- Frequently Asked Questions
Key takeaways
| Point | Details |
|---|---|
| Dark sky parks offer ideal settings | European dark sky parks like Mayo and Bieszczady provide visibility of thousands of stars, perfect for family photography sessions. |
| Proper preparation ensures comfort | Packing warm layers, red torches, and safety gear keeps children comfortable and safe during night outings. |
| The 500 Rule prevents star trails | Dividing 500 by your lens focal length calculates maximum exposure time for sharp star photos. |
| Engagement makes sessions successful | Storytelling, simple tasks, and interactive apps keep children interested and involved throughout the experience. |
Choosing the best dark sky parks for night sky photography with kids
Europe hosts exceptional dark sky parks that transform family photography outings into unforgettable experiences. These certified locations protect natural darkness, offering visibility that urban environments simply cannot match. Selecting the right park depends on accessibility, facilities, and unique features that engage young children.
The Mayo Dark Sky Park stands as Ireland’s first Gold Tier International Dark Sky Park, where families can observe up to 4,500 visible stars on clear nights. The park provides accessible trails and family friendly facilities, making it manageable even with younger children. Poland’s Bieszczady Star Sky Park raises the bar further, allowing visibility of up to 7,000 stars as the country’s first certified dark sky park. Its remote location rewards families willing to travel with spectacular celestial displays.
The South Downs National Park celebrates its 10th anniversary as an International Dark Sky Reserve in 2026, hosting special family friendly festivals throughout the year. These events combine stargazing with educational activities designed specifically for children, creating social learning opportunities alongside photography practice. The park’s proximity to southern England makes it highly accessible for weekend trips.
When selecting your destination, consider these factors:
- Distance from home and travel time with children
- Availability of toilet facilities and sheltered areas
- Mobile signal coverage for safety and navigation apps
- Seasonal weather patterns and typical cloud coverage
- Special events or guided sessions suitable for families
Dark sky preservation matters beyond photography. Understanding light pollution explained reveals how artificial brightness affects wildlife behaviour, human health, and our connection to nature. Teaching children to appreciate natural darkness instils environmental values that extend far beyond a single photography session. Each visit to a dark sky park demonstrates the difference between urban skies showing perhaps 200 stars and protected areas revealing thousands, creating powerful visual lessons about conservation.
Pro Tip: Check moon phase calendars before planning your trip. New moon periods offer the darkest skies, while quarter moons provide enough ambient light to navigate safely without compromising star visibility significantly.
Essential preparation and equipment for night sky photography with young children
Successful night sky photography sessions require thoughtful preparation that balances technical needs with children’s comfort. Cold temperatures and darkness present challenges that proper planning easily overcomes, transforming potential obstacles into manageable details.
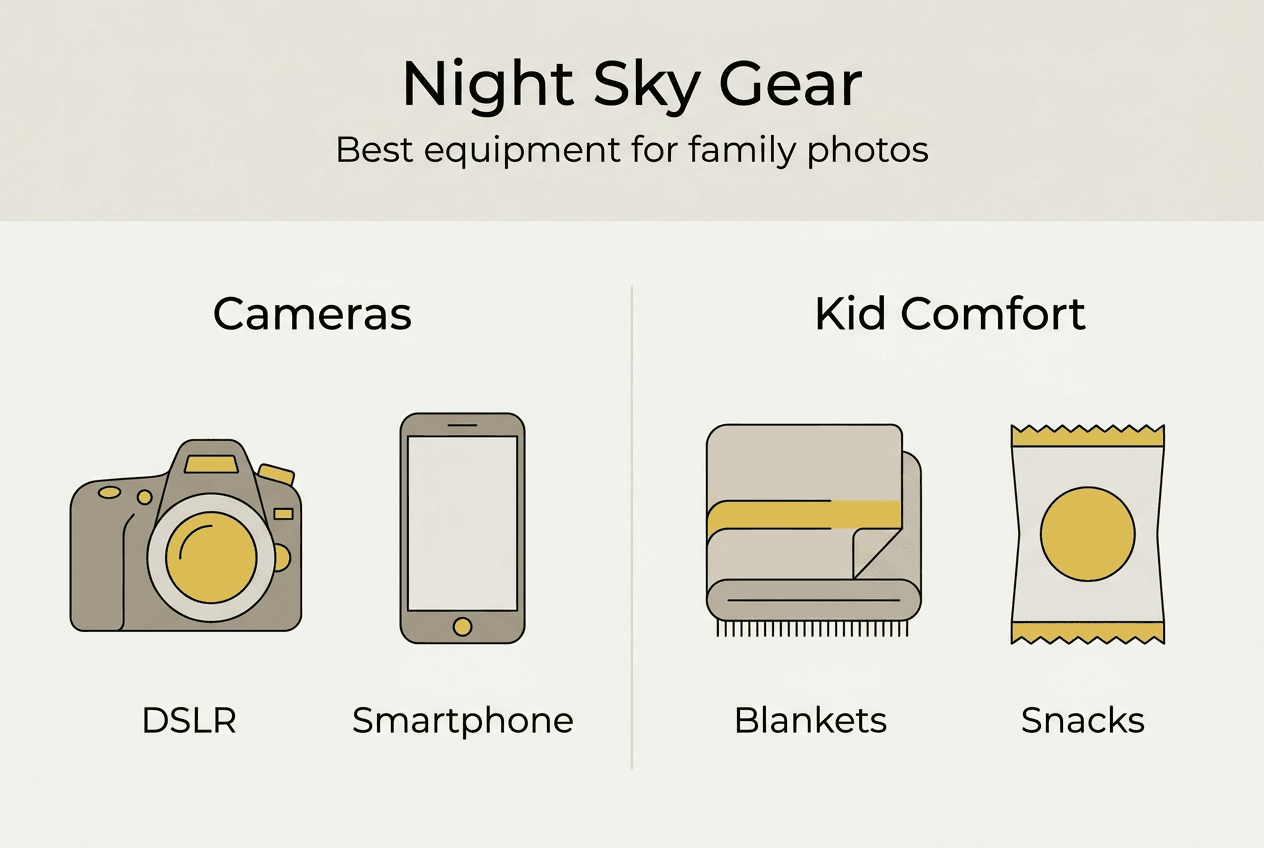
Clothing and comfort items form your first priority. Essential stargazing items include multiple wind blocking layers, insulated boots, warm hats, and gloves that allow finger movement for camera operation. Children lose body heat faster than adults, so pack extra blankets and thermal layers even when temperatures seem mild. Bringing hot chocolate in a thermos and favourite snacks maintains energy and enthusiasm during longer sessions.

Red beam head torches preserve night vision while providing necessary illumination for equipment adjustments and safety. White light destroys dark adaptation that takes 20 to 30 minutes to develop, forcing everyone to restart the adjustment process. Red light maintains this adaptation, keeping stars visible while you work. Purchase child sized head torches so young helpers can explore safely without disrupting the group’s vision.
Camera equipment need not be complex or expensive for beginning family photography. A DSLR or mirrorless camera with manual mode capability, a sturdy tripod, and a wide angle lens create everything needed for stunning results. Master photographing the night sky techniques using equipment you likely already own. Remote shutter releases or camera timer functions prevent vibration from button pressing, though the two second timer built into most cameras works perfectly.
| Equipment | Purpose | Child Friendly Option |
|---|---|---|
| Camera with manual mode | Captures long exposures | Smartphone with night mode |
| Wide angle lens | Shows more sky in frame | Kit lens works fine |
| Sturdy tripod | Eliminates camera shake | Tabletop tripod for phones |
| Red head torch | Preserves night vision | Clip on red filter |
| Stargazing app | Identifies constellations | Interactive learning tool |
| Extra batteries | Cold drains power quickly | Keep spares in warm pocket |
Stargazing apps transform phones into interactive learning tools that identify constellations, planets, and satellites in real time. Children point devices at the sky, watching as overlays name celestial objects and share mythology stories. This technology engagement maintains interest while teaching navigation skills and astronomical knowledge. Popular free options include Stellarium and Sky Map, both offering child friendly interfaces.
Pro Tip: Practise camera settings at home before your trip. Fumbling with unfamiliar menus in darkness while managing excited children creates unnecessary stress. Spend 30 minutes learning manual focus, ISO adjustment, and shutter speed changes in comfortable conditions, then night sessions flow smoothly.
Step by step guide to capturing clear night sky photos with children
Executing successful night sky photography follows a logical sequence that children can understand and participate in actively. Breaking the process into clear steps transforms complex technical photography into an accessible family activity.
-
Arrive at your chosen location while twilight remains, allowing time to set up equipment before full darkness. This timing lets children explore safely and helps everyone’s eyes adapt gradually to decreasing light.
-
Position your tripod on stable ground, extending legs fully and checking that the head moves smoothly. Let children help by holding equipment or choosing the exact spot, giving them ownership of the process.
-
Attach your camera securely, then switch to manual mode. Set your aperture to the lowest f number your lens offers, typically f/2.8 to f/4 for kit lenses. This wide opening gathers maximum light from faint stars.
-
Adjust ISO to between 1600 and 3200, balancing light sensitivity against digital noise. Higher ISOs brighten images but introduce grain, so start at 1600 and increase only if results appear too dark.
-
Calculate maximum exposure time using the 500 Rule, which prevents star trails by limiting how long your shutter stays open. Divide 500 by your lens focal length to find this limit. A 24mm lens allows roughly 20 seconds before stars blur into streaks, while a 50mm lens restricts you to 10 seconds.
-
Switch to manual focus and set your lens to infinity. Autofocus fails in darkness, so this manual adjustment ensures sharp stars. Some lenses mark infinity with a symbol, though testing focus on a distant light confirms accuracy.
-
Compose your shot by including interesting foreground elements like trees or hills, creating depth and context. Pure sky photos lack visual anchors that make images compelling, so frame thoughtfully.
-
Activate your two second timer or remote release, then trigger the shutter without touching the camera. Even gentle pressure creates vibration that blurs stars during long exposures.
-
Review your test image, checking focus sharpness and overall brightness. Adjust settings incrementally, involving children by asking them to spot the brightest stars or identify constellation patterns in captured photos.
-
Take multiple shots from different angles and compositions. Digital photography costs nothing beyond time, so experiment freely and let children suggest creative framing ideas.
Children contribute meaningfully by pointing out interesting sky features, operating the timer countdown, or sketching constellations they observe. These tasks maintain engagement while teaching observation skills and patience. Master photographing the night sky techniques grow naturally through repeated practice and experimentation.
Pro Tip: Take a few test shots at different ISO and exposure combinations, then compare results together. This scientific approach teaches children about cause and effect while finding optimal settings for current conditions. Label each test with its settings using a notepad, creating a reference guide for future sessions.
Common challenges in night sky photography with kids and how to overcome them
Anticipating difficulties transforms potential frustrations into manageable situations that strengthen rather than derail your photography sessions. Real world challenges affect every family, but preparation and flexible expectations create positive experiences regardless of technical outcomes.
Cold weather tops the list of physical challenges during night photography. Temperatures drop significantly after sunset, especially in elevated dark sky parks far from urban heat. Layer clothing using the three layer system: moisture wicking base layers, insulating mid layers like fleece, and windproof outer shells. Bring twice as many warm items as you think necessary, because children often underestimate their needs until discomfort sets in. Hand warmers tucked into gloves and boots maintain circulation in extremities most vulnerable to cold.
Maintaining children’s engagement requires creativity and realistic session lengths. Young attention spans rarely sustain interest beyond 45 to 60 minutes, so plan accordingly rather than forcing extended sessions. Use constellation mythology to create storytelling moments between photos. Challenge children to spot shooting stars or satellites crossing the sky, turning waiting time into active observation. The dark sky photography kids guide offers additional engagement strategies tailored to different age groups.
Technical difficulties like achieving sharp focus or correct exposure frustrate beginners, but accepting imperfection as part of learning reduces stress dramatically. Your first attempts will likely show blurry stars, incorrect brightness, or awkward compositions. These outcomes teach valuable lessons and improve with practice. Prioritise the experience over perfect results, celebrating effort and discovery rather than technical excellence.
Common challenges and practical solutions include:
- Blurry stars from camera shake: Use timer or remote release, never press shutter directly
- Images too dark: Increase ISO incrementally or extend exposure time within 500 Rule limits
- Children losing interest: Bring activities like constellation cards or simple stargazing games
- Difficulty seeing camera settings: Use red torch sparingly and learn button locations by touch
- Unexpected clouds: Check weather forecasts thoroughly and maintain backup activity plans
- Light pollution from passing cars: Position yourself away from roads or use vehicles as foreground elements creatively
Respecting the natural environment matters equally to technical success. Dark skies are vital for nature and human wellbeing, so teaching children to appreciate and protect these spaces builds environmental stewardship. Speak quietly to avoid disturbing wildlife and other visitors. Carry out all rubbish and stay on designated paths. These habits demonstrate that enjoying nature includes responsibility for its preservation.
Weather and moon phases significantly impact visibility and photographic results. Check forecasts several days ahead, looking specifically at cloud coverage predictions rather than just precipitation chances. Clear skies matter more than temperature for successful sessions. New moon periods offer darkest skies, though quarter moons provide helpful ambient light for navigating with children while still allowing excellent star visibility.
Pro Tip: Frame initial sessions as exploration rather than photography lessons. Success means spending quality time together under stars, not capturing perfect images. This mindset shift reduces pressure and lets technical skills develop naturally through repeated enjoyable experiences.
Discover photography gear and family friendly guides at The Zoofamily
Transforming your night sky photography adventures into lasting family traditions becomes easier with proper resources and supportive equipment. The Zoofamily specialises in creating tools that connect children with nature through creative exploration, offering cameras, binoculars, and educational content designed specifically for young adventurers.

Our comprehensive night sky photography guide expands on techniques introduced here, diving deeper into advanced settings and creative compositions that grow with your family’s skills. The dark sky photography kids guide provides age appropriate activities and learning frameworks that make astronomy accessible and exciting for children at every developmental stage. These resources complement hands on practice, building knowledge that enhances each outing while fostering genuine curiosity about our universe and the importance of protecting natural darkness for future generations.
Frequently asked questions
What is the best time of year for night sky photography in European dark sky parks?
Optimal viewing at Mayo Dark Sky Park occurs from September to April when long, crisp nights provide ideal conditions for stargazing and photography. These months offer extended darkness hours and typically clearer atmospheric conditions than summer months. Plan family visits during this window to maximise your chances of spectacular results and comfortable viewing temperatures.
How can parents keep young children engaged during night sky photography sessions?
Storytelling about constellation mythology, games identifying specific stars, and bringing favourite snacks maintain interest during photography sessions. Keep outings shorter than 60 minutes for younger children, matching their natural attention spans. The dark sky photography kids guide offers additional engagement strategies including scavenger hunts and interactive learning activities that transform technical photography into playful exploration.
What camera settings are best for photographing stars without trails?
Set your aperture to the widest opening available, ISO between 1600 and 3200, and calculate exposure time using the 500 Rule by dividing 500 by your lens focal length to prevent star trails. Use manual focus set to infinity, mount your camera on a sturdy tripod, and trigger the shutter with a timer or remote release. Master photographing the night sky through experimentation with these baseline settings, adjusting based on your specific equipment and conditions.
Do I need expensive equipment for night sky photography with children?
Any camera offering manual mode works perfectly for beginning night sky photography, including many smartphones with night mode capabilities. A basic tripod and wide angle lens create everything needed for stunning results. Prioritise learning fundamental techniques over purchasing expensive gear, as skill development matters far more than equipment cost for family photography sessions focused on experience and learning rather than professional results.