Children light up at the idea of building their own fairy gardens and it is easy to see why. Fairy gardens can turn even a recycled tin or an old flowerpot into a magical landscape where little ones can play out endless stories. Most parents focus on what to plant and which whimsical decorations to buy. Surprisingly, the real enchantment often begins with ordinary materials and some simple household tools. This means you do not need to buy anything fancy and the magic starts with what is already at home.
Table of Contents
- Step 1: Gather Your Materials And Tools
- Step 2: Select A Suitable Container And Location
- Step 3: Prepare The Base For Your Fairy Garden
- Step 4: Arrange Plants And Decorations To Create A Magical Scene
- Step 5: Add Finishing Touches For Charm And Character
- Step 6: Review And Maintain Your Fairy Garden Over Time
Quick Summary
| Key Point | Explanation |
|---|---|
| 1. Choose the Right Container | Select a container that is deep enough for soil and plants, ideally 6 to 8 inches with drainage holes to ensure healthy growth. |
| 2. Gather Essential Materials | Assemble potting soil, pebbles, miniature plants, and decorations to create a vibrant and imaginative fairy garden landscape. |
| 3. Involve Children in Creation | Encourage children to participate in the selection of containers and layout to enhance their excitement and investment in the project. |
| 4. Maintain the Fairy Garden Regularly | Establish a care routine to monitor plant health, adjust decorations, and keep the garden thriving and evolving with time. |
| 5. Add Finishing Touches | Incorporate miniature accessories and textures to create a magical atmosphere, sparking storytelling and imagination in children. |
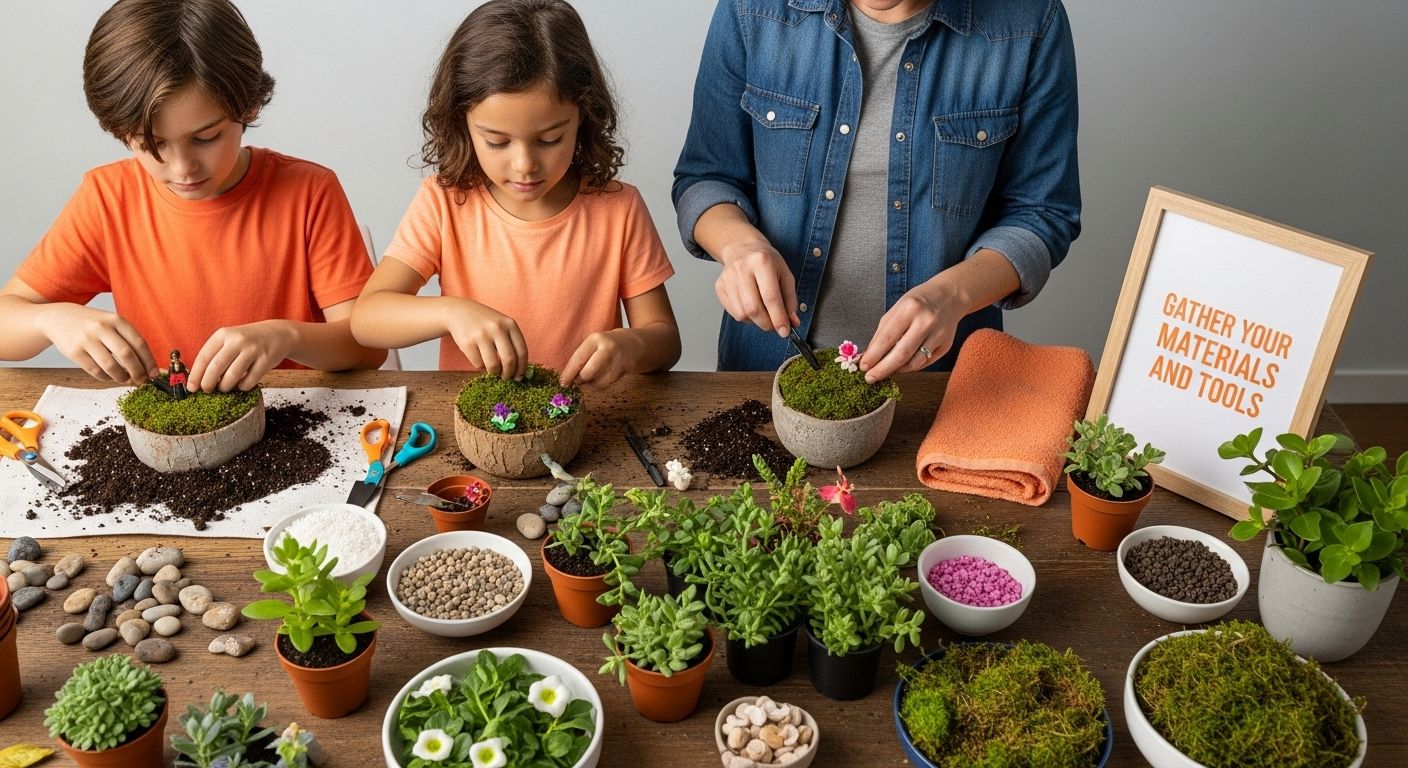
Step 1: Gather Your Materials and Tools
Creating a magical fairy garden begins with carefully selecting the right materials and tools. This crucial first step sets the foundation for a whimsical miniature world that will spark your child’s imagination and creativity. Before diving into the magical realm of fairy garden crafting, you’ll need to assemble a collection of supplies that will transform an ordinary space into an enchanting miniature landscape.
Start by gathering your primary container. Choose a container that sparks imagination - this could be an old wooden box, a ceramic planter, a large terracotta pot, or even a repurposed tin container. The container should be deep enough to accommodate soil and small plants, typically around 6 to 8 inches deep. Look for something with drainage holes or be prepared to create them yourself.
Your essential materials will include:
- Potting soil suitable for small plants
- Small pebbles or gravel for drainage
- Miniature plants like succulents, moss, or tiny ground covers
- Decorative elements such as small stones, twigs, and bark
- Miniature fairy garden accessories
Tools are equally important for creating your magical landscape. According to Carle Museum, you’ll want to collect natural materials like twigs, dried flowers, raffia, shells, and pine cones. For assembly, have on hand some key crafting tools:
- Sharp scissors
- Gardening gloves
- Small trowel or spoon
- Hot glue gun or strong craft glue
- Spray bottle for watering
Consider the age of the children involved when selecting tools. Younger children might need more supervision with sharp implements or hot glue guns. If working with very young children, opt for child-safe alternatives like tacky glue and rounded scissors.
Take time to lay out all your materials before beginning. This preparation ensures you have everything needed and prevents interruptions during the creative process. Remember, the magic of a fairy garden lies not just in the final result, but in the joyful journey of creation with your children.
Here is a table summarising essential tools and materials for creating a fairy garden, including their intended purposes and safety notes.
| Item | Purpose | Safety/Notes |
|---|---|---|
| Container | Holds soil, plants, and decorations | Depth 6-8 inches, with drainage holes |
| Potting soil | Supports plant growth | Choose well-draining mix |
| Pebbles or gravel | Provides drainage | Prevents soil waterlogging |
| Miniature plants | Adds greenery and life | Choose child-friendly varieties |
| Decorative elements | Enhances magical appearance | Natural (moss, stones, twigs) or crafted |
| Scissors | Cutting materials | Use child-safe scissors for young children |
| Small trowel or spoon | For planting and arranging soil | Supervise younger children |
| Hot glue gun or craft glue | Assembling decorations | Opt for tacky glue for very young children |
| Spray bottle | Gentle watering | Prevents overwatering |
| Gardening gloves | Hand protection | Especially for outdoor or messy setups |
Step 2: Select a Suitable Container and Location
Choosing the perfect container and location is a magical moment in creating your fairy garden. This step transforms an ordinary space into a potential wonderland where imagination can flourish. The right container becomes the foundation of your miniature world, setting the stage for an enchanting landscape that will captivate children and spark their creativity.
When selecting a container, consider both aesthetic appeal and practical functionality. According to Discover and Share, aim for a shallow container approximately 2 to 4 inches deep and 12 to 20 inches wide. This dimension provides ample space for creating intricate miniature landscapes without overwhelming young creators. Potential containers can include ceramic planters, wooden boxes, large terracotta pots, or even repurposed items like vintage tea cups, old wheelbarrows, or hollowed tree stumps.
Location is equally critical in bringing your fairy garden to life. Consider these key factors when choosing where to place your magical miniature world:
- Accessibility for children
- Adequate natural light
- Protection from harsh winds
- Proximity to water source for easy maintenance
- Stable surface that prevents accidental tipping
Indoor locations offer consistent environmental conditions and allow year-round enjoyment. A sunny windowsill, a dedicated shelf, or a quiet corner of a playroom can become the perfect spot. Outdoor locations provide natural elements and additional creative opportunities. A sheltered garden area, a quiet patio corner, or a spot beneath a tree can create a more immersive fairy garden experience.
Ensure the chosen location receives appropriate light for the plants you plan to include. Most miniature garden plants thrive in partial sunlight, so avoid extreme direct sun or complete shade. If creating an indoor fairy garden, consider supplemental grow lights to provide necessary illumination.
Take time to involve your children in this selection process. Let them explore potential containers and locations, encouraging their imagination and investment in the project. Their excitement and input will make the fairy garden feel truly special and personal. The perfect container and location are less about perfection and more about creating a space that sparks wonder and invites playful exploration.
The following table provides an at-a-glance overview of each step involved in creating a fairy garden, with estimated time, involvement level, and outcome for each stage.
| Step | Time Estimate | Involvement Level | Key Outcome |
|---|---|---|---|
| Gather Materials and Tools | 15-30 minutes | Parent & Child | All supplies organised for easy creation |
| Select Container and Location | 15 minutes | Child-led with supervision | Magical foundation and a safe, accessible space |
| Prepare the Base | 20 minutes | Parent & Child | Stable, healthy environment for planting |
| Arrange Plants and Decorations | 30-45 minutes | Mainly Child | Creative miniature landscape takes shape |
| Add Finishing Touches | 15-20 minutes | Child-led | Personalisation and storytelling elements |
| Review and Maintain | Ongoing (weekly) | Parent & Child | Fairy garden thrives and evolves over time |
Step 3: Prepare the Base for Your Fairy Garden
Preparing the base is a critical step that transforms your container from an empty vessel into a living, breathing miniature landscape. This foundational stage requires careful attention to detail and a bit of strategic planning to ensure your fairy garden will thrive and look magical.
Begin by thoroughly cleaning your chosen container. If you’re using a recycled container, wash it completely and ensure it has proper drainage holes. For containers without existing drainage, you’ll need to carefully create them using a drill or hammer and nail. These holes are crucial for preventing water accumulation that could damage plant roots and create unhealthy growing conditions.
The layering process is key to creating a successful fairy garden base. According to AARP, start with a bottom layer of small pebbles or gravel. This initial layer serves multiple purposes:
- Provides essential drainage
- Prevents soil from becoming waterlogged
- Creates a stable foundation for subsequent layers
After your drainage layer, add a thin layer of activated charcoal. This might sound unusual, but the charcoal helps purify water and prevent potential mold growth. You can find activated charcoal in the aquarium section of pet stores. Spread a thin, even layer over the pebbles, ensuring complete coverage.
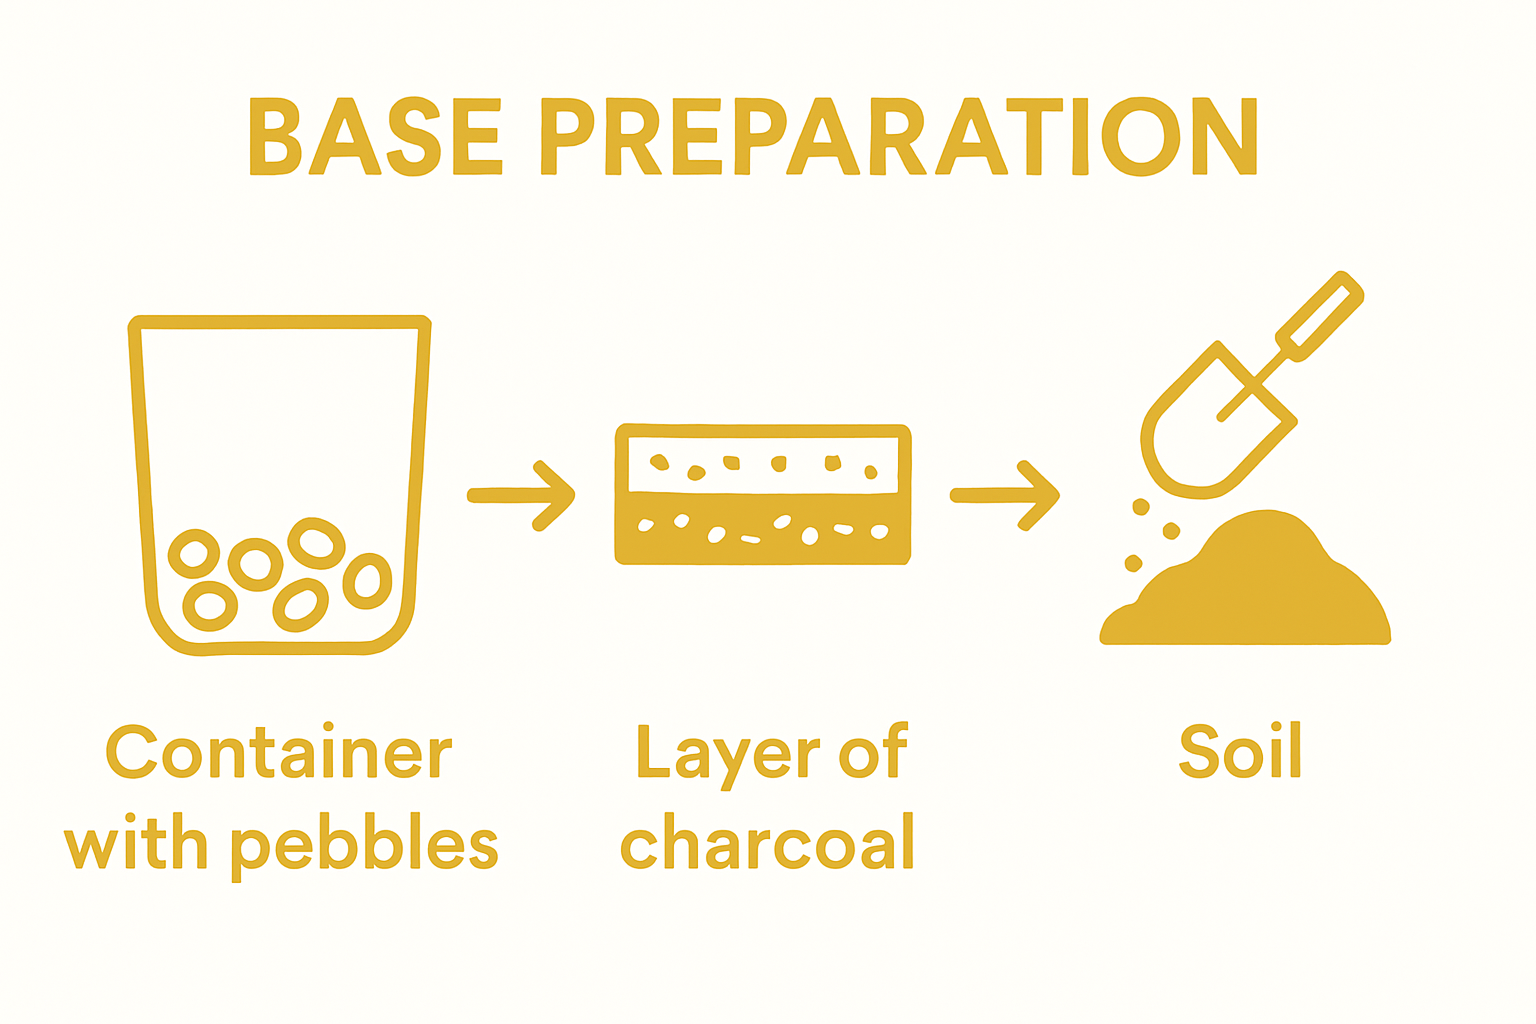
Next, add your potting soil. Choose a high-quality, well-draining potting mix specifically designed for container gardens. Fill the container to about an inch from the top, leaving room for plants and decorative elements. Gently press the soil to create a firm but not compacted base. Consider creating subtle variations in the soil level to mimic natural terrain - small hills and gentle slopes will make your fairy garden feel more realistic and interesting.
Before adding plants, take a moment to envision your fairy garden’s layout. Use a light hand when positioning soil, thinking about where tiny pathways might wind, where miniature plants will be situated, and how you’ll create visual interest. This planning stage is where imagination truly begins to take shape, turning a simple container into a potential magical realm waiting to be discovered by young explorers.
Step 4: Arrange Plants and Decorations to Create a Magical Scene
Arranging plants and decorations is where your fairy garden truly comes to life, transforming a simple container into an enchanting miniature world. This magical step invites creativity and imagination, allowing children to design a landscape that reflects their unique vision. The key is to create a scene that tells a story and sparks wonder.
Begin by selecting your focal point plant - this will be the largest or most visually striking plant in your garden. According to Kansas State University, start with a centerpiece plant and then build around it. Succulents, tiny ferns, and miniature ground covers work wonderfully in these small landscapes. Consider plants with different textures and heights to create visual interest and depth.
When positioning your plants, think about creating natural-looking layers. Place taller plants towards the back or center of your container, with smaller plants and ground covers filling in around them. Leave small spaces between plants to represent pathways or clearings where fairy figurines might be placed. Imagine you’re designing a tiny, living landscape that invites exploration and storytelling.
Decorative elements are what truly bring a fairy garden to life. Collect an assortment of miniature accessories that will transform your plant arrangement into a magical scene:
- Tiny fairy figurines
- Miniature houses or cottages
- Small stones and pebbles
- Bits of moss
- Miniature furniture
- Tiny bridges or ladders
- Small twigs or bark pieces
Arrange these elements thoughtfully, creating little vignettes that suggest stories and adventures. A tiny ladder leaning against a rock, a miniature bench nestled near a small plant, or a tiny house peeking out from behind some moss can create moments of magical discovery. Encourage children to use their imagination, positioning items in ways that tell a story or suggest fairy inhabitants.
Remember that negative space is important too. Not every inch needs to be filled - leaving some open areas allows the imagination to fill in the blanks and creates a sense of mystery. Step back occasionally and view your fairy garden from different angles, adjusting plants and decorations to create a balanced, enchanting scene that feels both deliberate and wonderfully spontaneous.
Step 5: Add Finishing Touches for Charm and Character
The final step in creating a fairy garden transforms your carefully crafted miniature landscape from a simple arrangement into a truly magical world. These finishing touches are where imagination truly comes alive, turning your garden into a captivating scene that tells a unique story and invites endless creative play. According to The Natural Learning Initiative, fairy gardens stimulate creative, dramatic play and provide enchanted spaces that foster children’s imagination.
Consider adding subtle details that create narrative depth. Tiny pathways made from small pebbles or crushed shells can wind between plants, suggesting secret routes for fairy travelers. Miniature accessories like tiny ladders, small bridges, or delicate wooden fences can create boundaries and suggest hidden realms within your magical landscape. Use natural materials like bark, moss, and small twigs to enhance the organic feel of your garden.
Lighting can dramatically transform your fairy garden’s atmosphere. Small LED fairy lights, battery-operated miniature lanterns, or glow-in-the-dark pebbles can add a magical nighttime dimension. Place these elements strategically to create subtle illumination that suggests fairy presence and brings your miniature world to life after dark.
Choose decorative elements that spark storytelling and imagination:
- Tiny woodland creature figurines
- Miniature seating areas
- Small magical artifacts
- Whimsical signposts
- Tiny musical instruments
- Minuscule treasure chests
Texture plays a crucial role in making your fairy garden feel authentic. Mix different materials like smooth stones, rough bark, soft moss, and delicate plant leaves to create visual and tactile interest. Consider adding a small water feature - even a tiny mirror can represent a magical pond or reflect light in interesting ways.
Encourage children to participate in this final stage of creation. Let them select special items that speak to their imagination, telling them that each small detail contributes to the garden’s unique story. The most magical fairy gardens are those created with genuine wonder and personal creativity, where every tiny element holds a spark of childhood imagination.

Step 6: Review and Maintain Your Fairy Garden Over Time
Maintaining your fairy garden is an ongoing adventure that keeps the magic alive and teaches children valuable lessons about nurturing living things. Regular care transforms your miniature landscape from a one-time project into a dynamic, evolving ecosystem. According to The Pennsylvania State University Extension, involving children in garden maintenance helps develop responsibility and a deeper connection with nature.
Establish a consistent care routine that becomes a special shared activity between you and your child. Check your fairy garden every few days, looking for signs of plant health, moisture levels, and the condition of decorative elements. Water plants gently using a small spray bottle or carefully measured amounts to prevent overwatering. If you’re interested in expanding your garden skills, read more about garden construction techniques that can complement your fairy garden project.
Plant maintenance requires careful attention. Trim plants that grow too large, removing any dead or yellowing leaves. Some miniature plants might need periodic replanting as they outgrow their space. Teach children to observe plant changes, helping them understand growth cycles and plant care. Rotate decorative elements occasionally to keep the garden feeling fresh and prevent wear on specific areas.
Key maintenance tasks include:
- Checking soil moisture
- Removing dead plant material
- Cleaning miniature decorations
- Adjusting plant positions
- Monitoring light exposure
Seasonally, consider refreshing your fairy garden. During winter, you might move an indoor garden to a bright window. In summer, protect it from intense direct sunlight. Encourage children to document their garden’s transformation through photographs or a small journal, creating a wonderful memory of their creative journey.
Remember that imperfection is part of the charm. A slightly overgrown plant or a moss-covered pathway adds authenticity to your magical miniature world. Treat maintenance as an opportunity for storytelling and imagination, where each small change becomes part of the ongoing narrative of your fairy garden.
Spark More Imagination with The Zoofamily
Have you just finished creating a magical fairy garden and wish your child could become even more curious about the natural world? As discussed in our article, bringing enchanted spaces to life can stir creativity and a lifelong respect for nature in children. Yet, many parents know it can be challenging to keep that spark going beyond one project. Keeping kids unplugged, engaged, and connected to our planet is a daily goal for many families.

Take your child’s sense of wonder even further with The Zoofamily. Our specially designed animal-themed cameras and outdoor tools encourage kids to explore the beauty of their fairy garden and the world around them. Reward their curiosity by letting them capture garden creations, or listen for woodland sounds using a walkie-talkie among the moss and pebbles. For every camera sold, we plant one tree. When you visit The Zoofamily, you join a community that values imagination and positive action for the planet. Discover more ways to nurture your child’s creativity and help restore nature’s beauty for generations today.
Frequently Asked Questions
What materials do I need to create a fairy garden?
To create a fairy garden, you’ll need a suitable container, potting soil, small pebbles or gravel, miniature plants, decorative elements like stones and twigs, and crafting tools such as scissors and glue.
How do I choose the right plants for my fairy garden?
Select miniature plants such as succulents, moss, or tiny ground covers. Aim for a variety of textures and heights to create visual interest. Consider light conditions to ensure the plants thrive in your chosen location.
How do I maintain my fairy garden over time?
Regular maintenance includes checking soil moisture, trimming plants as needed, cleaning decorative elements, and adjusting plant positions. Establishing a routine can help keep your garden healthy and vibrant.
What decorative elements can I add to enhance my fairy garden?
Consider adding miniature accessories such as tiny figurines, small houses, bridges, and pathways made from pebbles or shells. Natural materials like bark and moss can also enhance the organic feel of your garden.