Bug photography with children is much easier than you might think. Most extraordinary photographic opportunities often exist just outside your doorstep. Forget the idea that you need specialist kit or exotic locations. Because all you really need is a patient eye, a curious child, and a willingness to get a little closer to the ground than usual.
Table of Contents
- Step 1: Gather Your Photography Gear And Essentials
- Step 2: Select The Perfect Location For Bug Photography
- Step 3: Set Up Your Camera For Close-Up Shots
- Step 4: Approach Bugs With Care And Patience
- Step 5: Capture The Perfect Shot And Experiment
- Step 6: Review Your Photos And Plan For Improvements
Quick Summary
| Key Point | Explanation |
|---|---|
| 1. Use macro-capable camera equipment | A camera with macro features captures detailed insect images; smartphones can also be effective when equipped with macro modes. |
| 2. Choose suitable locations for photography | Gardens and parks with diverse plants attract various insects, enhancing your photography opportunities. |
| 3. Approach insects with care | Move slowly to avoid startling bugs; understanding their behaviour increases your chances of getting stunning photos. |
| 4. Use natural light for better results | Shoot during early morning or late afternoon when the light is softer, perfect for capturing insects without harsh shadows. |
| 5. Review and learn from your photos | Critically analyse your images to improve your skills; focus on aspects like composition, focus, and lighting for future sessions. |
Step 1: Gather Your Photography Gear and Essentials
Photographing bugs requires careful preparation and the right equipment. Before you head out into the garden or local park with your children, you’ll want to assemble a collection of tools that will help you capture stunning insect images while keeping the experience fun and educational.
Essential Photography Equipment
Start with a camera that offers good macro capabilities. While professional cameras with interchangeable lenses provide exceptional quality, parents can also achieve excellent results with modern smartphones equipped with macro modes. Digital cameras with close-focusing abilities work best for bug photography. Consider selecting a camera with manual focus settings, which allows more precise framing of tiny subjects.
Your bug photography kit should include several key accessories. A lightweight tripod can help stabilise your camera and reduce blur when capturing small, quick-moving creatures. Macro lens attachments are particularly useful for getting detailed, close-up shots without disturbing the insects. Some parents find that our guide on photography scavenger hunts offers additional insights into capturing wildlife images with children.
Preparing for Safe and Successful Bug Photography
Beyond technical equipment, prepare practical items that make bug photography comfortable and safe. Pack lightweight, neutral-coloured clothing that helps you blend into natural environments. Bring a small magnifying glass to help children observe insects up close before photographing them. Insect repellent and a first aid kit are also wise additions to your photography expedition.
Remember that patience is your most important tool. Insects are easily startled, so moving slowly and quietly will increase your chances of capturing remarkable images.
Here is a quick-reference table summarising the essential bug photography equipment and key extras, with their main purpose and tips for use.
| Equipment/Item | Purpose/Use | Tips for Use |
|---|---|---|
| Macro-capable camera or smartphone | Captures detailed close-up images | Use manual focus for precision |
| Macro lens attachment | Enables closer, detailed shots without disturbing insects | Choose lightweight options |
| Tripod | Stabilises camera to reduce blur and improve sharpness | Opt for portability |
| Neutral-coloured clothing | Helps blend into natural environments and prevents startling bugs | Dress children in muted tones |
| Magnifying glass | Allows close observation before photographing | Engage children in discovery |
| Insect repellent & first aid kit | Keeps outing comfortable and safe | Essential for outdoor sessions |
| Teach your children to approach bug photography with respect for the creatures and their habitats, observing without disturbing. By turning this into a gentle, educational experience, you’ll create lasting memories and potentially spark a lifelong interest in nature photography. |
Step 2: Select the Perfect Location for Bug Photography
Choosing the right location is crucial for successful bug photography. Your backyard, local park, or nearby garden can transform into a vibrant insect photography studio with the right approach. The most extraordinary photographic opportunities often exist just outside your doorstep.
Exploring Natural Habitats
Gardens and green spaces provide exceptional environments for capturing insect life. Look for areas with diverse vegetation, as different plants attract various insect species. Flowering plants, herb gardens, and areas with native wildflowers become bustling ecosystems teeming with photographic subjects. According to research from the Amateur Entomologists’ Society, local gardens can host remarkable biodiversity that young photographers will find fascinating.
Time of day plays a significant role in bug photography. Early morning and late afternoon offer softer light and increased insect activity. Insects are often more stationary during these cooler periods, providing excellent opportunities for detailed photographs. Sunlit areas near flowering plants or water sources tend to attract the most diverse insect populations. Children can learn to observe subtle movements and understand insect behaviors while waiting patiently for the perfect shot.
Preparing for Your Photographic Expedition
Before heading out, discuss safety and respect for nature with your children. Teach them to observe insects without disturbing their habitats. Encourage gentle movements and quiet observation. Wear neutral, muted clothing that helps you blend into the environment and minimise startling potential photographic subjects. Bring a small field guide or use smartphone identification apps to help children learn about the insects they encounter. By transforming bug photography into an educational adventure, you create memorable experiences that spark curiosity about the natural world and develop important observational skills.
Step 3: Set Up Your Camera for Close-Up Shots
Capturing stunning bug photographs requires more than just pointing and shooting. Mastering your camera’s macro settings transforms ordinary snapshots into extraordinary insect portraits. The key is understanding how to adjust your equipment to reveal the intricate details of tiny creatures.
Configuring Your Camera for Macro Photography
Start by switching your camera to macro mode, which enables close-up focusing capabilities. If you are using a smartphone, activate the dedicated macro setting or use a clip-on macro lens attachment. Digital cameras with manual settings offer the most flexibility. According to research from the Royal Photographic Society, selecting a higher f-stop number like f/8 or f/11 increases the depth of field, ensuring more of the insect remains in sharp focus.
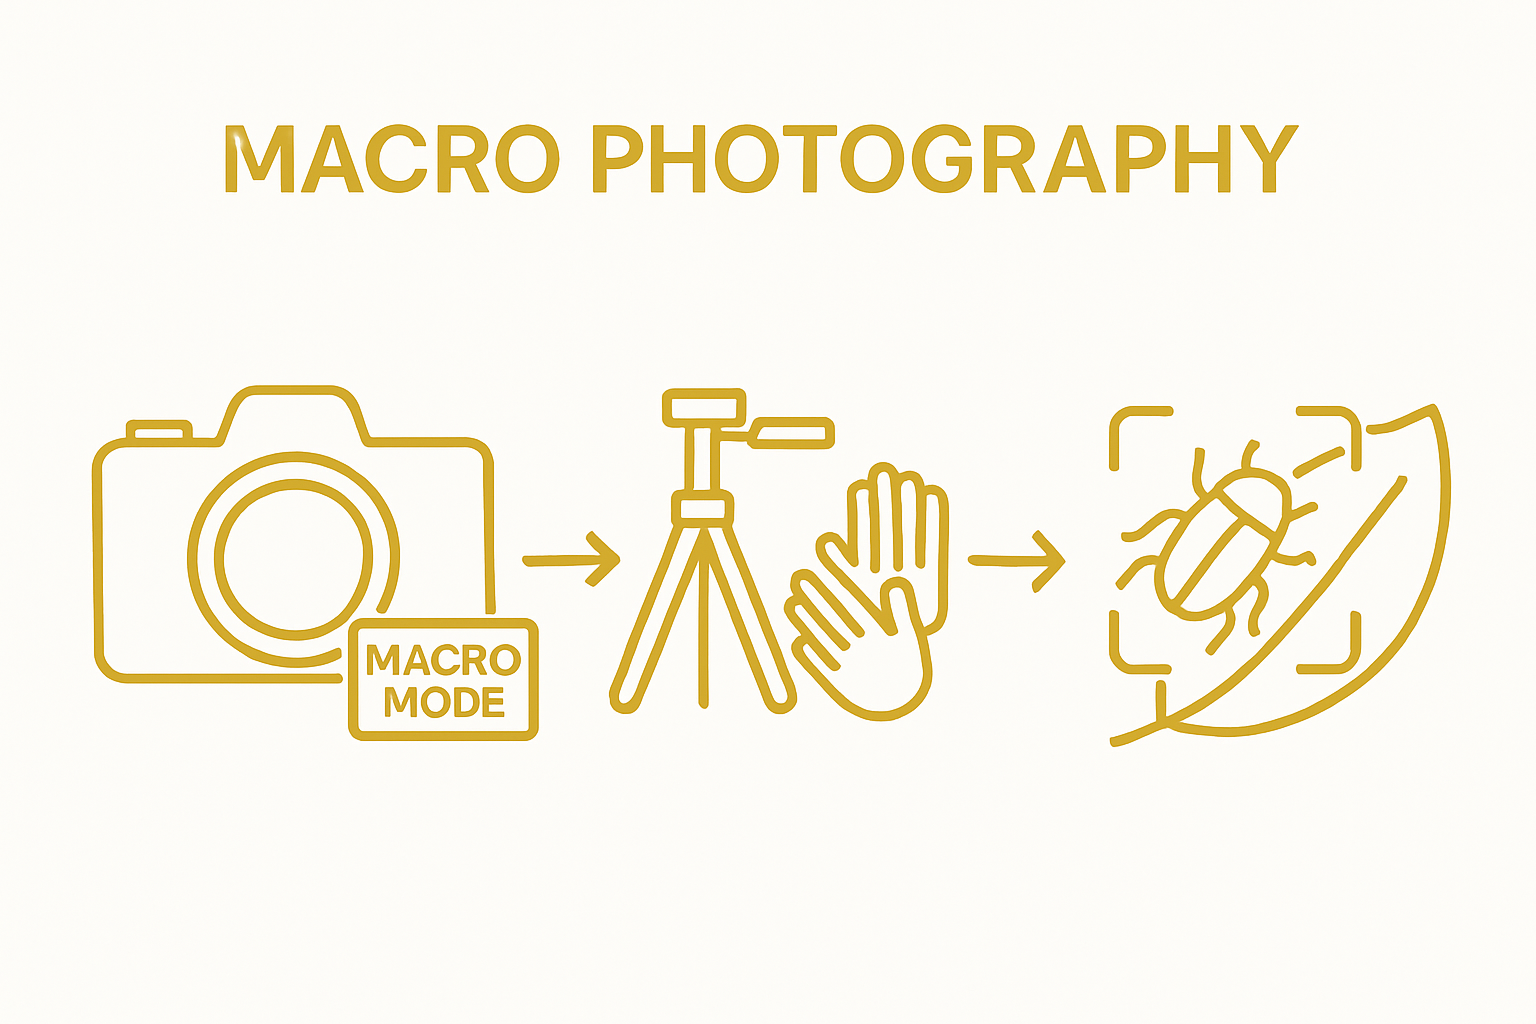
Manual focus becomes your best friend when photographing insects. Autofocus often struggles with small, intricate subjects, so take time to adjust the focus ring precisely. Move slowly and gently, avoiding sudden movements that might startle your tiny subject. A tripod can provide additional stability, reducing camera shake and helping you achieve crisp, detailed images.
If using a smartphone, consider investing in a small, portable tripod designed for mobile photography.
Lighting and Composition Techniques
Natural light works best for bug photography. Position yourself so soft, diffused sunlight illuminates your subject without creating harsh shadows. Early morning or late afternoon provide optimal lighting conditions. When photographing insects, aim to capture their unique characteristics like compound eyes, delicate wing structures, or intricate body patterns. Experiment with different angles positioning yourself at the insect’s eye level to create more engaging and intimate photographs. Remember that patience is crucial some of the most remarkable shots come from waiting quietly and allowing insects to become comfortable with your presence.
Step 4: Approach Bugs with Care and Patience
Successful bug photography requires more than technical skill it demands a gentle, respectful approach that minimises disturbance to these delicate creatures. Learning to move slowly and observe quietly transforms bug photography from a mere technical exercise into a mindful interaction with nature.
Understanding Insect Behavior
Bugs are incredibly sensitive to vibrations, movements, and sudden changes in their environment. When approaching potential photographic subjects, imagine yourself as a silent observer rather than an intruder. Move with deliberate, smooth movements that do not create sudden air currents or ground vibrations. Children can learn to walk softly, almost like they are playing a stealth game, which makes the photography experience both educational and entertaining.
Position yourself carefully, preferably at the same level as the insect. This might mean kneeling, lying down, or using a low stool to get the perfect angle. Your goal is to create minimal disruption while capturing the insect’s natural behavior. Some insects, like butterflies and dragonflies, are more tolerant of human presence than others. Observe their patterns first learn when they tend to rest or feed, which increases your chances of getting a remarkable photograph.
Ethical Photography Practices
Teach children the fundamental principle of respecting wildlife. This means never touching or moving insects, avoiding flash photography that might startle or harm them, and being mindful of their habitats. Explain that some insects play crucial roles in ecosystems and should be observed with reverence. If an insect seems agitated or begins to move away, allow it space and find another subject. Patience is not just a photographic technique but a valuable life lesson in understanding and appreciating the natural world. By approaching bug photography with gentleness and curiosity, you create an opportunity for children to develop empathy, observation skills, and a deep connection with the intricate world of insects.
Step 5: Capture the Perfect Shot and Experiment
The art of bug photography lies not just in technical precision, but in creative exploration and playful experimentation. Each insect presents a unique photographic challenge waiting to be transformed into a visual story. This step is about pushing beyond basic techniques and discovering the extraordinary within the miniature world around you.
Composition and Creative Techniques
Start by thinking beyond traditional framing. Instead of always centering your insect subject, experiment with rule of thirds composition. Position the bug slightly off-center to create more dynamic and visually interesting images. According to research from Insect Week, incorporating elements of the insect’s natural habitat can add depth and context to your photographs. Look for interesting backgrounds like leaf textures, flower petals, or morning dew that complement your tiny subject without overwhelming it.
Encourage children to view bug photography as a form of visual storytelling. Challenge them to capture images that reveal an insect’s personality or behavior. A butterfly mid-flight, a beetle navigating a complex leaf structure, or a tiny ant carrying a leaf can become compelling narratives. Vary your shooting angles dramatically get down to the insect’s eye level, try overhead shots, or explore side perspectives. Each angle reveals different textures, details, and dynamics that transform an ordinary snapshot into a remarkable image. Remember that digital photography allows unlimited attempts, so embrace imperfection and treat each shot as a learning opportunity. The most extraordinary photographs often emerge from countless experiments and a willingness to see the world from a completely different perspective.
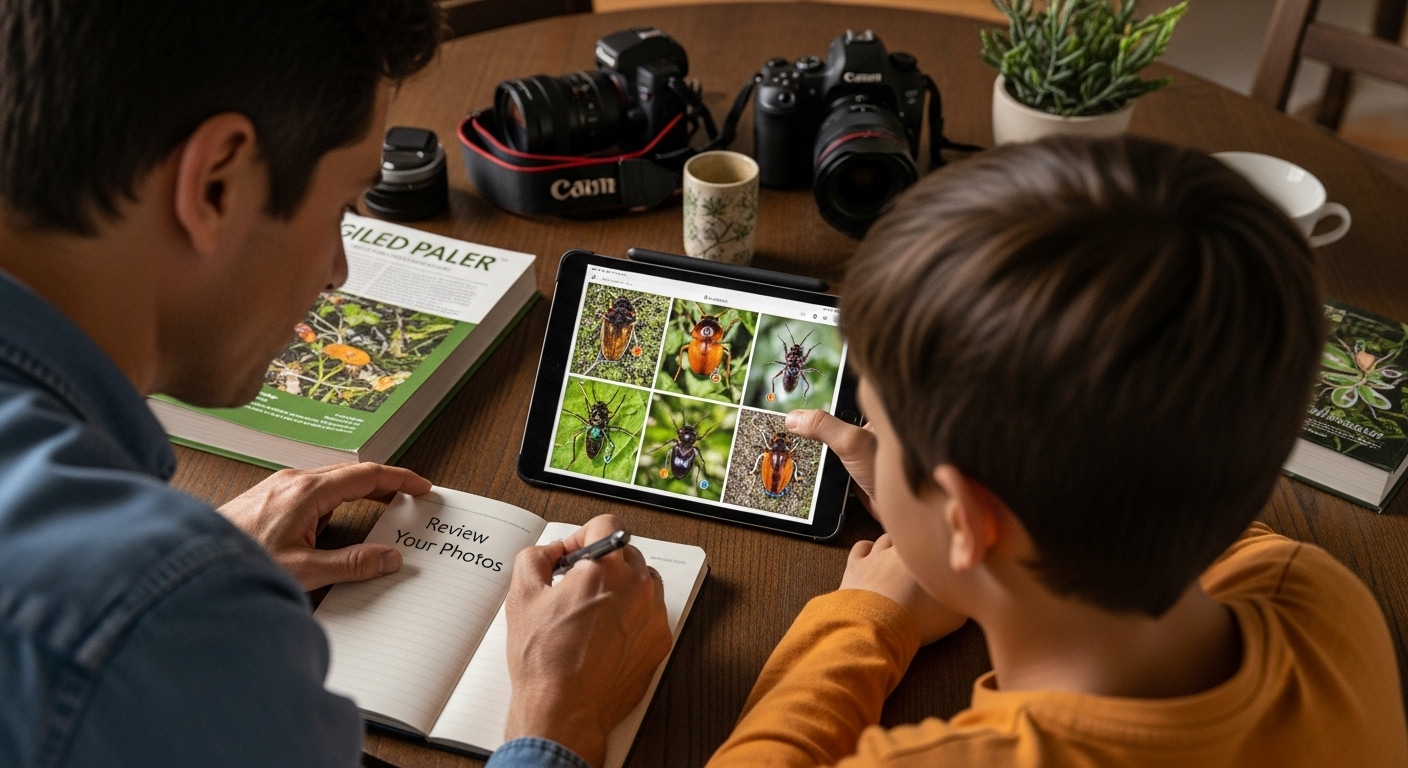
Step 6: Review Your Photos and Plan for Improvements
Photography is a continuous learning journey, and reviewing your images is crucial to developing your skills. Each photograph offers valuable insights that can transform your next bug photography adventure. This step is about transforming initial attempts into opportunities for growth and creative development.
Analysing Your Bug Photography
Immediately after your photography session, find a comfortable space to review your images together. According to research from Pennsylvania State University, examining photographs shortly after capturing them helps identify immediate areas for improvement. Gather around a tablet or computer screen, and make this a collaborative learning experience. Encourage children to share their observations about what they like or find interesting in each image.
Look critically at three key aspects of your photographs: focus, composition, and lighting. Are the insects sharp and clearly visible? Do the images capture interesting details like wing textures or compound eyes? Notice how backgrounds interact with your subject some images might benefit from a more neutral or complementary backdrop. Discuss technical elements like camera angle and how slight adjustments could enhance future photographs. This isn’t about criticism but about curious exploration. Share your own observations and invite children to contribute their perspectives, turning photo review into an engaging, educational moment. By treating each photograph as a learning opportunity, you transform bug photography from a simple activity into a rich, collaborative experience that develops observation skills, technical understanding, and a deeper appreciation for the intricate world of insects.
The following table gives an overview of the main steps in bug photography with children, including the purpose of each stage and key outcomes to expect.
| Step | Purpose | Key Outcome |
|---|---|---|
| Gather gear and essentials | Assemble equipment and prepare for comfort & safety | Ready and well-equipped for photography |
| Select the perfect location | Choose diverse, insect-rich habitats near home | Greater opportunity for bug encounters |
| Set up camera for close-up shots | Adjust settings for macro and stability | Detailed, focused insect photographs |
| Approach bugs with care and patience | Minimise disturbances, observe natural behaviour | More cooperative insect subjects |
| Capture the perfect shot and experiment | Apply creative techniques and experiment with angles | More engaging and dynamic images |
| Review photos and plan improvements | Reflect on images for learning and skill development | Improved technique for future sessions |
Ignite Your Child’s Creativity and Curiosity with The Zoofamily
Capturing the perfect bug photograph can be difficult for young parents and children. The challenges can include shaky hands, missed details, or a lack of engaging tools that keep children interested in nature photography. This step-by-step guide highlights the need for kid-friendly cameras and accessories that support exploration and hands-on learning. It is not just about teaching macro photography or patience, but also about finding safe equipment that makes nature accessible and fun. That is exactly where The Zoofamily steps in.

Ready to turn every bug-hunting adventure into a cherished memory? Discover thoughtfully designed kids’ cameras, walkie-talkies and binoculars featuring playful animal references to spark your child’s interest in the natural world. Each camera sold goes beyond learning, as we plant one tree and invest in restoring our planet for future generations. Bring your next family photography walk to life and start your nature journey with The Zoofamily at https://thezoofamily.com.
Frequently Asked Questions
What camera settings should I use for macro photography of bugs?
To capture stunning bug photographs, switch your camera to macro mode. A higher f-stop number, like f/8 or f/11, increases the depth of field, ensuring more of the insect remains in sharp focus. If using a smartphone, activate the macro setting or use a clip-on macro lens.
How can I improve my insect photography composition?
Experiment with the rule of thirds by positioning your insect slightly off-centre. Incorporating elements of the natural habitat, such as leaves or flowers, can add depth to your photographs. Different shooting angles, like getting down to the insect’s eye level, can also create more engaging images.
What is the best time of day for photographing insects?
The best times for bug photography are early morning and late afternoon. During these cooler periods, insects tend to be more stationary and easier to photograph, while the softer light enhances the quality of your images.
How can I approach insects without startling them?
Move slowly and quietly when approaching insects to minimise disturbances. Teach children to adopt gentle movements, observing from a distance first. Position yourself at the same level as the insect and be patient, allowing them to become comfortable with your presence.