

You can build a smell-free worm farm from two nesting opaque tubs, a pound of red wiggler worms and moist bedding. That is the whole system, and most beginners have one running within an afternoon.
Here is the short version. Get two 14–18 gallon opaque plastic tubs with lids, drill drainage and ventilation holes in the inner one, and fill it 6–8 inches deep with damp shredded newspaper or cardboard. Add roughly 1,000 red wigglers (about 1 lb), bury a small handful of chopped vegetable scraps, and keep the bedding as damp as a wrung-out sponge.
Three numbers matter more than anything else at the start:
- Worms: 1 lb (roughly 1,000 red wigglers) for a standard starter bin.
- Temperature: keep the bin between 13–27°C (55–80°F).
- Moisture: bedding should feel like a wrung-out sponge, around 75–85% water content.
Pro Tip: Do your first feed small. Worms need a week or two to settle before they can process much, and overfeeding on day one is the single most common reason new bins turn smelly.
Key Takeaways
| Point | Details |
|---|---|
| Start with the right ratio | Use about 1 lb (1,000) red wigglers per starter bin and feed 0.25 to 0.5 lb of scraps weekly. |
| Get the bin build right | Drill and screen ventilation and drainage holes, and raise the inner tub on spacers to stop waterlogging. |
| Hold moisture and temperature steady | Keep bedding like a wrung-out sponge (75–85%) and the bin between 13°C and 27°C. |
| Skip the forbidden foods | Avoid meat, dairy, oils, citrus, onions, and garlic to prevent odour and pests. |
| Harvest with migration or light | Use half-bin migration or light-avoidance mounds, then dilute worm tea at roughly 1:10 before use. |
| Extend the habit with Thezoofamily | Pair the worm farm with Thezoofamily’s nature-themed cameras and binoculars to keep children exploring outdoors. |
Table of Contents
- Materials and tools for making worm farms
- How do you build a worm farm step by step?
- What other worm farm systems should you consider?
- What can you feed a worm farm and how much?
- Why does a worm farm start smelling or losing worms?
- How do you harvest worm castings and worm tea?
- Sources
Materials and tools for making worm farms
The right container size solves half your problems before they start. Two nesting opaque plastic tubs, 14 to 18 gallons each, give a starter colony enough room to spread out without drying out too fast. Opacity matters because red wigglers are photophobic; a clear bin drives them to the bottom constantly, stressing the colony and slowing everything down. Both tubs need lids, mainly to keep light out and fruit flies at bay.
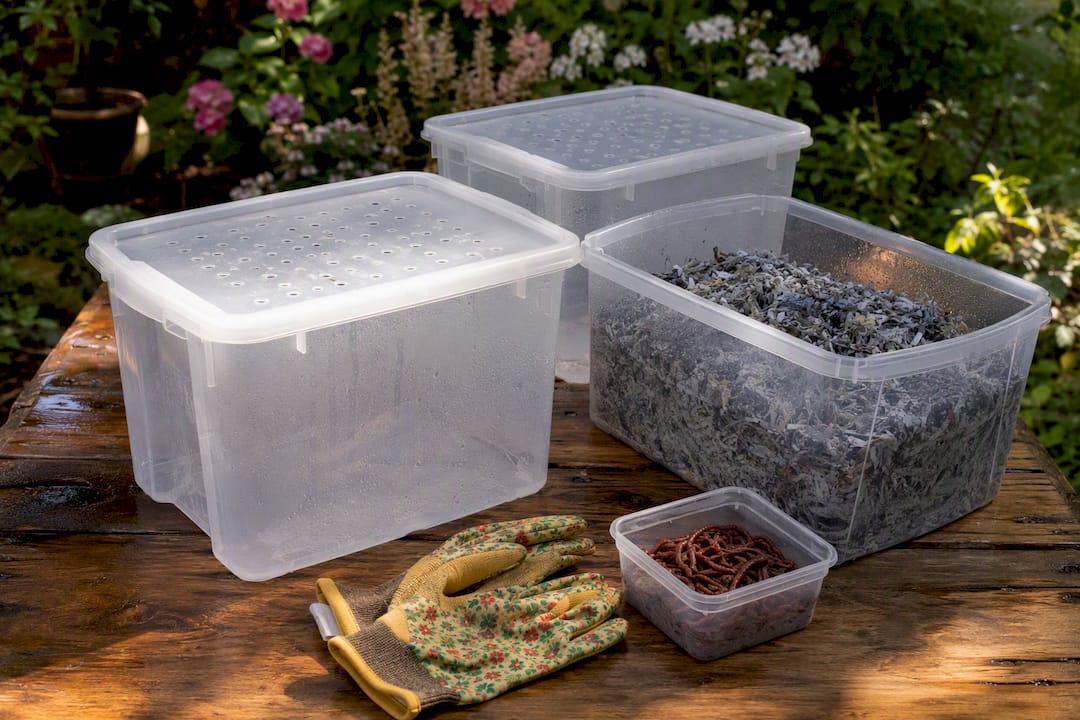
For bedding, shredded newspaper, cardboard, or coconut coir all work. Prepare enough to fill the inner bin 6 to 8 inches (roughly 15 to 20 cm) deep once damp and fluffed, which for a standard tub usually means a full grocery bag of shredded paper before soaking.
Add a small scoop of coarse sand, crushed eggshell, or rock dust as grit. Worms have no teeth. They grind food in a gizzard, and without grit that digestion slows right down, according to Oregon State University Extension.
Your tool list is short:
- A power drill with 1/4 inch to 1 inch bits for ventilation and drainage holes.
- Fine mesh or window screening to line larger holes and stop escapes.
- A spray bottle for topping up moisture without waterlogging the bedding.
- A small trowel or hand fork for burying scraps and turning bedding gently.
How do you build a worm farm step by step?
Building the bin itself takes under an hour. The routine that follows in week one is what determines whether your colony thrives or stalls.
- Drill the inner tub. Add roughly ten to twelve quarter-inch holes around the upper sides for ventilation, and ten to fifteen holes of a similar size across the base for drainage.
- Screen every hole. Line each one with mesh or fine screening, glued or taped in place, so air and liquid pass through but no worm escapes and no fly gets in, as recommended by the US EPA’s guidance on indoor worm bins.
- Raise the inner tub on spacers. Set it on bricks or plastic blocks inside the outer tub so the drainage holes stay clear of any collected liquid, a detail the Natural History Museum flags as easy to miss and important for avoiding a waterlogged bin.
- Prepare the bedding. Soak your shredded paper or coir until saturated, then wring it out firmly by the handful until it stops dripping. Fluff it up as you layer it in, aiming for that wrung-out sponge feel throughout.
- Add the worms. Place your pound of red wigglers on top of the bedding under a light source; they will burrow down within minutes to escape it.
- Add a small first feed. Bury a cup or two of chopped vegetable scraps under a few inches of bedding in one corner, not spread across the whole surface.
For the first week, check moisture daily by squeezing a handful of bedding. Look for worms near the surface after dark (a sign of stress) and confirm no liquid is pooling under the spacer blocks. Resist the urge to add more food until the first batch has visibly shrunk.
What other worm farm systems should you consider?
A two bin tote system suits flats, kitchens, and anyone starting small, but it is not the only option worth knowing; for tips on saving space and reducing waste in small kitchens, see how to optimize small kitchen space for eco-friendly living.
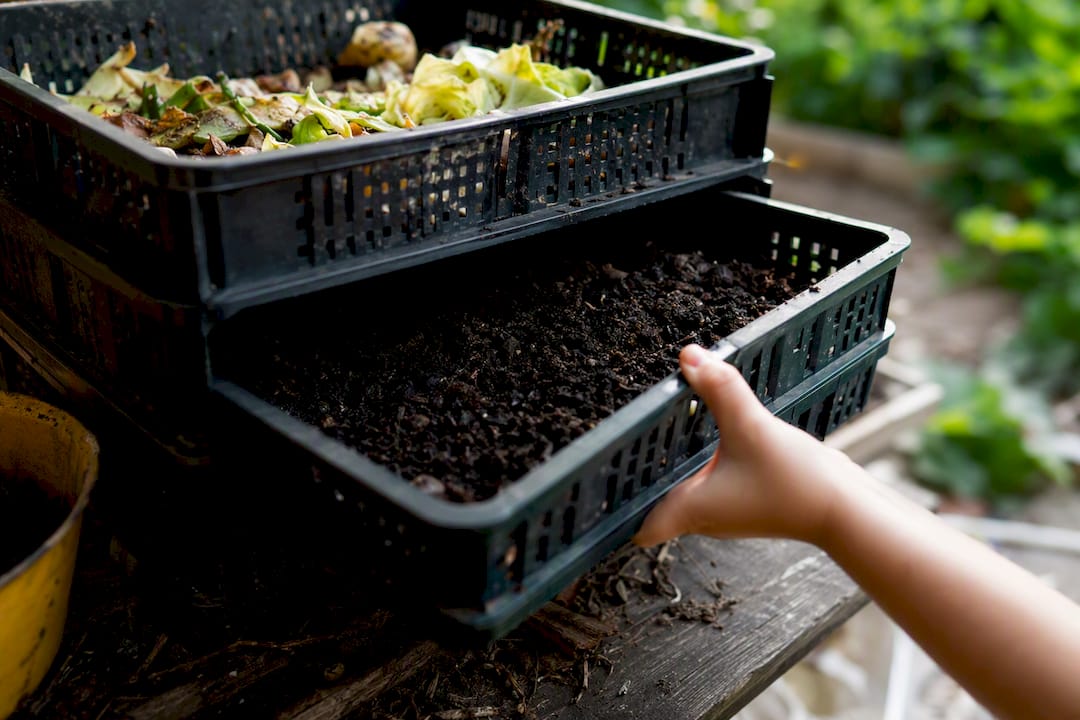
Stacking tray wormeries, sold as multiple perforated trays that sit on top of each other, make harvesting far simpler. Worms migrate upward toward fresh food, leaving finished castings behind in the lower trays, ready to lift out without digging through the whole colony.
In-ground worm towers work well if you already have garden beds. A perforated pipe or bin sunk into the soil lets worms move freely between the tower and surrounding earth, feeding plant roots directly, though it offers less control over temperature and moisture in extreme weather.
Larger outdoor tanks or raised wormeries suit households generating more scraps than a single tub can handle. They need placement in shade, protection from heavy rain, and closer monitoring in winter, since outdoor temperatures swing further outside the ideal 13–27°C range than an indoor bin ever will.
What can you feed a worm farm and how much?
Worms eat slowly compared with what most beginners expect. Start feeding at roughly 0.25 to 0.5 lb of food per pound of worms per week, then increase gradually as the colony grows. A pound of established worms can process about half a pound of scraps weekly, and populations can double every 60 to 90 days under good conditions, per the UC Master Gardener Program’s vermicomposting figures.
Good options include vegetable peelings, fruit scraps, coffee grounds, tea bags, and crushed eggshells, all in moderation and chopped small so they break down faster. Eggshells double as grit if crushed finely enough.
Avoid meat, dairy, oily foods, citrus, onions, and garlic. These items either attract pests, acidify the bedding, or simply take too long to break down, and they sit high on the list of mistakes that cause bin failure that extension services see most often.
Keep moisture at 75–85%, checked with the squeeze test, and temperature within 13–27°C (55–80°F). A simple weekly checklist keeps things on track:
- Bury new food scraps under a few inches of bedding, rotating location each time.
- Add a small pinch of grit every few weeks.
- Check the drainage tray or catch basin and empty it if liquid has collected.
- Spot check under the lid for fruit flies, mites, or ants.
Why does a worm farm start smelling or losing worms?
Most bin problems trace back to one of five causes, and each has a fast fix.
| Problem | Likely cause | Fix |
|---|---|---|
| Bad odour | Overfeeding or rotting food near the surface | Pause feeding for a week, bury scraps deeper, add dry bedding |
| Fruit flies or mites | Exposed food or overripe scraps | Bury food fully, freeze scraps before adding, tighten the lid seal |
| Worms escaping or climbing the lid | Bedding too wet, too acidic, or bin too warm | Add dry shredded paper, check drainage, move to a cooler spot |
| Waterlogged, anaerobic bedding | Blocked drainage or too much wet food | Drain the catch tray, add dry bedding, check spacer blocks |
| Slow processing, few new worms | Bin too cold, too dry, or overfed | Check temperature, adjust moisture, cut back feeding |
If a bin has gone badly wrong, such as prolonged waterlogging, it is often faster to start a fresh batch of bedding than to nurse a soggy one back to health. Preventing pests is largely about burying food fully and never leaving the lid loose enough for flies to get in.
How do you harvest worm castings and worm tea?
Harvest once bedding looks dark, crumbly, and largely unrecognisable as its original material, usually three to six months after starting, depending on feeding rate and bin size, per Oregon State University Extension.
- Half-bin migration. Push all finished compost to one side, add fresh bedding and food to the empty side, and wait two to three weeks. Worms migrate toward the food, letting you scoop out finished castings with minimal worm loss.
- Light-avoidance mounds. Tip the bin’s contents onto a tarp in bright light, forming several small cones. Worms burrow to the base of each cone to escape the light, so you scrape off the top layer repeatedly until only worms remain, a technique detailed by the University of Illinois Extension.
- Making worm tea. Steep finished castings in water for a day or two, then dilute at roughly 1:10, one part tea to ten parts water, before watering plants, especially seedlings sensitive to concentrated feeds.
For potting mix, blend castings in at an appropriate proportion by volume. As a top dressing, a thin layer worked into the topsoil around vegetables or containers is plenty. Store extra castings in a breathable bag out of direct sun, and use them within a few months for best results. Worm castings also work well through the wildlife-friendly beds many families are already growing.
The Thezoofamily view on worm farming with kids
Handling worms teaches children patience and respect for small creatures without much risk, provided an adult manages the sharp tools and the food scraps. It fits naturally alongside other outdoor projects like a robin feeder build. Restoring soil, one bin at a time, is exactly the kind of quiet environmental habit Thezoofamily wants more families to build together.
Bring the nature habit home with Thezoofamily
A worm farm is one project. Building a household of children who notice, care for, and explore the natural world is the bigger one, and it is what Thezoofamily designs its entire range around. Every animal-themed camera, walkie-talkie, and pair of binoculars is built to pull young children outside and get them looking closely at what is already in the garden, from the worm bin to the birds it might attract.
 Caption: A child using a Thezoofamily binocular or camera to explore the garden alongside a homemade worm farm.
If your family has just built its first worm bin, keep the momentum going. Browse the Thezoofamily range of nature-focused cameras and binoculars designed for children aged three and up, and remember that for every camera sold, Thezoofamily plants a tree.
Sources
- Worm Warriors: Getting started with vermicomposting | UC Master Gardener Program of Contra Costa County
- Vermicomposting resources | NCSU Extension
- Composting with worms (EM9034) | Oregon State University Extension
- How to Create and Maintain an Indoor Worm Composting Bin | US EPA