

Choosing the right camera paper can feel like standing in a stationery shop with no signage. The shelves are full of options, yet nothing tells you which one actually suits your project. Whether you are printing thermal snapshots from a kids’ instant camera, mounting gallery-quality fine art prints, or creating scrapbook layouts from your latest nature shoot, the paper you choose shapes every outcome. This guide cuts through the noise and gives you a clear, practical map of every major camera paper type, finish, and format so you can print with confidence and creativity.
Table of Contents
- Key takeaways
- Camera paper types: what you need to know
- Specialised papers: instant and thermal cameras
- How paper finish transforms your final print
- Paper sizes, aspect ratios, and printer compatibility
- Choosing and using camera paper: a practical process
- What I have learned from years of printing on the wrong paper
- Explore camera paper projects with Thezoofamily
- FAQ
Key takeaways
| Point | Details |
|---|---|
| Paper type defines print quality | Choosing between glossy, luster, matte, or fine art paper directly affects colour vibrancy, durability, and display suitability. |
| Weight matters for longevity | Fine art papers weigh around 308 gsm while standard glossy sits near 196 gsm, with heavier stock lasting significantly longer. |
| Thermal paper has specific specs | Thermal camera rolls use a standard 57 x 25 mm format, printing in black and white without any ink cost. |
| Aspect ratio prevents cropping | Matching paper size to your camera’s 2:3 aspect ratio, such as 4x6 or 13x19, avoids unwanted automatic cropping. |
| Finish choice affects handling | Luster and matte finishes resist fingerprints far better than glossy, making them ideal for frequently handled prints and craft projects. |
Camera paper types: what you need to know
Not all photo printing paper is created equal, and the differences go well beyond brand names. The type of paper you use determines how ink bonds to the surface, how long the print survives, and how it feels in your hands. Understanding the core categories saves you from wasted prints and disappointing results.
Glossy paper is the most recognisable format. It produces vivid, punchy colours and deep blacks, which makes it popular for portraits and retail prints. The trade-off is a highly reflective surface that shows fingerprints easily and can produce glare under direct lighting.
Matte paper sits at the opposite end. The surface is non-reflective and soft to the touch, which suits documentary-style photography, fine art reproductions, and text-heavy craft projects. Colours appear slightly more subdued compared to glossy, but the handling experience is far more pleasant for anything that will be touched repeatedly.
Luster paper occupies the middle ground and is arguably the most versatile finish available. It offers a fine pebble texture that reduces reflection and resists fingerprints, while still delivering strong colour saturation. Glossy gives vibrant saturated colour while luster provides a gallery-quality result that handles daily use with far more grace.
Fine art cotton rag paper is the premium choice for archival display. Archival cotton rag paper prevents colour degradation and preserves fine detail over many years, making it the go-to for limited edition prints and museum-quality work. It typically carries a heavier weight and a distinctly tactile feel that elevates the perceived value of any print.
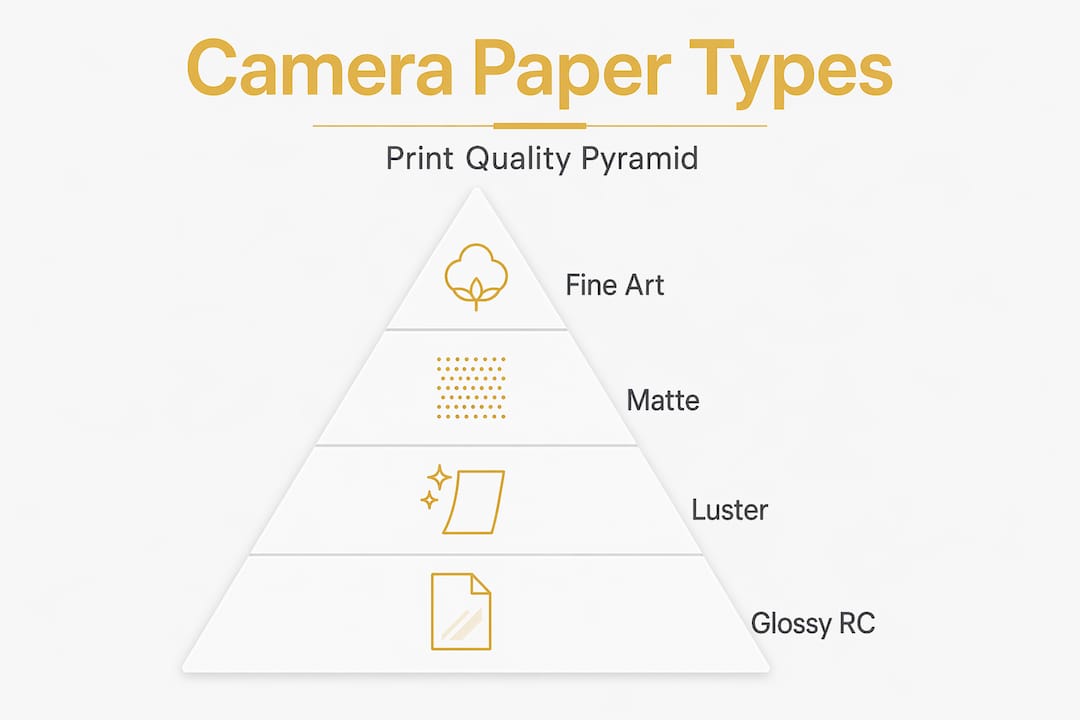
Resin-coated (RC) paper is the workhorse of professional print labs. It has a plastic base that makes it water-resistant, quick-drying, and dimensionally stable under temperature changes. Drylab papers such as Buffalo Imaging’s 250 gsm resin-coated rolls are engineered specifically for high-volume professional printing with UV and scratch resistance built in.
| Paper type | Weight range | Finish options | Best use | Durability |
|---|---|---|---|---|
| Glossy RC | 196–250 gsm | Glossy | Portraits, retail prints | Good (shows wear) |
| Luster RC | 250 gsm | Luster | Gallery, framing, gifting | Very good |
| Matte | 170–220 gsm | Matte | Fine art, scrapbooking | Good |
| Fine art cotton rag | 270–308 gsm | Matte/textured | Archival display, fine art | Excellent |
| Thermal roll paper | Lightweight | Black and white | Instant cameras, thermal printers | Moderate |
Fine art paper weighs around 308 gsm while standard glossy sits closer to 196 gsm. That weight difference is not just about sturdiness. Heavier papers accept ink with more depth and resist warping when humidity changes, which matters if you live somewhere with unpredictable weather.
Specialised papers: instant and thermal cameras
Thermal and instant cameras have their own paper ecosystem, and it is genuinely fascinating once you understand how it works. These are not your standard photo printing papers. They function through heat rather than ink, which changes everything about the format, cost, and aesthetic.
Thermal camera paper comes in small rolls designed specifically for compact portable printers. Thermal rolls sized at 57 x 25 mm are the standard format, producing black-and-white prints instantly without any ink cartridge costs. Multi-packs are affordable and widely available, which makes thermal printing an accessible entry point for younger photographers and craft enthusiasts alike. Thezoofamily’s thermal camera options are designed with exactly this kind of accessible creativity in mind.
The black-and-white aesthetic of thermal prints is not a limitation. It is a creative constraint that sharpens your eye. Because the paper can only render tones in greyscale, you are forced to think about light, shadow, and contrast before you press the shutter. This is genuinely useful for building photography confidence and developing a strong visual instinct.
Analog box cameras take a completely different approach. Cameras like the Alfie BOXX use wet-process photographic paper rather than thermal rolls. The Alfie BOXX produces 6 x 9 cm prints via in-camera chemical development, requiring approximately 10 ml of developer per print. The film holder is designed to accept manually cut sheets of black-and-white photographic paper, which you prepare in a light-safe environment before loading.
Here are the key points to consider when working with these specialised formats:
- Thermal rolls are inexpensive and readily available in multi-packs, but they degrade faster in heat and direct sunlight than standard photo papers.
- Analog wet-process paper requires handling in low-light or dark conditions to prevent premature exposure before use.
- Refill costs for thermal cameras remain low because there is no ink involved, just heat-reactive paper.
- Wet-process paper produces richer tonal gradations than thermal, giving it a more classically photographic feel.
Pro Tip: When printing from a thermal camera, keep contrast settings below 40% during image preparation. Going above this threshold triggers firmware errors on many thermal camera models and produces uneven prints. Lower contrast also tends to produce a cleaner, more pleasing black-and-white result on thermal paper specifically.
How paper finish transforms your final print
Choosing a paper finish is one of those decisions that sounds minor until you see the difference side by side. The finish affects not only how the print looks, but how it behaves in the real world: in frames, in albums, in hands, and on walls.
Glossy finishes produce the most visually striking results straight off the printer. Colours appear deep and saturated, and fine detail pops with clarity. Professional photographers regularly choose glossy for vibrant retail and commercial prints precisely because of this intensity. The problem is that the highly reflective surface picks up every fingerprint and shows glare under gallery lighting or window light, which limits its usefulness in display settings.
Luster is the professional’s choice for gallery and framing work. The fine pebble texture scatters light rather than reflecting it directly, which eliminates glare and keeps the image readable from multiple angles. It also resists fingerprints significantly better than glossy, making it the obvious choice for prints that will be handled, gifted, or displayed without glass.
Matte finishes reward slower, more considered viewing. They suit fine art photography, documentary work, and any print where the image itself carries more weight than technical wow-factor. Matte paper also works beautifully in craft-focused nature photo projects where the tactile, paper-forward aesthetic is part of the creative intention.
Here is a quick reference for matching finish to project type:
- Glossy: Portraits, product shots, prints destined for protective sleeves or frames with glass.
- Luster: Gallery prints, framed displays without glass, photo gifts, and family albums.
- Matte: Fine art editions, documentary photography, scrapbooking, and layered craft projects.
- Fine art textured: Limited editions, archival display, and work destined for permanent collection.
Pro Tip: Store finished prints in acid-free sleeves before framing or gifting. Even luster and matte papers can absorb oils from handling over time, and the sleeve adds a layer of protection without affecting the print’s visual quality.
Paper sizes, aspect ratios, and printer compatibility
This is where many enthusiastic photographers run into trouble. You take a beautiful shot, send it to print, and the result comes back cropped in ways you never intended. The culprit is nearly always a mismatch between paper size and your camera’s native aspect ratio.
Most digital cameras shoot at a 2:3 aspect ratio, meaning for every 2 units of height, the image is 3 units wide. Standard paper sizes do not always match this natively. Paper sizes that match the 2:3 ratio include 4x6 inches, 9x13 cm, 13x19 cm, and 17x25 cm. Using these sizes means your full-frame image prints without any automatic cropping applied by your printer or print service.

| Paper size | Aspect ratio | Typical use | Crop risk |
|---|---|---|---|
| 4x6 inches (10x15 cm) | 2:3 | Standard prints, photobooks | None |
| 5x7 inches (13x18 cm) | ~5:7 | Gifting, framing | Slight |
| 8x10 inches (20x25 cm) | 4:5 | Framing, display | Moderate |
| 13x19 cm | 2:3 | Large prints, drylab | None |
| A4 | ~1:1.41 | Desktop printing | Moderate |
For home printing, standard inkjet photo papers in A4 or letter format require you to add white borders or accept a crop. The better approach for craft and display projects is to choose paper sized specifically for your camera’s output. Drylab roll papers offer more flexibility here because you can cut to the exact dimension you need.
Handling and storage also matter more than most guides admit. Keep unprinted photo paper in its original packaging in a cool, dry location away from direct sunlight. Exposure to humidity causes paper to warp and affects how ink bonds to the surface. For analog photographic paper, dark and temperature-stable storage is non-negotiable.
Choosing and using camera paper: a practical process
Getting from “I want to print this image” to a finished print you are proud of takes a few deliberate steps. Here is the process that consistently produces the best results:
- Define the project outcome first. A framed gallery print needs different paper than a scrapbook insert or a thermal snapshot. Decide whether you are printing for display, gifting, documentation, or craft before you choose any paper.
- Match paper type to printer. Inkjet papers are not compatible with laser or drylab printers. Check your printer’s specifications and buy paper rated for that technology.
- Select the right size for your aspect ratio. Choosing 4x6 or 13x19 paper for full-frame digital images avoids the frustration of automatic cropping.
- Prepare your image file. For thermal printing, reduce contrast settings below 40% to avoid errors and achieve clean greyscale output. For inkjet printing, soft-proof your colours if your editing software supports it.
- Do a test print. Before committing to a full print run or an expensive sheet of fine art paper, run a small test print on ordinary paper to check composition, tones, and any margin settings.
- Handle prints by the edges only. Even after printing, oils from fingertips can affect the surface of glossy and luster papers. Use cotton gloves for fine art prints.
- Store or display correctly. Frame archival prints behind UV-filtering glass. Store unframed prints flat in acid-free sleeves.
What I have learned from years of printing on the wrong paper
I have made nearly every paper mistake possible, and most of them were expensive. My first serious gallery print was on standard glossy paper because I thought “high quality” on the packet was enough information. It was not. The reflective surface under the gallery lights made the image almost unreadable from certain angles, and the fingerprints from handling it during framing were visible from across the room.
What I have come to understand is that paper choice is genuinely part of the creative process, not just a technical afterthought. The decision between a fine art cotton rag sheet and a resin-coated luster roll changes the emotional register of the same image. One feels precious and permanent. The other feels crisp and immediate. Neither is wrong. They are different conversations with the viewer.
I also think the conventional advice to always choose the heaviest paper is overstated. For thermal camera prints intended for quick, joyful sharing, the lightweight thermal roll is perfect. The slight fragility is part of what makes those prints feel like moments rather than monuments. For photography scavenger hunts with children, a set of thermal prints feels like treasure, not a professional portfolio.
My honest advice: buy small sample packs of three or four paper types before committing to a large purchase. Print the same image on each. The difference will tell you more than any spec sheet ever could.
— ALAIN
Explore camera paper projects with Thezoofamily
At Thezoofamily, photography is never just about the camera. It is about what you do with the moments you capture, whether that is a thermal print from a nature walk or an archival fine art sheet from a carefully composed shot. The Zoofamily’s range of cameras is designed to grow alongside your creative ambitions, and the blog is packed with practical guidance on printing, display, and creative projects for photographers of all ages. From advice on thermal camera comparisons to tips for ecological photography with children, you will find the context you need to make smart, satisfying printing choices. Explore the full range of cameras and creative resources at Thezoofamily and take your next print project from idea to finished piece with confidence.
FAQ
What is camera paper used for?
Camera paper refers to any paper designed specifically for printing photographs, including glossy, matte, luster, fine art, and thermal roll paper. The correct type depends on whether you are displaying, gifting, archiving, or creating craft projects from your images.
What size paper works best for printing digital camera photos?
Paper sized to match the 2:3 aspect ratio of most digital cameras, such as 4x6 inches or 13x19 cm, avoids automatic cropping and produces full-frame prints without losing any of the original composition.
How does thermal camera paper work?
Thermal camera paper is a heat-reactive roll, typically 57 x 25 mm, that produces black-and-white prints without ink. The camera applies controlled heat to the paper surface to form the image, making refills inexpensive and the printing process instant.
Which paper finish is best for framed photo displays?
Luster finish is widely considered the best choice for framed displays without glass because it reduces glare, resists fingerprints, and delivers strong colour saturation with a gallery-quality appearance.
How long do printed photos last on archival paper?
Archival cotton rag paper, when stored or displayed correctly, preserves colour depth and detail for many decades. Standard glossy or matte papers are more suitable for casual display and shorter-term use.